REAR WIRE
ACCESS
COVER
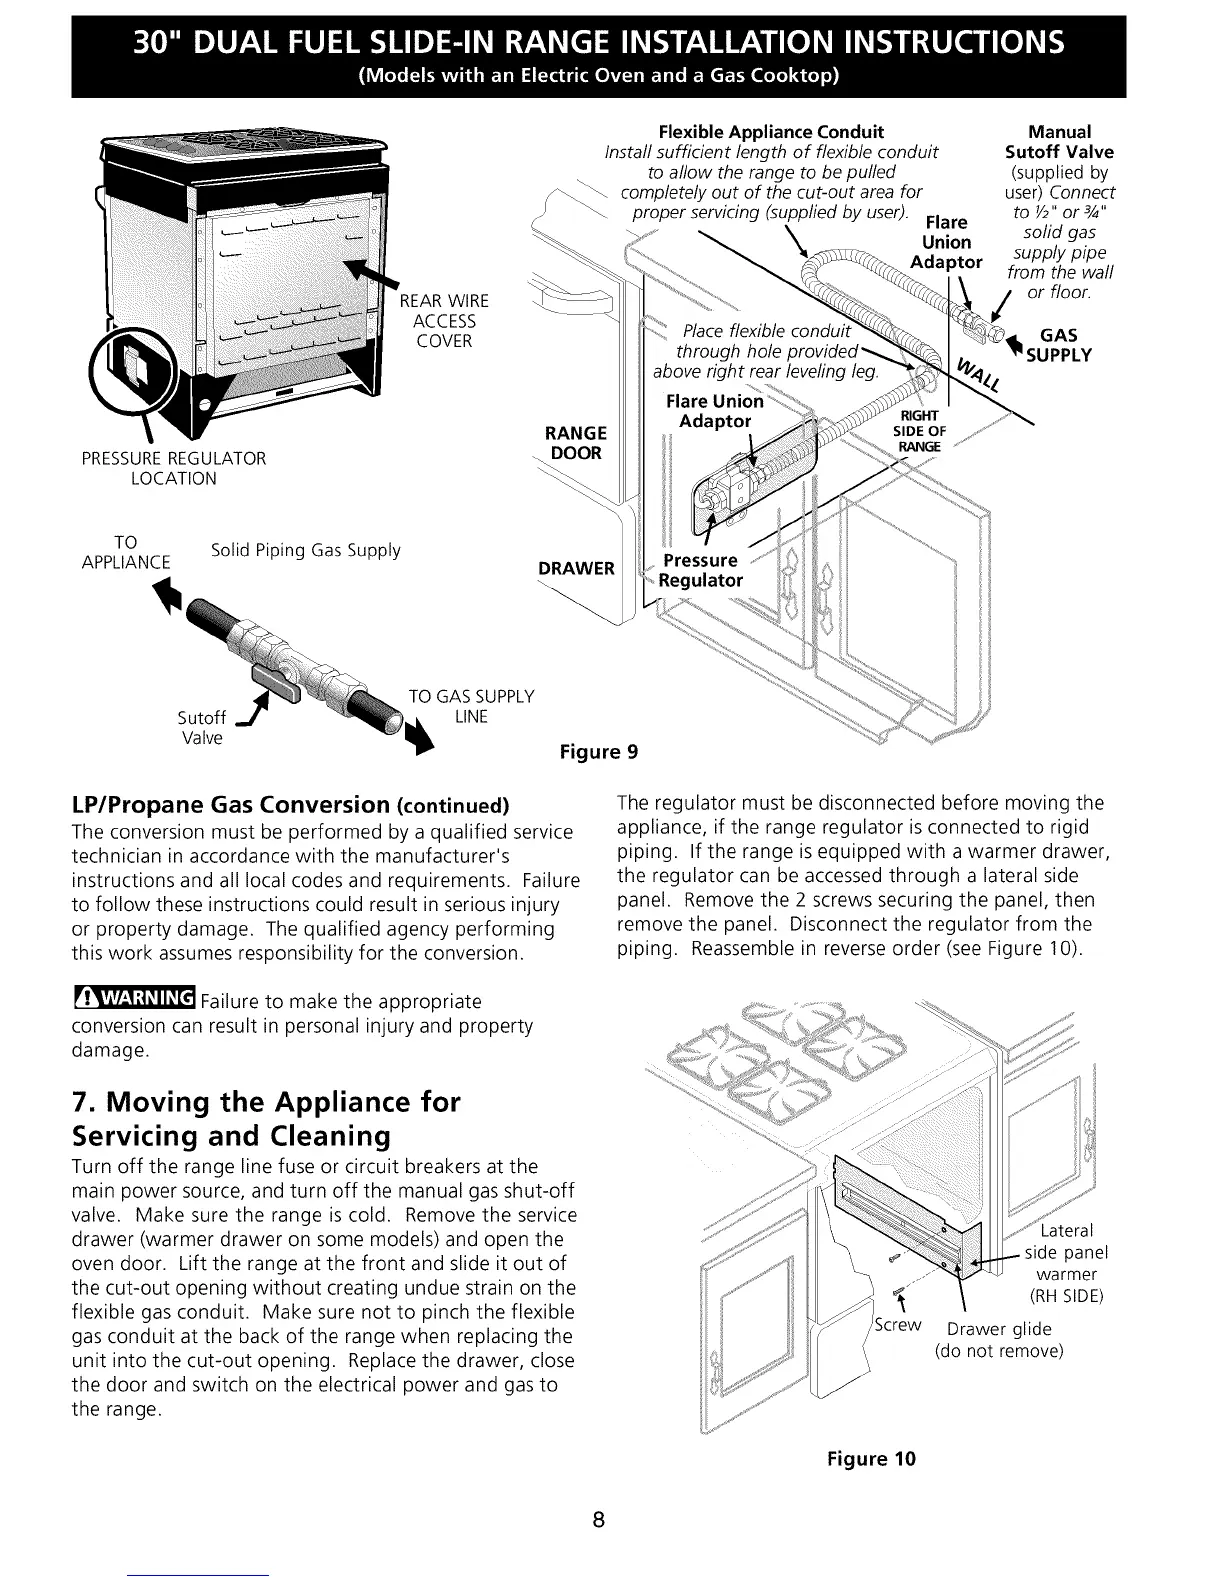
Flexible Appliance Conduit
Install sufficient length of flexible conduit
to allow the range to be puffed
/_ completely out of the cut-out area for
proper servicing (supplied by user).
Flare
Union
Adaptor
Manual
Sutoff Valve
(supplied by
user) Connect
to ½', or 3/4',
solid gas
supply pipe
from the wall
or floor.
GAS
IPPLY
PRESSUREREGULATOR
LOCATION
RANGE
RIGHT ....
SIDE OF
RANGE 'Y_s_
TO
APPLIANCE
Solid Piping Gas Supply
DRAWER
Sutoff
Valve
TO GAS SUPPLY
LINE
Figure 9
LP/Propane Gas Conversion (continued)
The conversion must be performed by a qualified service
technician in accordance with the manufacturer's
instructions and all local codes and requirements. Failure
to follow these instructions could result in serious injury
or property damage. The qualified agency performing
this work assumes responsibility for the conversion.
Failure to make the appropriate
conversion can result in personal injury and property
damage.
7. Moving the Appliance for
Servicing and Cleaning
Turn off the range line fuse or circuit breakers at the
main power source, and turn off the manual gas shut-off
valve. Make sure the range is cold. Remove the service
drawer (warmer drawer on some models) and open the
oven door. Lift the range at the front and slide it out of
the cut-out opening without creating undue strain on the
flexible gas conduit. Make sure not to pinch the flexible
gas conduit at the back of the range when replacing the
unit into the cut-out opening. Replace the drawer, close
the door and switch on the electrical power and gas to
the range.
The regulator must be disconnected before moving the
appliance, if the range regulator is connected to rigid
piping. If the range isequipped with a warmer drawer,
the regulator can be accessed through a lateral side
panel. Remove the 2 screws securing the panel, then
remove the panel. Disconnect the regulator from the
piping. Reassemble in reverse order (see Figure 10).
panel
.-_ warmer
(RH SIDE)
Screw Drawer glide
(do not remove)
Figure 10
8