8
INSTALLATION INSTRUCTIONS - FREESTANDING GAS RANGE
5.6 CAPACITY
Readthefollowingelectrical
connection details before
connecting electricity to range.
Beforeservicing,disconnectelectrical
supplyatcircuitbreaker,fuseorpowercord.
Electric requirements:
Adedicated,properlygroundedandpolarizedbranch
circuitprotectedbya15amp.circuitbreakerortimedelay
fuse. See serial plate for proper voltage.
Extensioncordprecautions:
Becauseofpotentialsafetyhazardsundercertain
conditions, we strongly recommend against the use of
anyextensioncord.However,ifyoustillchoosetousean
extensioncord,itisabsolutelynecessarythatitbeaUL
listed3-wiregroundingtypeapplianceextensioncord
and that the current carrying rating of the cord in amperes
be equivalent to or greater than the branch circuit rating.
Suchextensioncordsareobtainablethroughyourlocal
serviceorganization.
Please read carefully! For personal safe-
ty, this product must be properly grounded.
Do not, under any circumstances, cut or remove the third
(ground)prongfromthepowercord(SeeFig.12).
Whereastandardtwo-prongwallreceptacleis
encountered, it is the personal responsibility and obligation
of the customer to have it replaced with a properly ground-
ed three-prong wall receptacle.
Grounding instructions:
The power cord of this appliance is equipped with a
3-prong(grounding)plugwhichmateswithastandard
3-pronggroundingwallreceptacletominimizethe
possibilityofelectricshockhazardfromthisappliance.
The customer should have the wall receptacle and circuit
checkedbyaqualiedelectriciantomakesurethe
receptacleisproperlygroundedandpolarized.
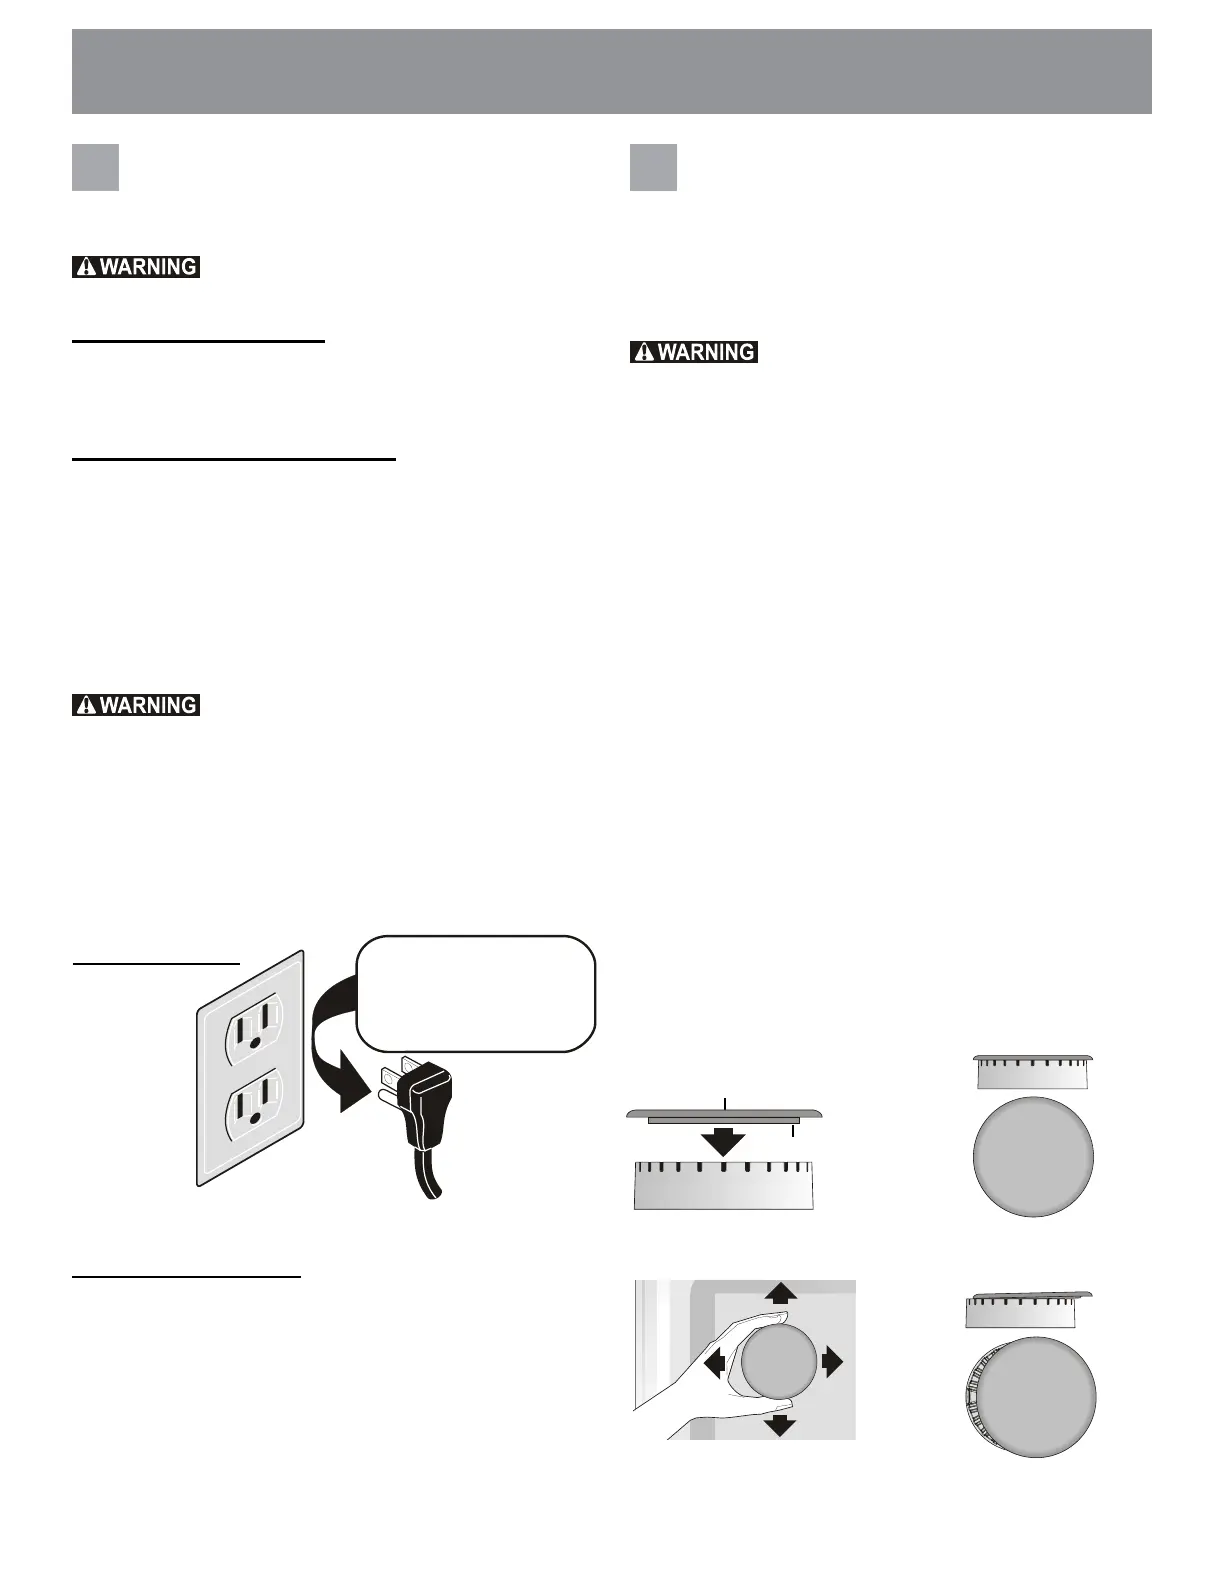
Fig.13
Burner cap lip
Burner cap
Correct burner cap placement
Fig.14
Incorrect burner cap placement
Fig.15
Check burner cap placement.
It is very important to be sure that all surface burner caps
and burner grates are properly installed and in the correct
locations before operating the appliance. Please note that
the burner heads are secured to the cooktop. The cook-
top is not removeable. Do not attempt to remove or lift
the cooktop.
Topreventare-upsandavoidcreationof
harmful by-products, do not use the cooktop without all
burner caps properly installed to insure proper ignition and
gasamesize.
Alwayskeeptheburnercapsandburnerheadsinplace
whenever the surface burners are in use.Donotallow
spills,food,cleaningagentsoranyothermaterialto
enterthegasoriceholderopenings.
Checkandbesurethesizeofeachburnercapmatches
thesizeoftheburnerhead.Checkandbesurethatall
round style burner caps are correctly in place on round
burner heads.
Check and be sure that all oval style burner caps are cor-
rectlyinplaceonovalburnerheads(ifequipped).Check
and be sure that all dual or twinstyle burner caps are cor-
rectlyinplaceondualortwinburnerheads(ifequipped).
Onroundstyleburners,theburnercaplip(SeeFig.13)
shouldtsnugintothecenterofburnerheadandbelevel.
RefertoFigs.14&15forcorrectandincorrectburnercap
placement.
Onceinplace,youmaycheckthetbygentlysliding
theburnercapfromsidetoside(Fig.16)tobesureit
iscenteredandrmlyseated.Whentheburnercaplip
makes contact inside the center of the burner head you will
be able to hear the burner cap click. Please note that the
burnercapshouldNOTmoveoffthecenteroftheburner
head when sliding from side to side.
Fig.16
Donot,underany
circumstances,cut,
remove or bypass the
grounding prong.
Preferred method
Grounding
typewall
receptacle
Power
supply
cordwith
3-prong
grounding
plug
5 6
Fig. 12