Canning Tips &
mnformation
Canning can generate
large amounts of steam. Useextreme cau-
tion to prevent burns. Always raise tile
lid to vent steam away from you.
1. Use tested recipes and follow instructions carefully. Check with your local
Cooperative Agricultural Extension Service or a manufacturer of glassjars for
the latest canning information.
2. Useflat-bottomed canners only. Heat is spread more evenly when the bottom
surface is flat.
3. Center canner on the burner grate.
4. Start with hot water and a high heat setting to reduce the time it takes to bring
the water to a boil; then reduce the heat setting as low aspossible to maintain
a constant boil.
5. It isbest to can small amounts and light loads.
Prevent damage to cooktop and burner grates:
1. Do not use water bath or pressure canners that extend more than one inch
beyond the edge of the burner grate,
2. Do not leave water bath or pressure canners on high heat for an extended
amount of time,
3. Alternate surface units between each batch to allow the units and surrounding
surfaces to cool down. Try to avoid canning on the same burner unit all day.
Safecanning requires that harmful micro-organisms are destroyed
and the jars are sealed completely. When canning in a water bath canner, a gentle
but steady boil must be maintained continuously for the required time.
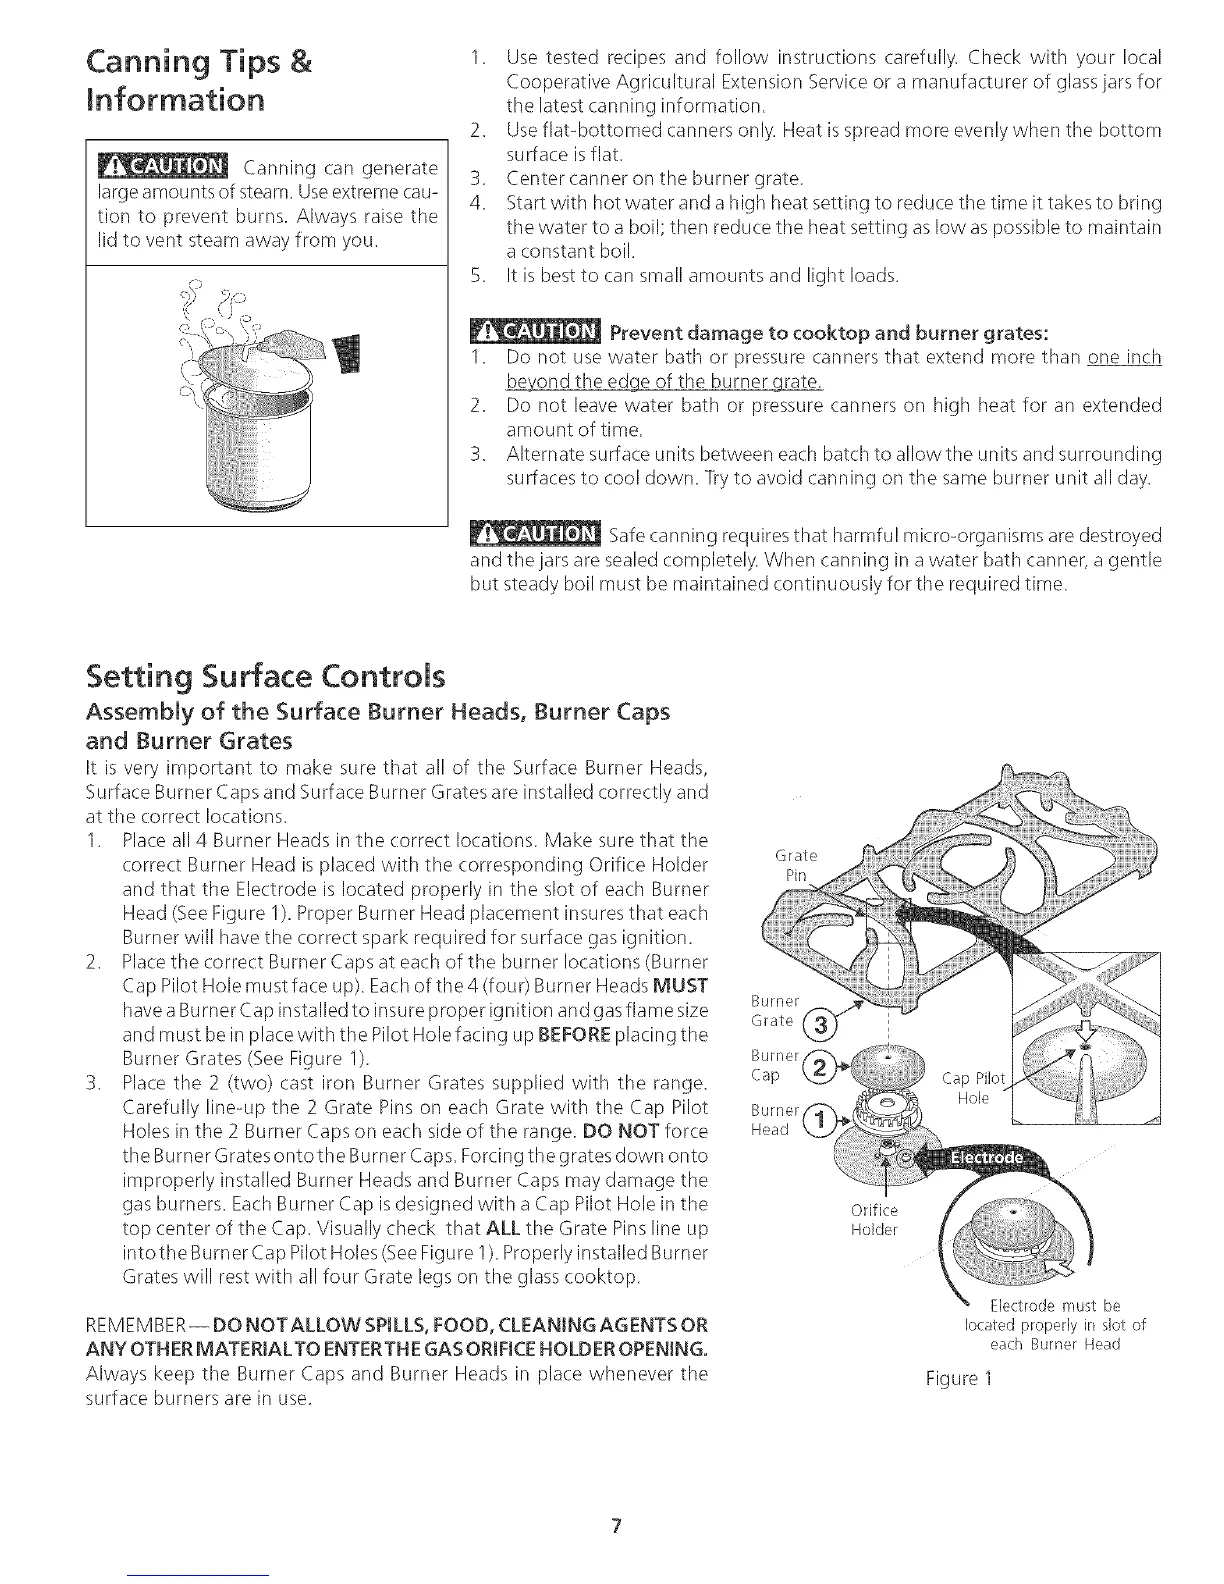
Setting Surface Controls
Assembly of the Surface Burner Heads, Burner Caps
and Burner Grates
It is very important to make sure that all of the Surface Burner Heads,
Surface Burner Caps and Surface Burner Grates are installed correctly and
at tile correct locations.
1. Placeall 4 Burner Heads in the correct locations. Make sure that the
correct Burner Head is placed with the corresponding Orifice Holder
and that the Electrode is located properly in the slot of each Burner
Head (SeeFigure 1). Proper Burner Head placement insures that each
Burner will have the correct spark required for surface gas ignition.
2. Placetile correct Burner Caps at each of the burner locations (Burner
Cap Pilot Hole must face up). Each of the4 (four) Burner Heads MUST
havea Burner Cap installed to insure proper ignition and gas flame size
and must be in place with the Pilot Hole facing up BEFOREplacing the
Burner Grates (See Figure 1).
3. Placethe 2 (two) cast iron Burner Grates supplied with the range.
Carefully line-up the 2 Grate Pins on each Grate with the Cap Pilot
Holes in the 2 Burner Caps on each side of the range. DO NOT force
the Burner Grates onto tile Burner Caps. Forcing the grates down onto
improperly installed Burner Heads and Burner Caps may damage tile
gas burners. EachBurner Cap is designed with a Cap Pilot Hole in the
top center of the Cap. Visually check that ALL the Grate Pins line up
into the Burner Cap Pilot Holes (SeeFigure 1). Properly installed Burner
Grates will rest with all four Grate legs on tile glass cooktop.
REMEMBER-- DO NOTALLOW SPILLS,FOOD, CLEANING AGENTS OR
ANY OTH ERMATERIALTO ENTERTHEGASORIFICEHOLDER OPENING,
Always keep the Burner Caps and Burner Heads in place whenever the
surface burners are in use,
Electrode must be
located properly in slot of
each Burner Head
Figure 1