WARNING: Never inate a tyre beyond the maximum pressure marked on the
tyre sidewall. Exceeding the recommended maximum pressure may blow the
tyre o the rim, which could cause damage to the bike and injury.. The best and
safest way to inate a tyre to the correct pressure is with a bicycle pump with a
built-in pressure gauge.
WARNING: There is a safety risk in using petrol station air hoses or other air
compressors. They are not made for bicycle tyres. They move a large volume of
air very rapidly, and will raise the pressure in your tyre very rapidly, which could
cause the tube to explode.
Tyre pressure is given either as maximum pressure or as a pressure range. How a
tyre performs under dierent terrain or weather conditions depends largely on tyre
pressure. Inating the tyre to near its maximum recommended pressure gives the
lowest rolling resistance but also produces the harshest ride. High pressures work
best on smooth, dry roads. Very low pressures, at the bottom of the recommended
pressure range, give the best performance on looser or rougher surfaces.
Tyre pressure that is too low for your weight and the riding conditions can cause a
puncture by allowing the tyre to deform suciently to pinch the inner tube between
the rim and the riding surface.
CAUTION: Pencil type tyre gauges used for car tyres can be inaccurate and
should not be relied upon for consistent, accurate pressure readings. Instead,
use a high quality dial gauge.
Ask your stockist to recommend the best tyre pressure for the kind of riding you will
most often do, and ask them to inate your tyres to that pressure. Then check ination
as described in Section 1.C so you know how correctly inated tyres should look and
feel when you don’t have access to a gauge. Some tyres may need to be brought
up to the correct pressure every week or two so it is important to check your tyre
pressures before every ride.
Some special high-performance tyres have unidirectional treads: their tread pattern
is designed to work better in one direction than in the other. The sidewall marking of
a unidirectional tyre will have an arrow showing the correct rotation direction. If your
bike has unidirectional tyres, be sure that they are mounted to rotate in the correct
direction.
G2. Tyre Valves
There are primarily two kinds of bicycle tube valve: the Schraeder valve and the Presta
valve. The bicycle pump you use must have the tting appropriate to the valve stems
on your bike.
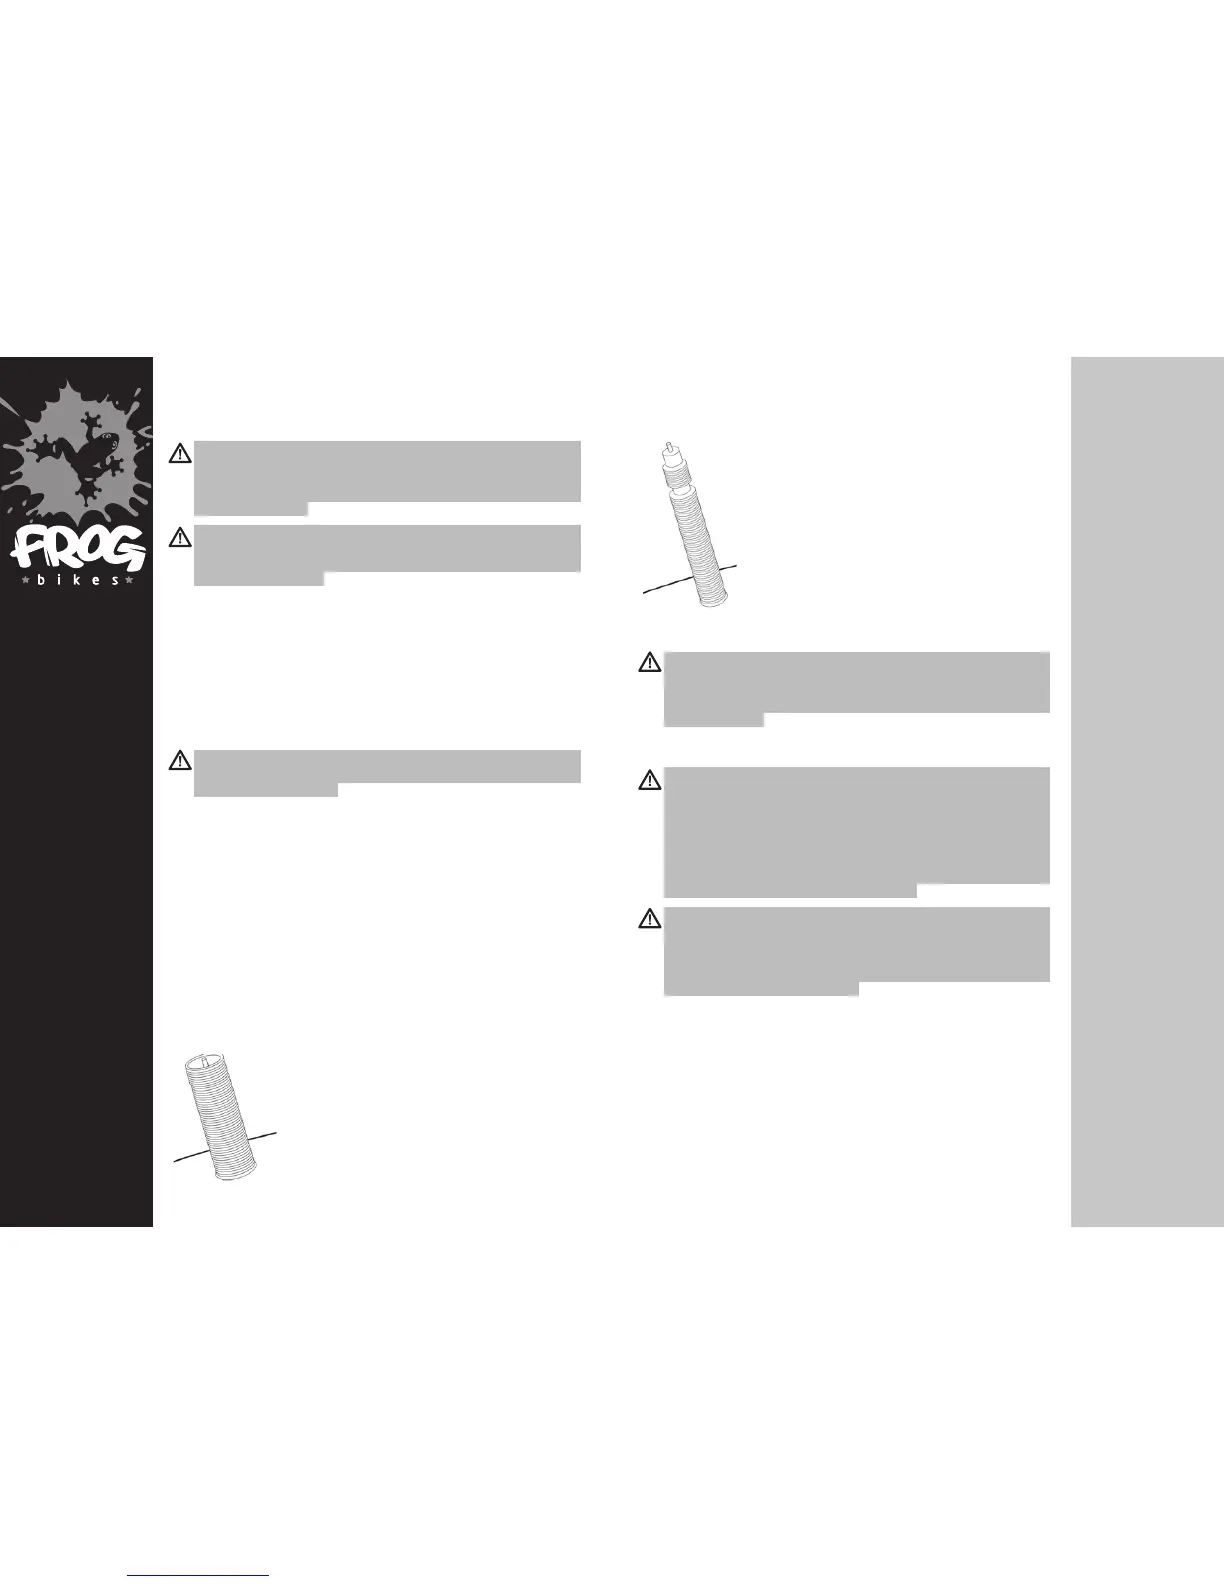
The Schraeder valve is like the valve on a car tyre. To inate a
Schraeder valve tube, remove the valve cap and clamp the
pump tting onto the end of the valve stem. To let air out of
a Schraeder valve, depress the pin in the end of the valve
stem with the end of a key or other appropriate object. All
Frog hybrid bikes use the Schraeder valve,
The Presta valve has a narrower diameter and is only found
on bicycle tyres. To inate a Presta valve tube using a Presta
headed bicycle pump, remove the valve cap; unscrew (anti-
clockwise) the valve stem lock nut; and push down on the
valve stem to free it up. Then push the pump head on to the
valve head, and inate. All Frog road bikes use the Presta
valve.
To inate a Presta valve with a Schraeder pump tting, you’ll
need a Presta adapter (available at your stockist) which
screws on to the valve stem once you’ve freed up the valve.
The adapter ts into the Schraeder pump tting. Close the
valve after ination. To let air out of a Presta valve, open up the
valve stem lock nut and depress the valve stem.
WARNING: We highly recommend you carry a spare inner tube when you ride
your bike. Patching a tube is an emergency repair. If you do not apply the patch
correctly or apply several patches, the tube can fail, resulting in possible tube
failure, which could cause you to lose control and fall. Replace a patched tube
as soon as possible.
5/ SERVICE
WARNING: Technological advances have made bicycles and bicycle
components more complex, and the pace of innovation is increasing. It is
impossible for this manual to provide all the information required to properly repair
and/or maintain your bike. In order to help minimize the chances of an accident
and possible injury, it is critical that you have any repair or maintenance which
is not specically described in this manual performed by your stockist. Equally
important is that your individual maintenance requirements will be determined by
everything from your riding style to geographic location. Consult your stockist for
help in determining your maintenance requirements.
WARNING: Many bicycle service and repair tasks require special knowledge
and tools. Do not begin any adjustments or service on your bike until you have
learned from your stockist how to properly complete them. We recommend that
signicant mechanical repairs should be carried out by a qualied mechanic.
Improper adjustment or service may result in damage to the bike or in an accident
which can cause serious injury or death.
If you want to learn to do major service and repair work on your bike:
1. Ask your stockist for copies of the manufacturers’ installation and service
instructions for all the components on your bike, or contact the component
manufacturer.
2. Ask your stockist to recommend a book on bicycle repairs, or a website.
3. Ask your stockist about the availability of bicycle repair courses in your area.
We recommend you ask your stockist to check the quality of your work the rst time
you work on something and before you ride the bike, just to make sure that you
adjusted everything correctly. Since that will require the time of a mechanic, there
may be a modest charge for this service. We also recommend you ask your stockist
for guidance on what spare parts, such as inner tubes, light bulbs, etc. you will need
once you have learned how to replace such parts.
4/ TECHNICAL INFORMATION