30
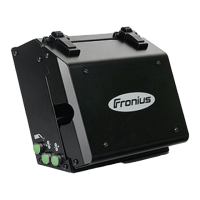
Fitting the weld-
ing torch - Tweco
connection
Inserting the welding torch into the connection for Twe-
co
turn the power source mains switch to
the "O" position
Check that the welding torch is correc-
tly set up. Insert it - infeed tube first -
into the torch connection (1)
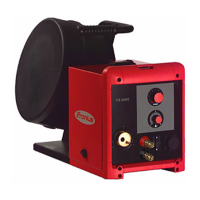
Fixing welding torch in place using a knurled screw
Fix the welding torch in place using a
knurled screw (2)
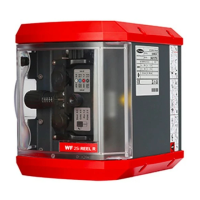
Connecting water connections for water flow and wa-
ter return
If present: plug the control plug of the
welding torch into the Robacta robot
welding torch connection (3) and tigh-
ten the union nut to secure it in place
If present: connect the external water
flow (4) and return (5) connections cor-
rectly, matching the colours
(1)
1
2
(2)
3
(4)
(3)
(5)
4
5
 Loading...