92 FONIX FP40 Portable Hearing Aid Analyzer
5.4.3 Viewing the SPL screen
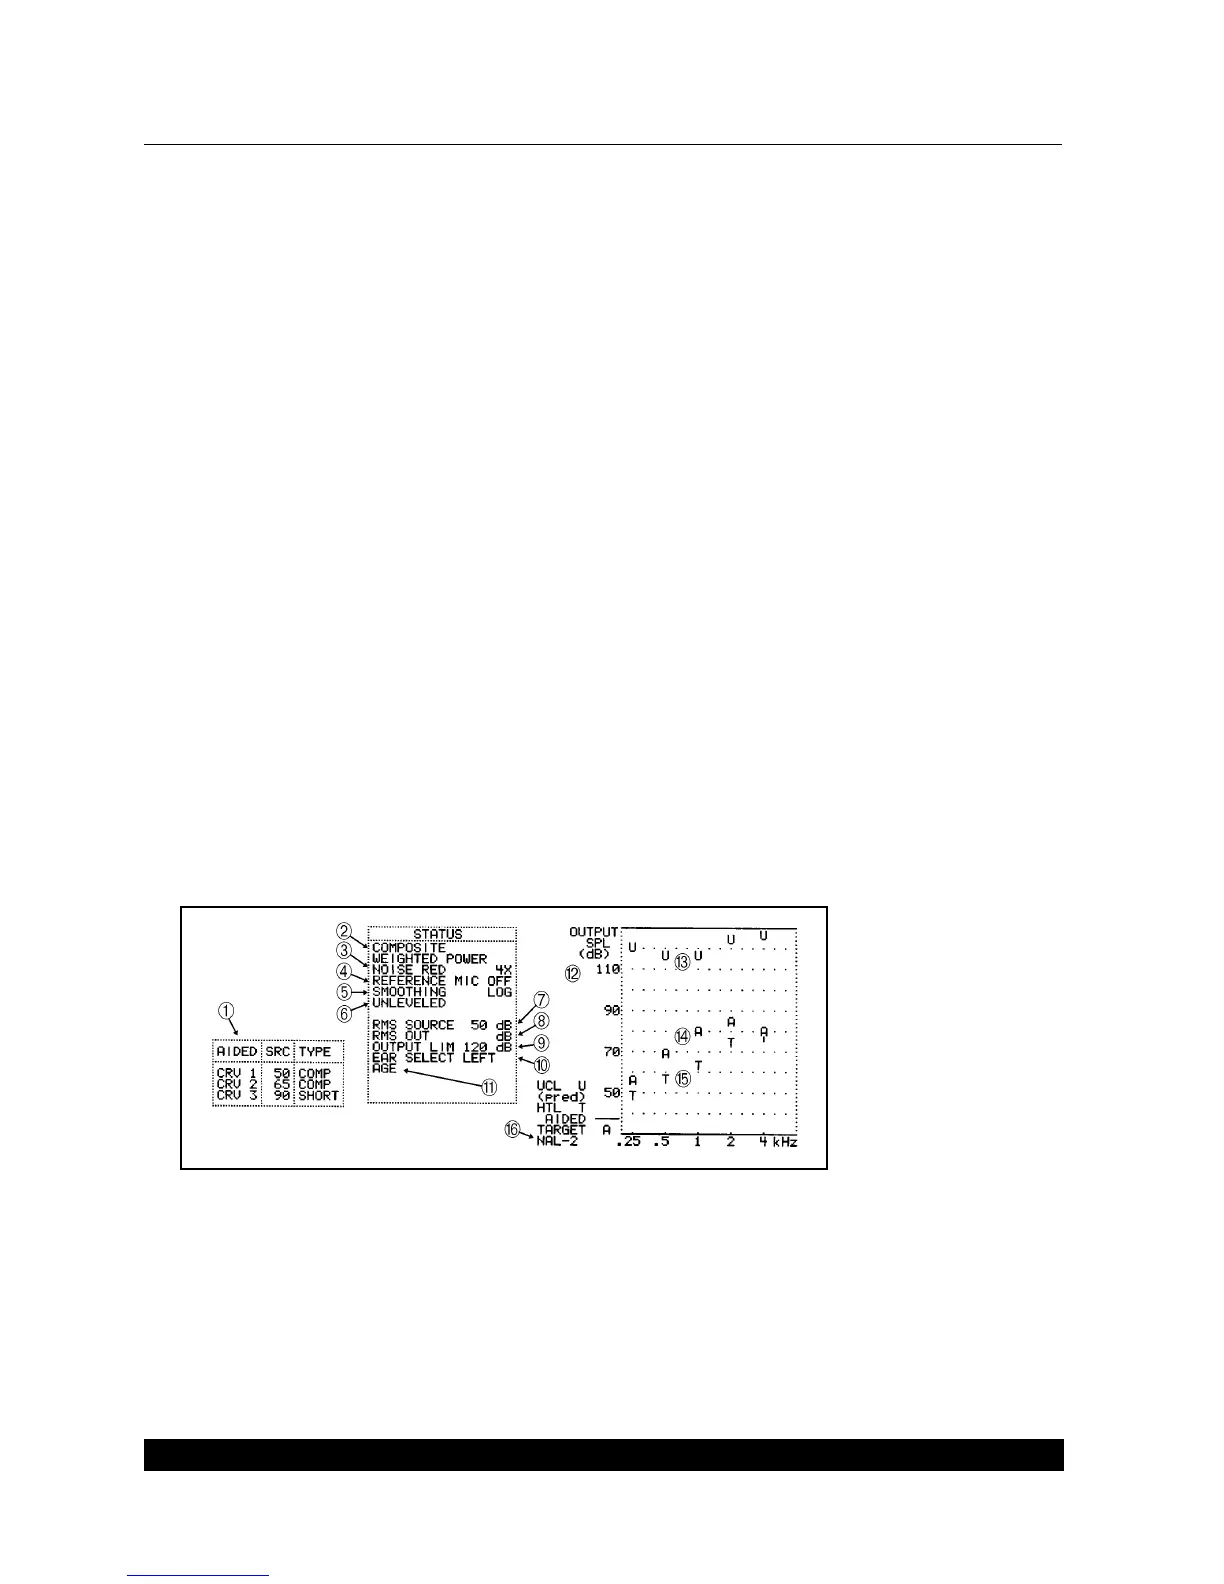
See Figure 5.4.3 for a picture of the SPL testing screen.
1. Curve box containing the source type and amplitude of each of the three measurement
curves.
2. Source type for current curve
3. Noise reduction status for current curve
4. Reference microphone status
5. Smoothing status
6. Leveling status
7. RMS source level used to take measurement
8. RMS of the current curve. Not available with pure-tone source types.
9. Output limit status
10. Selected ear
11. Selected age of client
12. SPL graph for aided measurements, HTL, UCL, and AIDED 2 target
13. UCL values shown in dB SPL
14. Target for AIDED 2 shown in dB SPL
15. HTL values shown in dB SPL
16. Selected fitting rule
Figure 5.4.3—SPL Testing screen
5.4.4 Taking the SPL measurements
1. Create the real-ear target, if desired, by following the instructions found in Section 5.2. Make
sure to choose SPL in step 2 of that section.