Executing 2 Sided Color Scanning Calibration
99
Maintenance
3
6 Select [Print Chart].
Note • To restore the previous values, select [Restore Previous Values], and then [Start]. To restore the
factory default values, select [Restore Factory Default Values], and then [Start]. When the
restoration is completed, a message appears on the screen.
7 Select [Start].
Note • A message saying “Outputting the chart for 2 Sided Color Scanning Calibration....” appears, and the
machine prints the 2 Sided Color Scanning Calibration Chart.
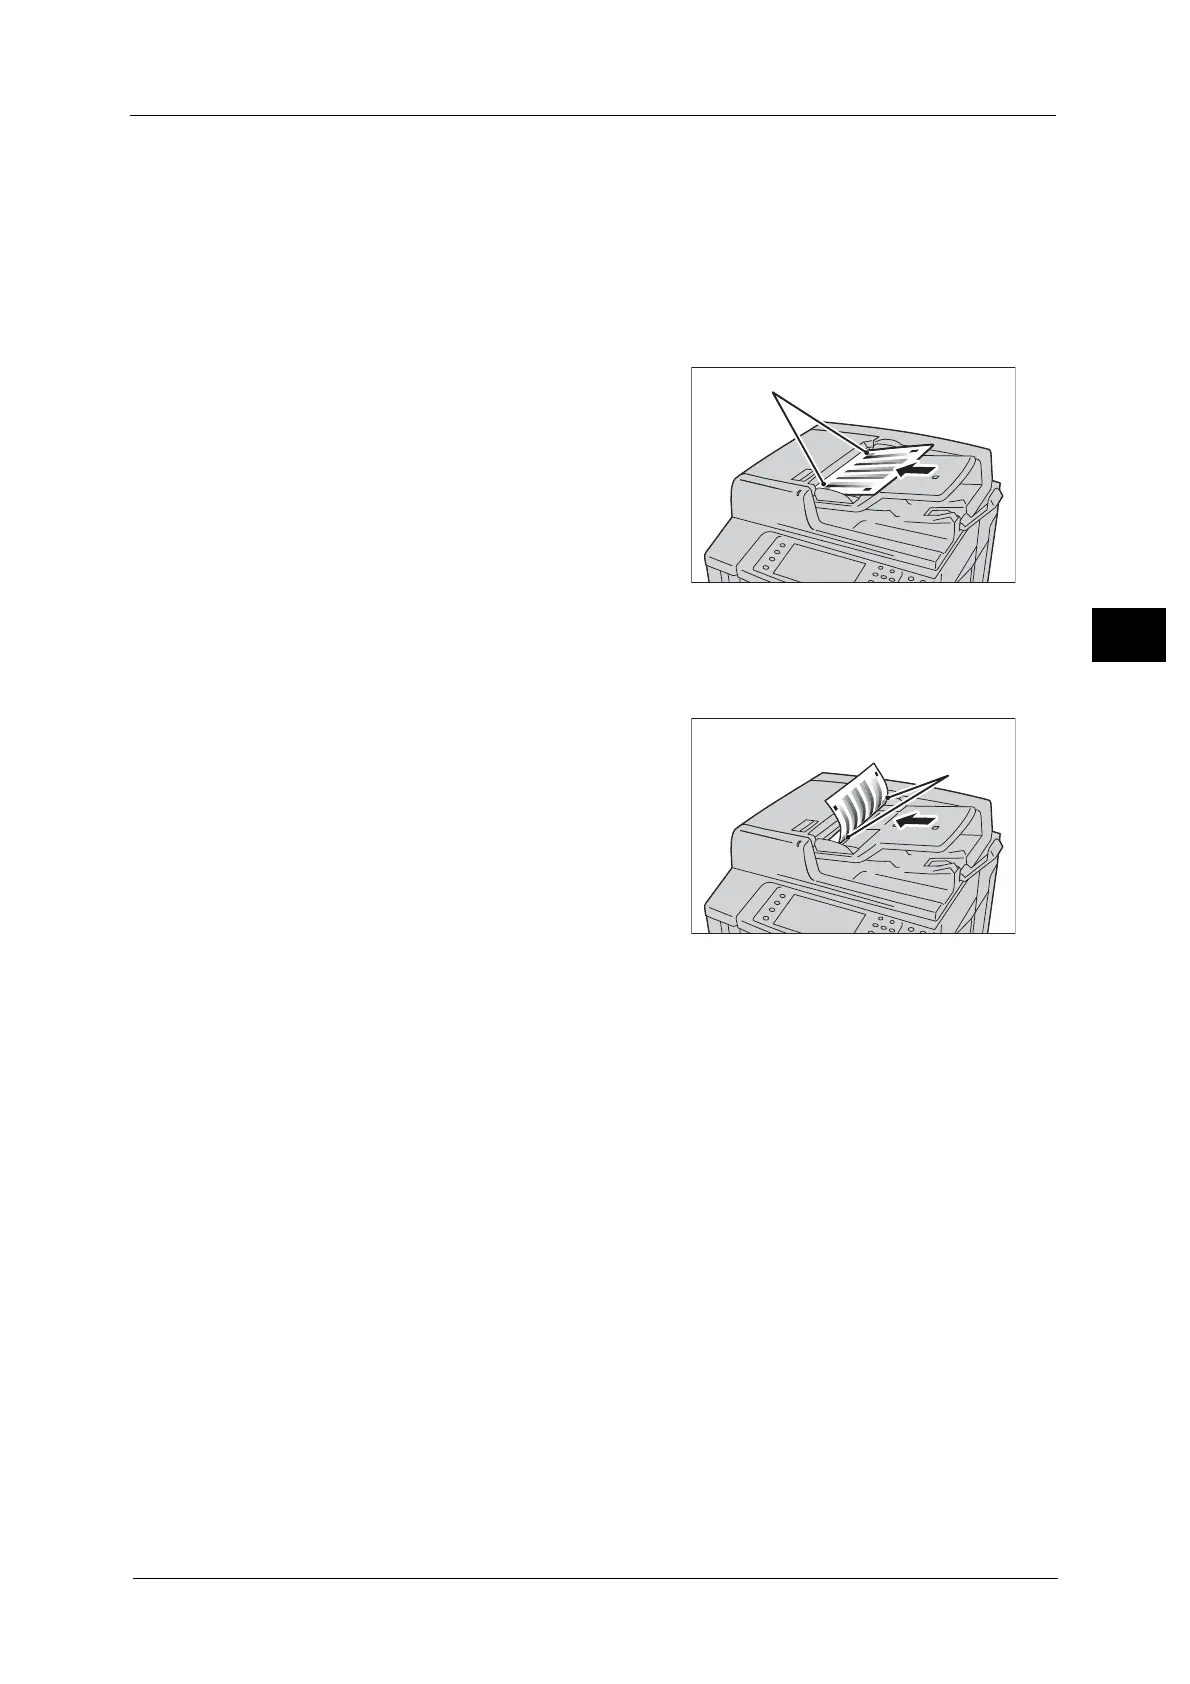
8 Load the 2 Sided Color Scanning Calibration
Chart face up on the document feeder with the
magenta marks on corners on your left hand
side.
9 Select [Start].
A message saying “Scanning chart...” appears.
10 Load the 2 Sided Color Scanning Calibration
Chart face down on the document feeder with
the magenta marks on corners on your left
hand side.
11 Select [Start].
A message saying “Scanning chart and performing color correction...” appears, and the
machine starts calibration. When the calibration is completed, the calibration result will be
shown on the screen.
Note • If an error message appears on the screen, select the [Confirm] button, and then repeat steps 8 to
11.
12 Select [Confirm].
13 Select [Close] repeatedly until the [Tools] screen is displayed.
14 Select [Close].
15 Copy an image to see the calibration result reflected on the printout.
Note • During calibration, the machine cannot receive print jobs or faxes.
16 Select [Close].
 Loading...


