18
Scan
(Via network)
Scan (1) Select the Mailbox, and Scan the Document
1
Select [Scan].
2
Select the mailbox.
(1) Select [Mailbox] on the [Scan] screen.
(2) Select the mailbox to store the scanned documents.
(3) Enter the password.
(4) Select [Confirm].
(5) Select [Close].
3
Set the methods for saving the
document.
Select the features such as [File Format] and [Scan
Resolution].
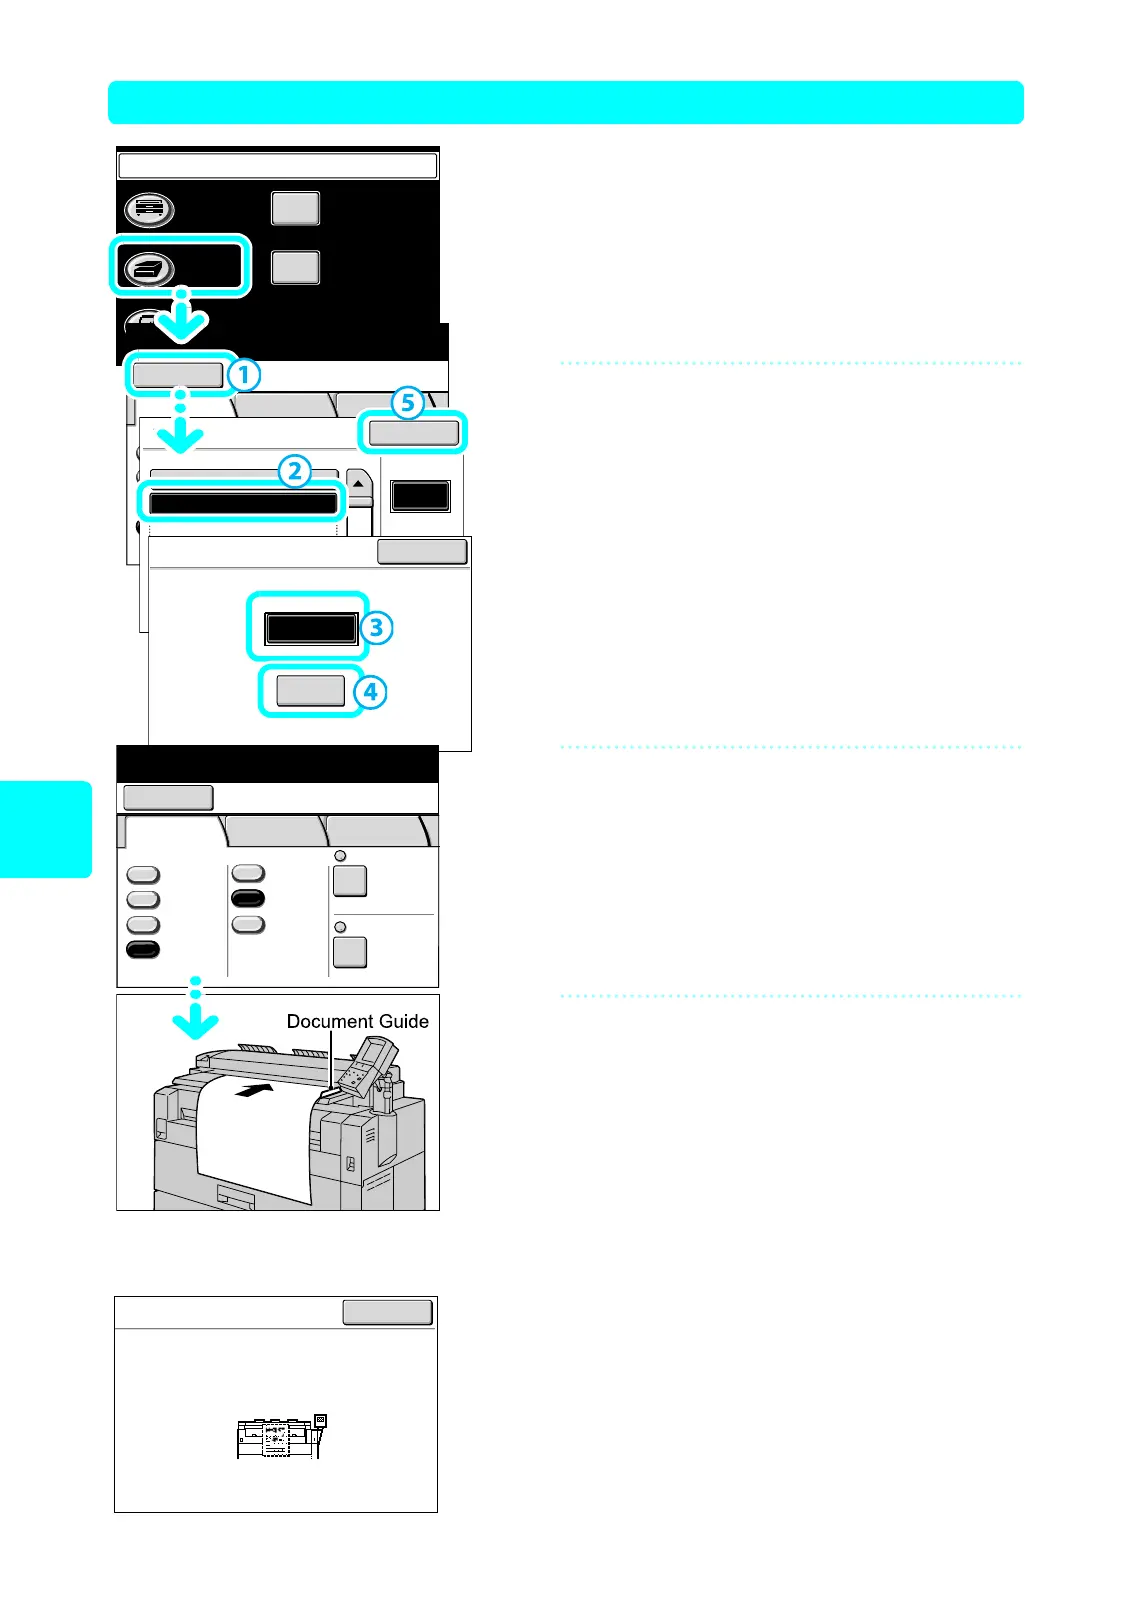
4
Set the document.
Align the document face down with the document guide.
When selecting [Single Page TIFF] in [File Format]
(When Saving Single Document as One File)
The machine starts scanning automatically. The screen
that indicates the scanning state appears.
When scanning is completed, the [Scan] screen appears.
Menu
Copy
Scan
Stored
Programming
Setup Menu
Language
Select a Save in location (Mailbox) to store
the scanned documents.
Mailbox
Save in: Not Entered
Basic
Scan
Image
Quality
More
Features
Scan ResolutionFile FormatOutput Color
Color
Grayscale
Multi-page
TIFF
Single
Page TIFF
More
Reduce/Enlarge
100.0%
600dpi
Black
& White
Halftone
Mailbox
Mailbox Name
Page
1 of 20
Go to
(001-100)
Document
List
#
A Mailbox001.
B Mailbox002.
(Not in Use)003.
(Not Entered)004.
(Not in Use)005.
Close
Mailbox 002: B Mailbox
Cancel
Password
Confirm
****
Ready to scan
Mailbox
Save in: Mailbox 002
B Mailbox
Basic
Scan
Image
Quality
More
Features
Scan ResolutionFile FormatOutput Color
Color
Grayscale
Black
& White
Halftone
Multi-page
TIFF
Single
Page TIFF
More...
Reduce/Enlarge
100.0%
600dpi
Scan
Save in
Document Name
100.0%
600dpi
A0
: Mailbox 002 - B Mailbox
: 002-081001-0001.tif
Close
 Loading...