En-14
CAUTION
When removing the cabinet (iron plate), be careful not to damage the indoor unit inter-
nal parts and surrounding area (outer case).
When processing the cabinet (iron plate), be careful not to injure yourself with burrs, etc.
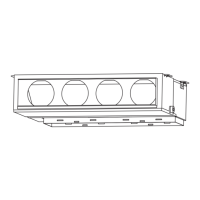
Install the round fl ange (option parts) to the fresh air intake.(2)
Round duct
Connect the duct to the round fl ange.(3)
Seal with a band and vinyl tape, etc. so that air does not leak from the connection.(4)
Duct
10. TEST RUN
CHECK ITEMS
(1) Is operation of each button on the remote controller normal?
(2) Do not air fl ow direction louvers operate normally?
(3) Is the drain normal?
(4)
Is there any abnormal noise and vibration during operation?
• Do not operate the air conditioner in test run for a long time.
[OPERATION METHOD]
• For the operation method, refer to the operating manual.
(1) Stop the air conditioner operation.
(2)
Press the MODE button and the FAN button simultaneously for 2 seconds or more to
start the test run.
Test run display
(3) Press the START/STOP button to stop the test run.
If “C0” appears in the unit number display, there is a remote controller error. Refer to the
installation manual included with the remote controller.
Unit number Error code Content
Incompatible indoor unit is connected
Indoor unit
↔
remote controller communication
error
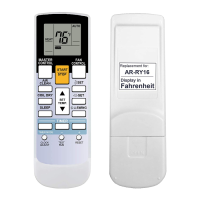
[Using the wireless remote controller for test run] (Option)
• For the operation method, refer to the operating manual.
•
The outdoor unit may not operate depending on the room temperature. In this case,
press the TEST RUN button on the wireless remote controller while the air conditioner
is running. (Point the transmitter section of the wireless remote controller toward the air
conditioner and press the TEST RUN button with the tip of a ball-point pen, etc.)
Transmitter section
TEST RUN button
•
To end test operation, press the wireless remote controller START/STOP button.
(When the air conditioner is run by pressing the TEST RUN button, the OPERATION
indicator lamp and TIMER indicator lamp will simultaneously fl ash slowly.)
11. CHECK LIST
Pay special attention to the check items below when installing the indoor unit(s). After
installation is complete, be sure to check the following check items again.
CHECK ITEMS If not performed correctly CHECK BOX
Has the indoor unit been
installed correctly?
Vibration, noise, indoor unit may
drop
Has there been a check for gas
leaks (refrigerant pipes)?
No cooling, No heating
Has heat insulation work been
completed?
Water leakage
Does water drain easily from the
indoor units?
Water leakage
Are the wires and pipes all con-
nected completely?
No operation, heat or burn dam-
age
Is the connection cable the
specifi ed thickness?
No operation, heat or burn dam-
age
Are the inlets and outlets free of
any obstacles?
No cooling, No heating
After installation is completed,
has the proper operation and
handling been explained to the
user?
12. OPTIONAL KIT INSTALLATION (OPTION)
WARNING
Regulation of cable differs from each locality, refer in accordance with local rules.
This air conditioner can be connected with the following optional kits.
Option type Connector No.
UTY-XSZX (Remote sensor unit) CN8
UTD-ECS5A (External input) CN102
UTD-ECS5A (External output) CN103
UTZ-PX1NBA (Drain pump unit)
CN106 ( Drain pump )
CN9 ( Float SW )
CN103
CN102
CN106
CN8
CN9
9379127035-02_IM.indb Sec1:149379127035-02_IM.indb Sec1:14 23/01/2013 16:25:4623/01/2013 16:25:46
 Loading...