EasyManua.ls Logo

Fujitsu Slim Duct Type User Manual

Fujitsu Slim Duct Type
26 pages
To Next Page IconTo Next Page
Page #1 background imageLoading...
Page #1 background image
PART NO. 9374342105-05
EnglishFrançaisEspañol
INSTALLATION MANUAL
AIR CONDITIONER
INDOOR UNIT
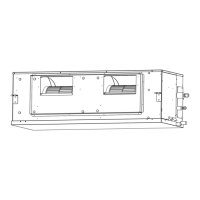
Slim Duct Type
For authorized service personnel only.
Contents
1. SAFETY PRECAUTIONS ............................................. 2
1.1. IMPORTANT! Please Read Before Starting ........... 2
1.2. Special precautions ................................................ 2
2. ABOUT THE UNIT ........................................................ 3
2.1. Precautions for using R410A refrigerant ................ 3
2.2. Special tools for R410A .......................................... 3
2.3. For authorized service personnel only. .................. 3
2.4. Accessories ............................................................ 4
2.5. Optional parts ......................................................... 5
3. GENERAL ..................................................................... 5
3.1. Type of copper pipe and insulation material ........... 5
3.2. Additional materials required for installation.......... 5
3.3. Operating range ..................................................... 5
4. ELECTRICAL REQUIREMENT ..................................... 6
5. SELECTING THE MOUNTING POSITION ................... 6
6. INSTALLATION WORK ................................................. 7
6.1A. Installation dimensions
(Ceiling concealed type) ...................................... 7
6.1B. Installation dimensions (Wall mounted type/
Floor standing concealed type) ........................... 7
6.2A. Installation the unit (Ceiling concealed type) ....... 7
6.2B. Install the unit (Wall mounted type/
Floor standing concealed type) ......................... 10
7.
PIPE INSTALLATION .................................................. 12
7.1. Selecting the pipe material ................................... 12
7.2. Pipe requirement .................................................. 12
7.3. Flare connection (Pipe connection)...................... 12
7.4. Installing heat insulation ....................................... 13
8. INSTALLING DRAIN PIPES ........................................ 14
8.1A. Installing drain pipes
(Ceiling concealed type) .................................... 14
8.1B. Installing drain pipes (Wall mounted type/
Floor standing concealed type) ......................... 14
8.2. Install the drain pipe ............................................. 15
9. ELECTRICAL WIRING ................................................ 16
9.1. INDOOR UNIT SIDE ............................................ 17
10. REMOTE CONTROLLER SETTING ........................... 18
10.1. Installing the remote controller ........................... 18
10.2. Setting the dip switches ..................................... 19
10.3. Function setting .................................................. 19
10.4. Jumper wire setting ............................................ 22
10.5. Test run .............................................................. 22
11. SPECIAL INSTALLATION METHODS ......................... 23
12. OPTIONAL PARTS ..................................................... 23
12.1. External input and external output ..................... 23
12.2. Remote sensor (Optional parts) ......................... 24
12.3. IR Receiver Unit (Optional parts) ....................... 24
13. ERROR CODES ......................................................... 25
14. CUSTOMER GUIDANCE ............................................ 26

Table of Contents

Question and Answer IconNeed help?

Do you have a question about the Fujitsu Slim Duct Type and is the answer not in the manual?

Fujitsu Slim Duct Type Specifications

General IconGeneral
BrandFujitsu
ModelSlim Duct Type
CategoryAir Conditioner
LanguageEnglish

Summary

1. Safety Precautions

1.1. Important Pre-Installation Reading

Crucial information and warnings that must be read before starting installation.

1.2. Special Installation Precautions

Specific safety measures and advice for installation procedures.

General Handling and Servicing Safety

Safety guidelines for transporting, installing, connecting, and servicing the unit.

2. About the Unit

2.1. R410A Refrigerant Precautions

Key safety and procedural precautions when working with R410A refrigerant.

2.2. Special Tools for R410A

Essential tools required for installing and servicing units using R410A refrigerant.

2.3. Authorized Personnel Requirement

Specifies that installation and service must be performed by qualified personnel.

Copper Pipe Specifications for R410A

Requirements and specifications for copper pipes suitable for R410A refrigerant.

2.4. Accessories

Standard Included Accessories

List of parts furnished with the unit for installation.

Optional Accessories List

List of optional parts available for the unit.

2.5. Optional Parts

Optional Parts Details

Detailed descriptions of various optional parts.

3. General Information

Piping and Insulation Material Specifications

Details on copper pipe types and required heat insulation materials.

Additional Installation Materials

List of supplementary materials needed for installation.

Operating Range Parameters

Specified operating temperature and humidity ranges for cooling/heating.

4. Electrical Requirements

Connection Cable and Circuit Specifications

Requirements for the connection cable, including gauge and voltage.

5. Mounting Position Selection

General Mounting Location Guidelines

Advice on selecting a suitable and secure location for unit installation.

Installation Site Restrictions

Areas where the unit should not be installed due to potential damage or hazards.

Customer Input for Mounting Location

Factors to consider and discuss with the customer for optimal positioning.

6. Installation Work

6.1A. Installation Dimensions - Ceiling Concealed

Dimensional requirements for the ceiling concealed type unit installation.

6.1B. Installation Dimensions - Wall Mounted/Floor Standing

Dimensional requirements for wall mounted and floor standing types.

6.2A. Ceiling Concealed Unit Installation Procedure

Step-by-step guide for installing the ceiling concealed indoor unit.

6.2A.1. Duct Connection for Ceiling Concealed Unit

Instructions for connecting ducts to the inlet and outlet of the ceiling concealed unit.

6.2A. Installation Details - Ceiling Concealed

Duct Static Pressure Limits

Maximum allowable external static pressure for different unit models.

Cover Replacement Procedure

Steps for removing and reinstalling the unit cover.

6.2A.2. Filter Installation

Procedure for installing air filters into the unit.

Procedure for installing air filters into the unit.

6.2A.3. Drilling and Bolt Installation

Steps for drilling holes and installing mounting bolts using a template.

Steps for drilling holes and installing mounting bolts using a template.

6.2A.4. Unit Mounting and Securing

Hanging the Unit

Method for hanging the indoor unit using provided hardware.

Unit Leveling Procedure

Ensuring the unit is installed level for proper operation.

6.2B. Wall Mounted/Floor Standing Unit Installation

6.2B.1. Installation Example and Ductwork

Example installation, duct connection, and static pressure limits for specific units.

Cover Replacement Procedure

Steps for removing and reinstalling the unit cover.

6.2B.2. Filter Installation

Procedure for installing air filters into the unit.

Procedure for installing air filters into the unit.

6.2B.3. Unit Mounting and Alignment

Instructions for securing the unit and ensuring it is properly aligned.

Instructions for securing the unit and ensuring it is properly aligned.

7. Pipe Installation

Pipe Material and Requirements

Guidance on selecting and specifying copper pipes and necessary insulation.

Flare Connection and Flaring Techniques

Detailed steps for performing flare connections and the flaring operation.

Pipe Bending Guidelines

Precautions and techniques for bending refrigerant pipes without damage.

Precautions and techniques for bending refrigerant pipes without damage.

Pipe Connection Torque Specifications

Torque values for tightening flare nuts during pipe connection.

Torque values for tightening flare nuts during pipe connection.

Coupler Heat Insulation Installation

How to install coupler heat insulation on refrigerant pipe joints.

How to install coupler heat insulation on refrigerant pipe joints.

8. Drain Pipe Installation

8.1A. Drain Pipe Installation - Ceiling Concealed

Procedure for installing drain pipes for ceiling concealed units.

8.1B. Drain Pipe Installation - Wall Mounted/Floor Standing

Procedure for installing drain pipes for wall mounted/floor standing units.

Basic Drain Pipe Installation Guidelines

General guidelines for drain pipe installation including gradient and supports.

8.2. Drain Pipe Installation Details

Drain Hose and Hose Band Attachment

Instructions for attaching the supplied drain hose and hose band.

Drainage Check and Hose Insulation

Verifying proper drainage and insulating the drain hose.

Drainage Verification Method

Procedure to confirm that the unit's drainage system is functioning correctly.

Procedure to confirm that the unit's drainage system is functioning correctly.

9. Electrical Wiring

General Electrical Wiring Safety

Critical safety precautions and general rules for electrical wiring.

Ring Terminal Connection Method

Proper method for connecting wires using ring terminals.

9.1. Indoor Unit Side Wiring

Control Box Cover Removal

Steps to remove the control box cover for access.

Cable Connection Procedures

Connecting power and remote controller cables to the terminal board.

Indoor Unit Wiring Diagram

Schematic illustrating the wiring connections for the indoor unit.

10. Remote Controller Setting

10.1. Remote Controller Installation

Physical installation steps for mounting the remote controller.

Remote Controller Cable Management

Techniques for concealing and securing the remote controller cable.

10.2. DIP Switch Settings

Instructions for configuring the unit using DIP switches on the remote controller.

Instructions for configuring the unit using DIP switches on the remote controller.

10.3. Function Setting

Function Setting Details

Configuration options for filter signs, static pressure, and cooling temperature correction.

Advanced Configuration Settings

Adjusting heating temperatures, sensor selection, auto restart, and external controls.

10.4. Jumper Wire Settings

Drainage and Fan Delay Configuration

Setting drainage function and fan delay using jumper wires.

Jumper Wire Setting Notes

Important notes regarding jumper wire settings and forbidden configurations.

10.5. Test Run

Test Run Preparation and Procedure

Pre-test checks, operation steps, and wireless remote test run.

11. Special Installation Methods

Dual Remote Controller Configuration

Methods for setting up and operating the unit with two remote controllers.

Dual Controller Wiring and DIP Switch Setup

Wiring and DIP switch settings for dual remote controller installations.

12. Optional Parts

12.1. External Input and Output

Details on connecting external input and output devices to the unit.

12.2. Remote Sensor Installation

Steps for installing the optional remote temperature sensor.

Steps for installing the optional remote temperature sensor.

12.3. IR Receiver Unit Installation

Steps for installing the optional IR receiver unit.

Steps for installing the optional IR receiver unit.

13. Error Codes

Error Code Reference Guide

A comprehensive list of error codes, their descriptions, and remarks.

14. Customer Guidance

Post-Installation Customer Explanation

Key points to explain to the customer regarding unit operation and maintenance.

Related product manuals