Get Started with your
LIFEBOOK
®
AH532 Notebook
Page 3 of 5
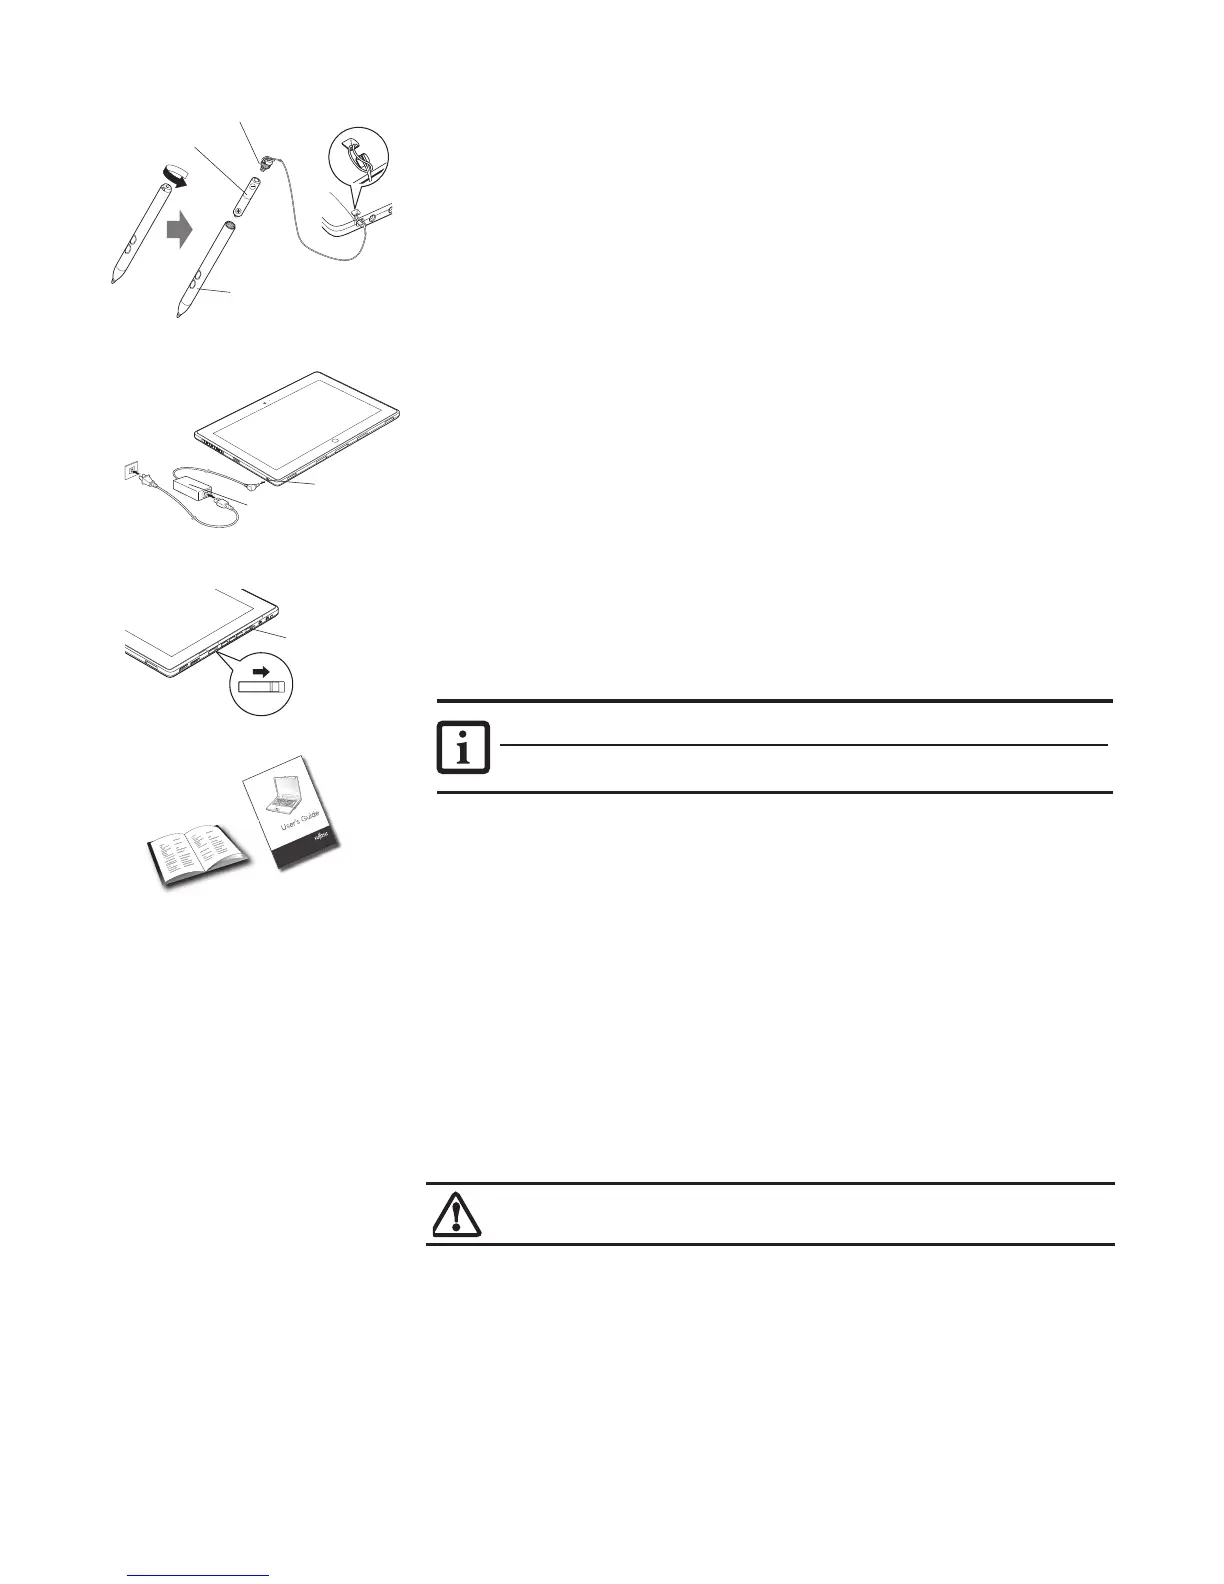
1. Install the Pen Battery
■ Remove the cap from the end of the pen and insert a AAAA-battery positive end rst.
Reinstall the pen cap.
2. Attach the Pen Tether
■ Take the smaller loop on the pen tether and insert it about half way into the slot in the pen cap.
Thread the tether through the end of the loop extending through the slot. Now take the larger loop
on the tether and insert in the same manner through the attachment point on the right side of your
tablet. Thread the pen through the end of the loop extending through the attachment point.
3. Connect AC Power
■ Plug the power cord into the AC adapter.
■ Plug the AC adapter into your STYLISTIC Hybrid Tablet.
■ Connect the power cord to an electrical outlet.
4. Booting the System
■ We strongly recommend that you do not attach any external devices until you have gone through
the initial power on sequence.
■ Slide and release the Power/Suspend Resume switch.
■ Your tablet is now on and the battery is being charged.
■ When you turn on your tablet for the rst time, it will display a Fujitsu logo on the screen. If you
do nothing the system will load the operating system, and then the Windows Welcome will begin.
5. Starting Windows
®
for the First Time
■ After you boot up the system the rst time and follow the instructions on the screen, you will
eventually come to the Welcome window. After the Welcome window appears, the screen will black
out for up to several minutes. This is normal. DO NOT ATTEMPT TO POWER DOWN THE SYSTEM
AT THIS POINT. While the screen is blacked out, your system conguration is being set up and the
necessary les are being installed.
■ During the course of the rst start up, you will need to read and accept the End User License
Agreements (EULAs) for Microsoft and Fujitsu.
6.
Connect to the Internet or Network
■ Move the Wireless Device switch to on.
After you have congured your computer, you can connect to
an active network by clicking on the Wireless Network icon in the system tray
■ Register your STYLISTIC Q702 with Fujitsu Service and Support via our website (http://solutions.
us.fujitsu.com/www/content/support/). This helps us to better serve you.
Initial Start Up
Pen Cap
Pen Barrel
AAAA-battery
DC Power Jack
AC Adapter
Wireless
Device
Switch
Power/Suspend/
Resume Switch
If you reject the terms of the license agreement you will be asked to review the license agreement for
information on returning Windows
®
or to shut down your tablet.
You cannot use your tablet. until you have accepted the license agreement. If you stop the process your tablet. will
return to the beginning of the Windows
®
Welcome Process, even if you shut your tablet. down and start it up again.
DO NOT USE EXCESSIVE FORCE WHEN TAPPING ON THE SCREEN DURING CALIBRATION. USE OF EXCESSIVE FORCE
COULD RESULT IN DAMAGE TO THE LED AND/OR TOUCH PANEL
7.
Activate Additional Utilities, Applications, & Drivers
■ You can launch desktop icon “Fujitsu Bonus Apps” to see if there are any additional applications
available for the system. Bonus Apps contains optional applications. You can select individual or all
software that is available. BonusApps will automatically install for you.
8.
Calibrating the Display
In order to ensure accurate tracking between the stylus and cursor, you must run the Calibration
Utility before you use the system for the rst time, or after you change the display resolution.
To run the calibration utility:
■ Go to Start -> Control Panel.
■ Double-click the Tablet Settings icon and select the Display tab
■ Click the [Calibrate] button, then select whether you want to calibrate pen input or touch input.
■ Adjust the display of your tablet to a comfortable angle and nd the (+) symbol in the upper-left
corner of the display.
■ Using the stylus or your nger (depending upon which type of input you are calibrating), rmly
touch the screen directly on the (+) symbol. Lift the stylus from the screen and the target will move
to a different location on the screen.
■ Repeat the previous step until you have selected all of the (+) symbols.
■ Once you have selected all the symbols, press the [OK] button.
■ Touch the stylus to various points on the screen to verify that the screen is correctly calibrated. If
you are not satised with the screen’s calibration, press the [Calibrate]) button to begin again.
9. Create backup media with MyRecovery
■ Click on the [MyRecovery] icon to create backup recovery media discs. (You will need to use an
external optical drive.)
■ Look in the User’s Guide (Troubleshooting Your STYLISTIC Q702) for more detailed instructions.
 Loading...