En-12
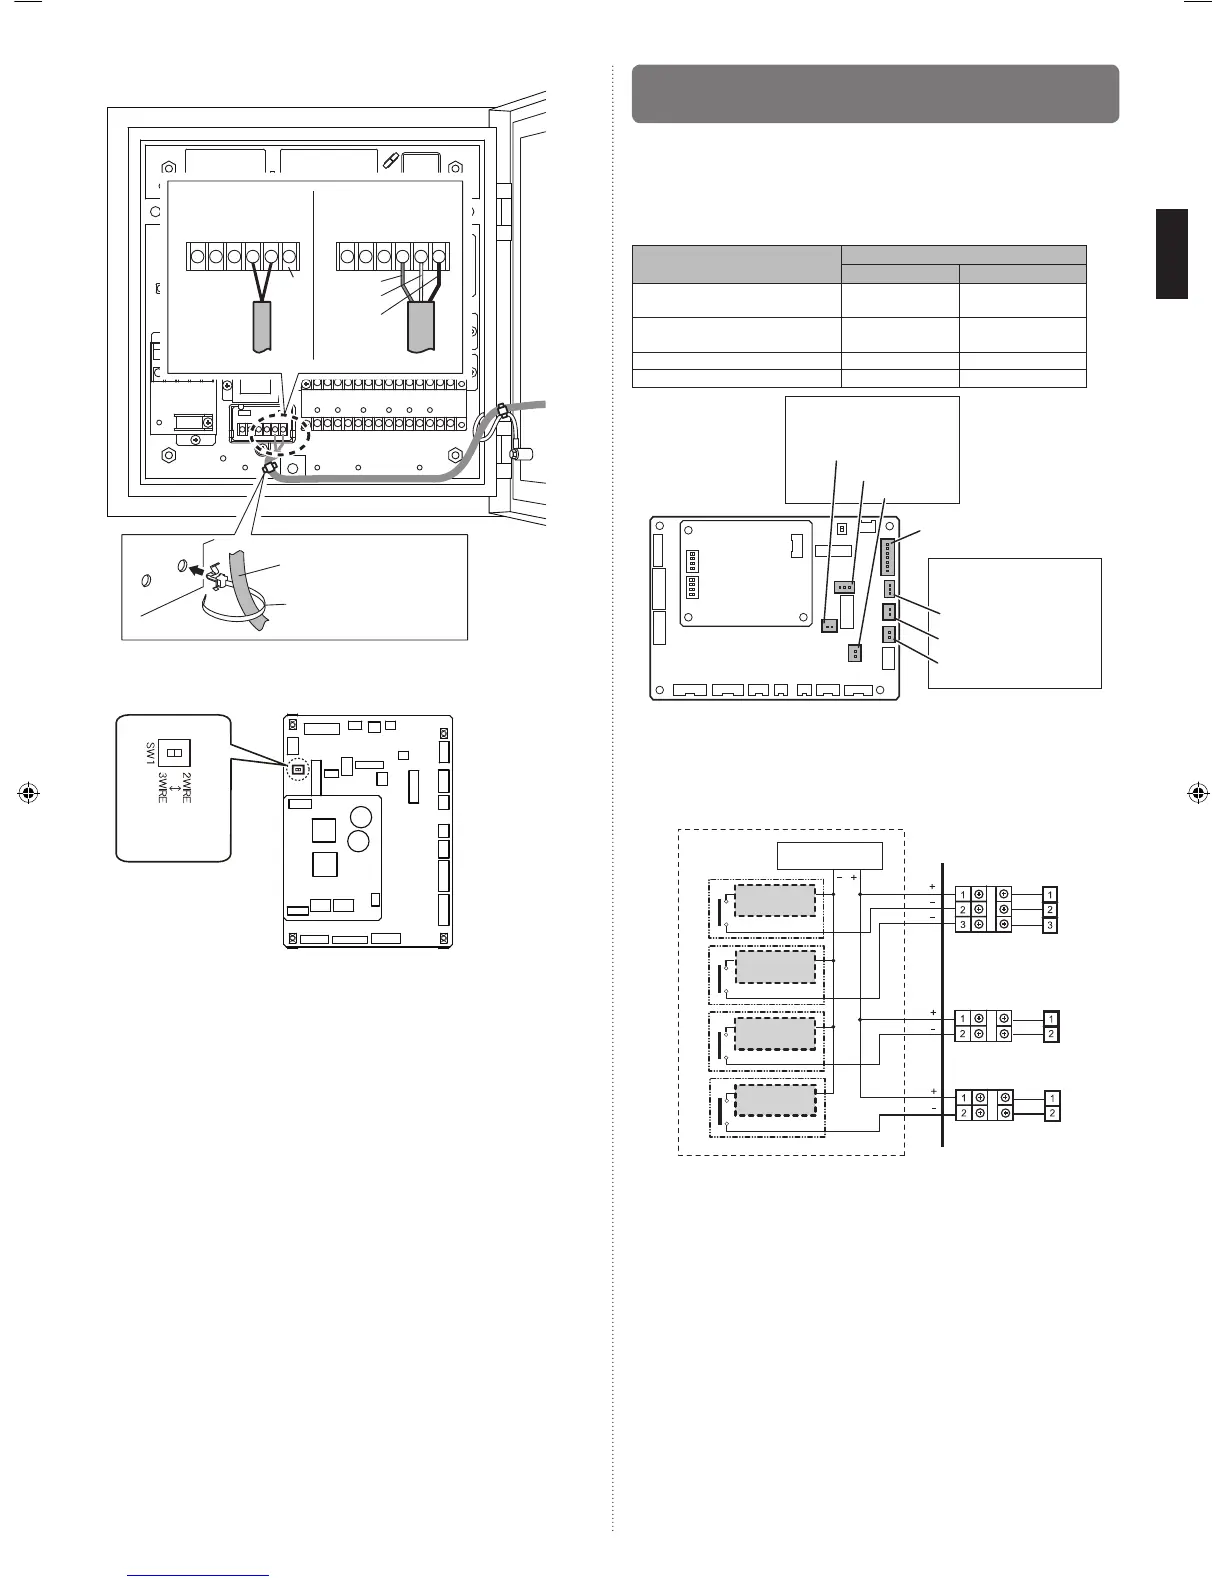
(3) Wiring the remote controller cable (device side)
Y1 Y2 Y3Y1 Y2
Non-polar
*1
Red
White
Black
For 2-wire type For 3-wire type
Remote controller cable
Cable tie (Accessories)
*1) If you connect the remote controller cable to the terminal Y3, 2-wire type remote con-
troller does not work.
(4) Set the DIP switch according to the type of remote controller used.
Factory setting : 2WIRE
DIP switch
(SW1)
• When using the wired remote controller, if the temperature drops below 0°C, the LCD
display may become dim, the response may become slower, and the time accuracy of
the clock will be lost.
7.5. External input and external output (Optional
parts)
7.5.1. Digital external inputs
• Select either the apply voltage method or dry contact method for digital external inputs.
• Both types of terminals cannot be used simultaneously.
• Float witch signal is compatible with the dry contact method only.
Switch connectors as shown in the table below according to the method selected.
Terminal name
PCB connector (*: Factory setting)
Apply voltage Dry contact
ON/OFF SIGNAL
(INPUT)
CNA01 CNA02*
ERROR SIGNAL
(INPUT)
CNA06 CNA07*
COOL / HEAT SIGNAL CNA03 CNA04*
FLOAT SW SIGNAL Incompatible CNA05*
External input terminal
(Dry contact terminal)
External input terminal
(Apply voltage terminal)
External output terminal
CNA01
CNA04
CNA02
CNA07
CNB01
Controller PCB
CNA03
CNA06
• Use an external input and output cable with appropriate external dimension, depending
on the number of cables to be installed.
• The wire connection should be separate from the power cable line.
● Apply voltage terminal ([CNA01], [CNA03], [CNA06])
When a power supply must be provided at the input device you want to connect, use the
Apply voltage terminal ([CNA01], [CNA03], [CNA06]).
Power supply
DC 12 to 24 V
Load
resistance
Load
resistance
Load
resistance
Load
resistance
connected unit
Input 1Input 2Input 3
Control unit
Terminal
board
P.C.B.
CNA01
*b
*1
*a
*a
*a
*a
CNA06
CNA03
*1
Make the power supply DC12 to 24V. Select a power supply capacity with an ample
surplus for the connected load.
Do not impress a voltage exceeding 24V across pins 1-2, and 1-3.
*a The allowable current is DC 5mA to 10mA. (Recommended: DC5mA)
Provide a load resistance such that the current becomes DC10mA or less.
Select very low current use contacts (usable at DC12V, DC1mA or less).
*b The polarity is [+] for pin 1 and [-] for pin 2 and 3. Connect correctly.
9381279005_IM.indb 129381279005_IM.indb 12 6/30/2014 11:31:18 AM6/30/2014 11:31:18 AM
 Loading...