4. INSTALLATION
38
Installation procedure
If the thickness of the hull varies, then the at-
tenuation of the ultrasound pulse may vary.
Select a location where the attenuation is the
lowest.
1. Select two or three locations considering
the points mentioned below. (You will fi-
nalize the mounting location through
some trial and error.)
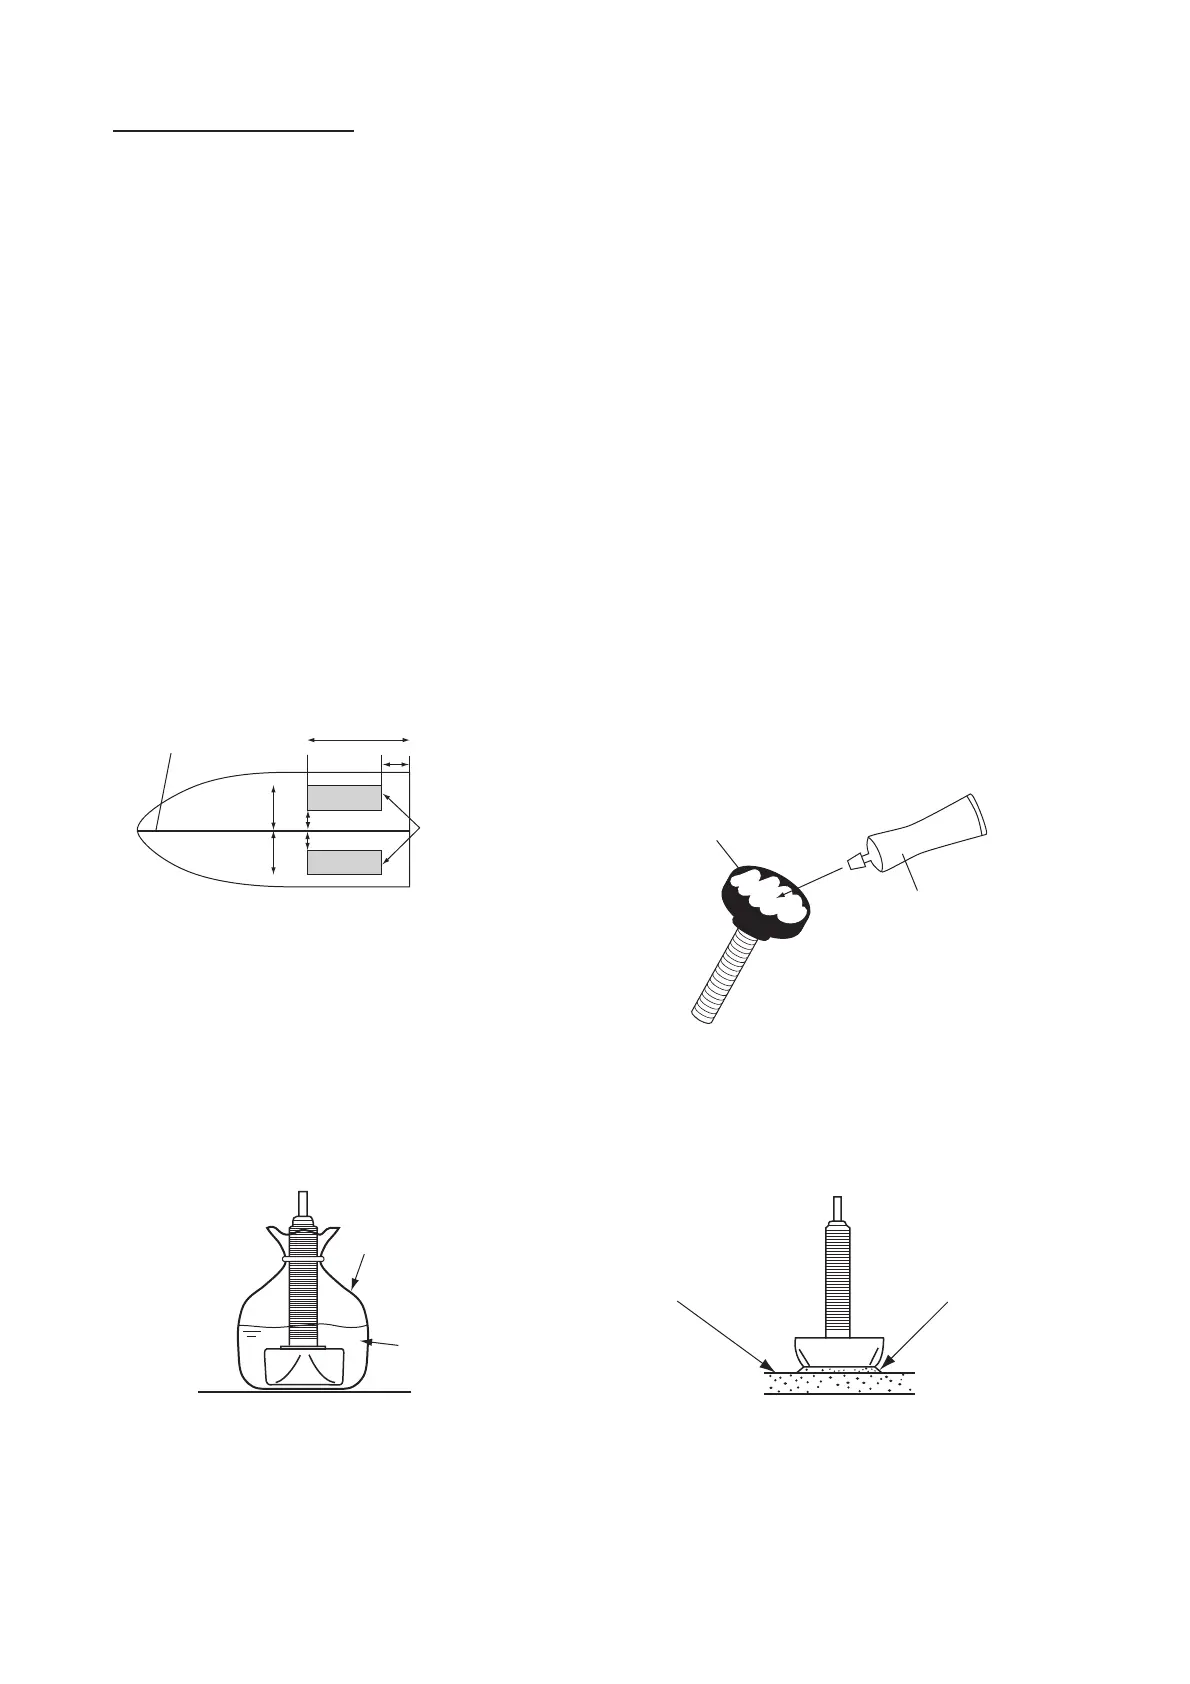
• Mount the transducer at a location 1/2
to 1/3 of the length of the boat from the
stern.
• The mounting location is between 15 to
50 cm from the centerline of the hull.
• Do not place the transducer over hull
struts or ribs which run under the hull.
• Avoid a location where the rising angle
of the hull exceeds 15°, to minimize the
effect of the boat's rolling.
Inside-hull transducer mounting location
2. Decide the most suitable site from
the selected locations by doing the follow-
ing:
1) Connect the power cable and trans-
ducer cable to the display unit.
2) Put the transducer into a water-filled
plastic bag. Press the transducer
against the chosen site.
3) Turn on the display unit.
4) Push the MENU/ESC key to show the
main menu.
5) Select [Sounder] menu.
6) Set the [TX Power] to [10%].
7) Press the MENU/ESC key two times.
8) Check if the bottom echo appears on
the display. If it doesn’t, do this proce-
dure until a suitable location is found.
9) After the mounting location is decid-
ed, turn off the power of display unit.
3. Remove the transducer from the plastic
bag and wipe the face of transducer with
a cloth to remove water and any foreign
material. Lightly roughen the face of
transducer with #100 sandpaper. Also,
use the sandpaper to roughen the inside
of the hull where the transducer is to be
mounted.
4. Wipe off any sandpaper dust from the
face of the transducer.
5. Dry the face of the transducer and the
hull. Coat the transducer face and mount-
ing location with marine sealant. Harden-
ing begins in approx. 15-20 minutes so do
this step without delay.
6. Attach the transducer to the hull.
Press the transducer firmly down on the
hull and gently twist it back and forth to re-
move any air which may be trapped in the
marine sealant.
7. Support the transducer with a piece of
wood to keep it in place while the marine
sealant is drying. It takes 24-72 hours to
harden completely.
1/3
1/2
Centerline
Transducer
mounting
location
50 cm
50 cm
15 cm
15 cm
Plastic bag
Water
Hull plate
Transducer
Marine
Sealant
Hull
Marine
Sealant


 To Next Page