4. INSTALLATION
40
Mounting location
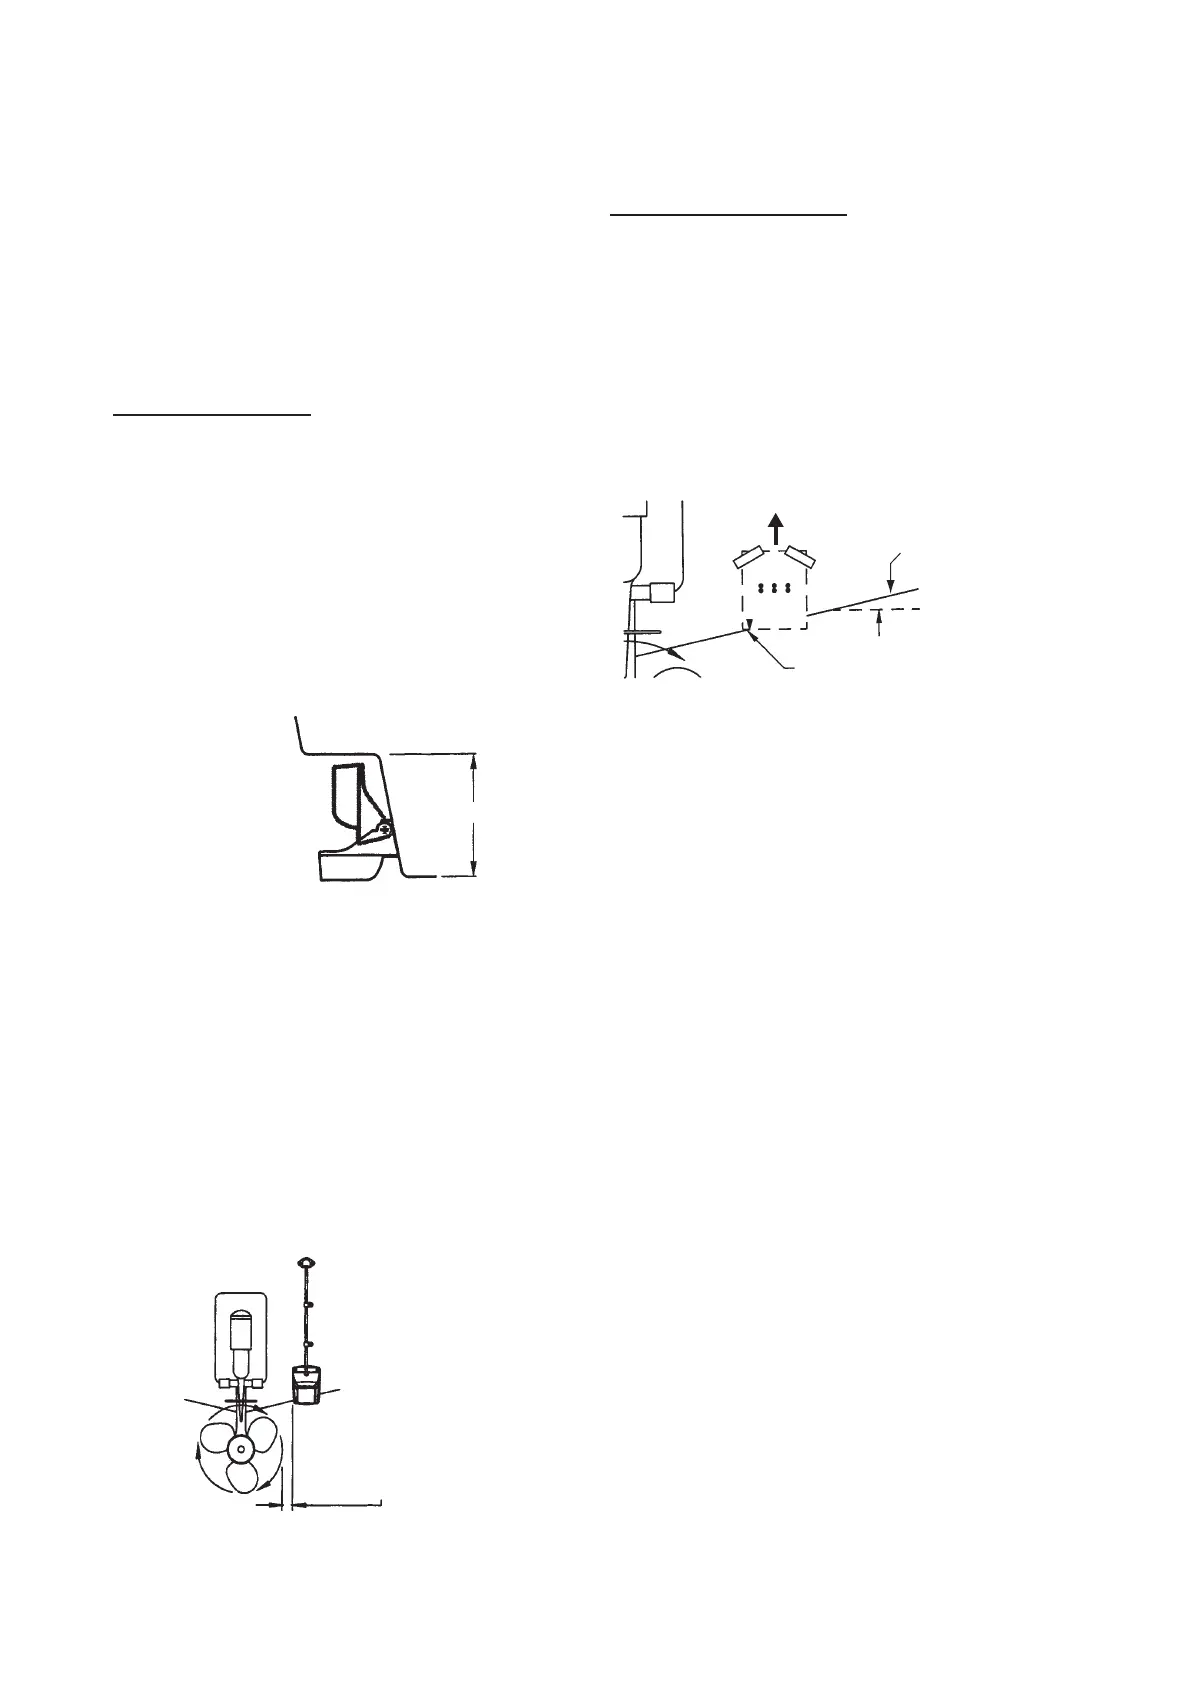
To ensure the best performance, the sensor
must be submerged in aeration-free and tur-
bulence-free water. Mount the sensor close to
the centerline of the boat. On slower heavier
displacement hulls, positioning it farther from
the centerline is acceptable.
Allow adequate space above the bracket for it
to release and rotate the sensor upward.
Note 1: Do not mount the sensor in an area of
turbulence or bubbles: near water intake or
discharge openings; behind strakes, struts,
fittings, or hull irregularities; behind eroding
paint (an indication of turbulence).
Note 2: Avoid mounting the sensor where the
boat may be supported during trailering,
launching, hauling, and storage.
Note 3: For single drive boat, mount on the
starboard side at least 75 mm (3") beyond the
swing radius of the propeller.
Mounting location on single drive boat
Note 4: For twin drive boat, mount between
the drives.
Installation of bracket
1. Cut out the installation template (en-
closed with transducer) along the dotted
line.
2. At the selected location, position the tem-
plate, so the arrow at the bottom is
aligned with the bottom edge of the tran-
som. Being sure the template is parallel to
the waterline, tape it in place.
Positioning the template
Warning: Always wear safety goggles
and a dust mask.
3. Using a 4 mm, #23, or 9/64" bit, drill three
holes 22 mm (7/8") deep at the locations
indicated. To prevent drilling too deeply,
wrap masking tape around the bit 22 mm
(7/8") from the point.
Fiberglass hull: Minimize surface crack-
ing by chamfering the gelcoat. If a cham-
fer bit or countersink bit is not available,
start drilling with a 6mm or 1/4" bit to a
depth of 1 mm (1/16").
4. If you know your transom angle, the
bracket is designed for a standard 13°
transom angle.
11°-18° angle: No shim is required. Skip
to step 3 in "Adjustments".
Other angles: The shim is required. Skip
to step 2 of "Adjustments".
If you do not know the transom angle,
temporarily attach the bracket and sensor
to the transom to determine if the plastic
shim is needed.
5. Using the three #10 x 1-1/4" self-tapping
screws, temporarily screw the bracket to
the hull. DO NOT tighten the screws com-
pletely at this time. Follow the step 1-4 in
• Drill bit:
For bracket holes: 4 mm, #23, or 9/64"
For fiberglass hull: chamfer bit (preferred),
6 mm, or 1/4"
For transom hole: 9 mm or 3/4" (optional)
For cable clamp holes: 3 mm or 1/8"
• Straight edge • Marine sealant
• Pencil • Cable ties
• Water-based antifouling paint (mandatory
in salt water)
Height
Height without
speed sensor
191 mm (7-1/2")
Height with
speed sensor
213 mm (8-1/2")
75 mm (3")
minimum beyond
swing radius
Align template vertically.
Deadrise angle
Slope of hull
Parallel to
waterline
Align template arrow with
bottom edge of transom.


 To Next Page