21
Futurelight Scan SC - 740
Powerful scanner with the latest technology
11 different, dichroic colour-filtres and white • Via 2 correction-filters, up to 36 different colours and semi-colours
can be created • Rainbow-effect in both directions • Static gobo-wheel with 8 gobos, 1 dichroic glass-gobo and
open • Rotating gobo wheel with 2 metal gobos, 3 glass gobos, 1 multicolor dichroic gobo (with cyan, magenta
and yellow) • Via the combination between multicolor-gobo and color-wheel even more colour-combinations possible •
Iris • Strobe-effect with adjustable speed (1-7 flashes/sec.) via static gobo-wheel • Smooth dimmer via special
effect wheel • Correction-filters 3200 K and 5600 K • UV effect • Frost-filter and static 3-facet-prism • 8 high-quality
stepper-motors for smooth mirror-movements • 16-bit-resolution or 8-bit-resolution for the mirror-movements (64
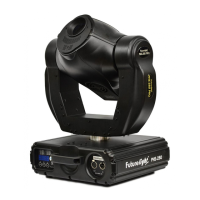
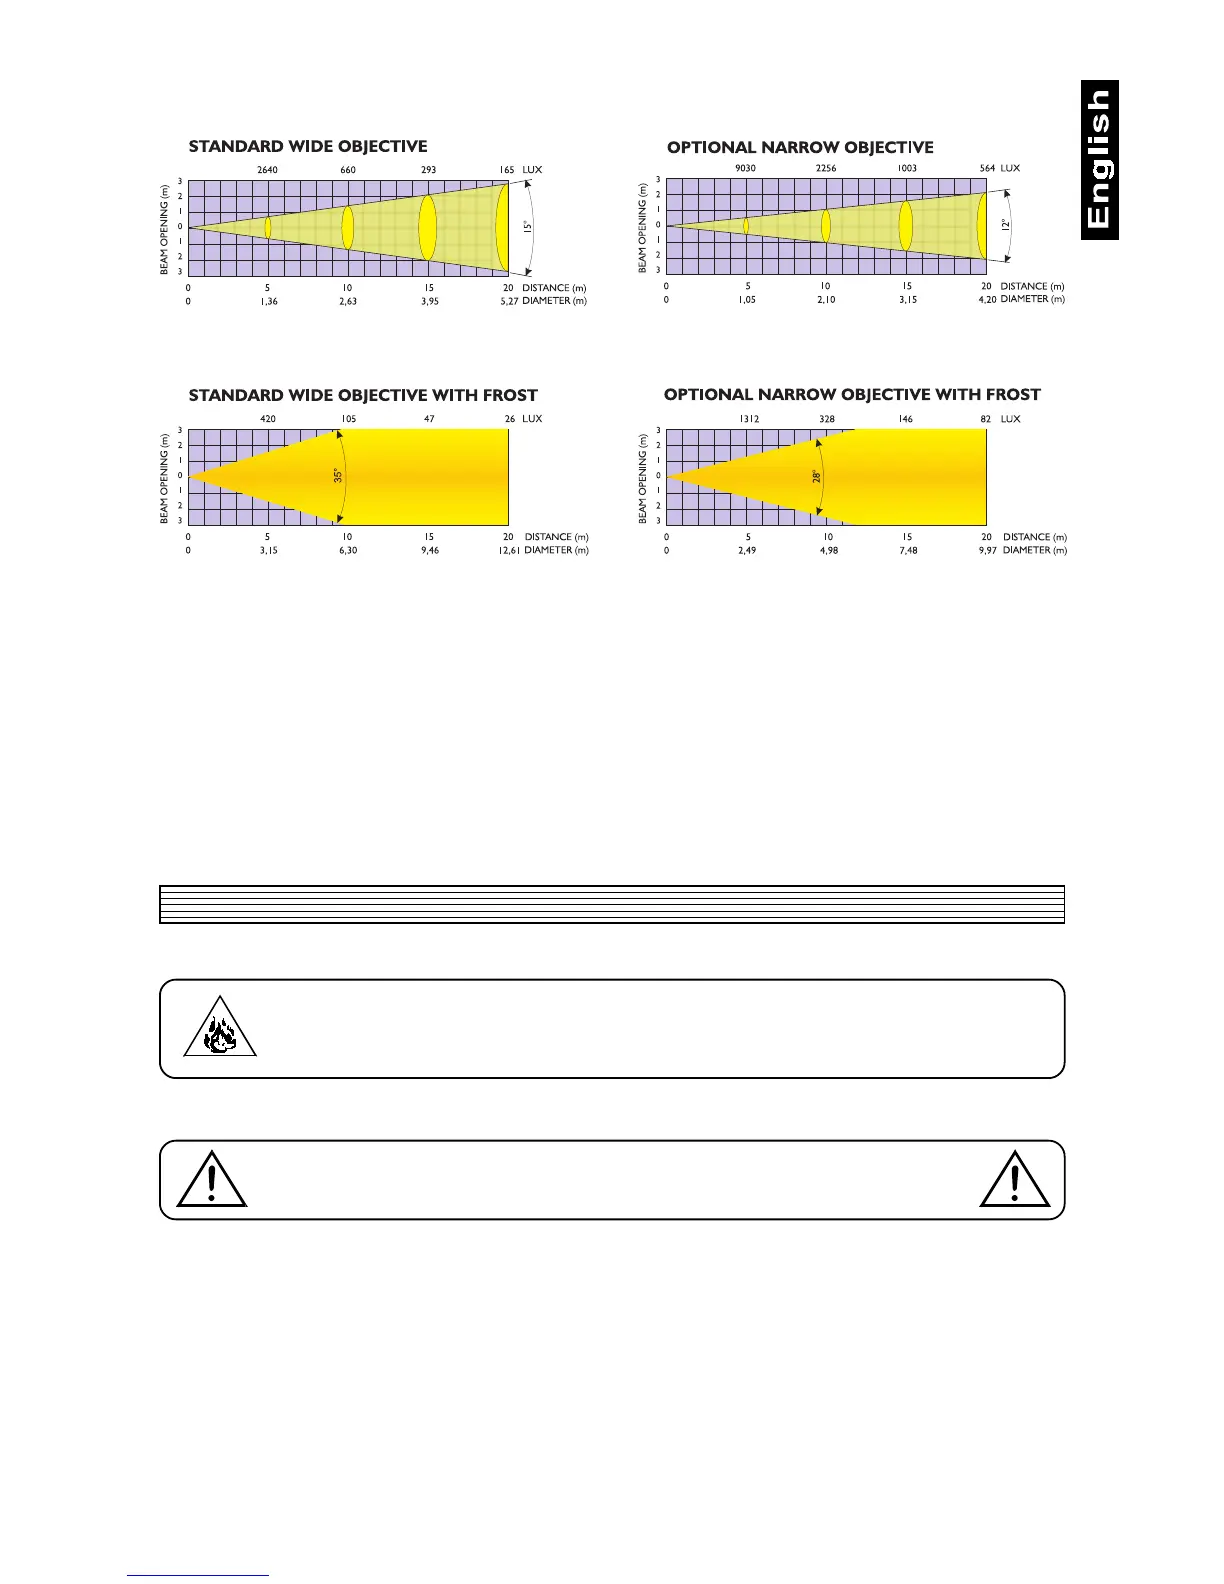
microsteps) • 15°-wide-angle objective (12° optional) • Reduced noise via adjustable fan-power • Self-resetable thermo-
fuse • Integrated control-unit for digital adjustment of starting-address, lamp-operation, etc. • DMX-control via every
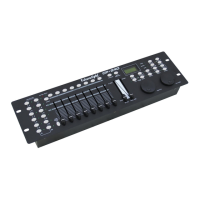
standard DMX-controller • 11/13 DMX-control-channels required • Suitable FUTURELIGHT controllers: C-64 MKII
controller, C-128 controller, CP-192 controller
3. Installation
3.1 General instructions
DANGER OF FIRE !
When installing the device, make sure there is no highly inflammable
material (decoration articles, etc.) in between a distance of min. 0,5 m.
The projectors can be installed in any position without altering its operation characteristics.
Make sure that the device is fixed properly ! Ensure that the structure
to which you are attaching the projectors is secure
For fixing the projectors use the hole provided in the bracket. The hole in the adjustable mounting bracket has
a diameter of 10 mm.
For overhead use, fit a safety chain or cord.
3.2 Connection to the mains
Connect the projector to the mains with the enclosed power-plug.
3.3 DMX-512 connection / connection between projectors
Connect the controller to the projector or one projector to another only by a stereo shielded cable and 3-pin
XLR-plugs.
Caution: At the last scanner, the DMX-cable has to be terminated with a 120W resistor. Solder the resistance
into a 3-pin XLR-plug and plug it in the DMX output of the last scanner.
 Loading...