INSTALLATION OF THE OUTDOOR UNIT
21
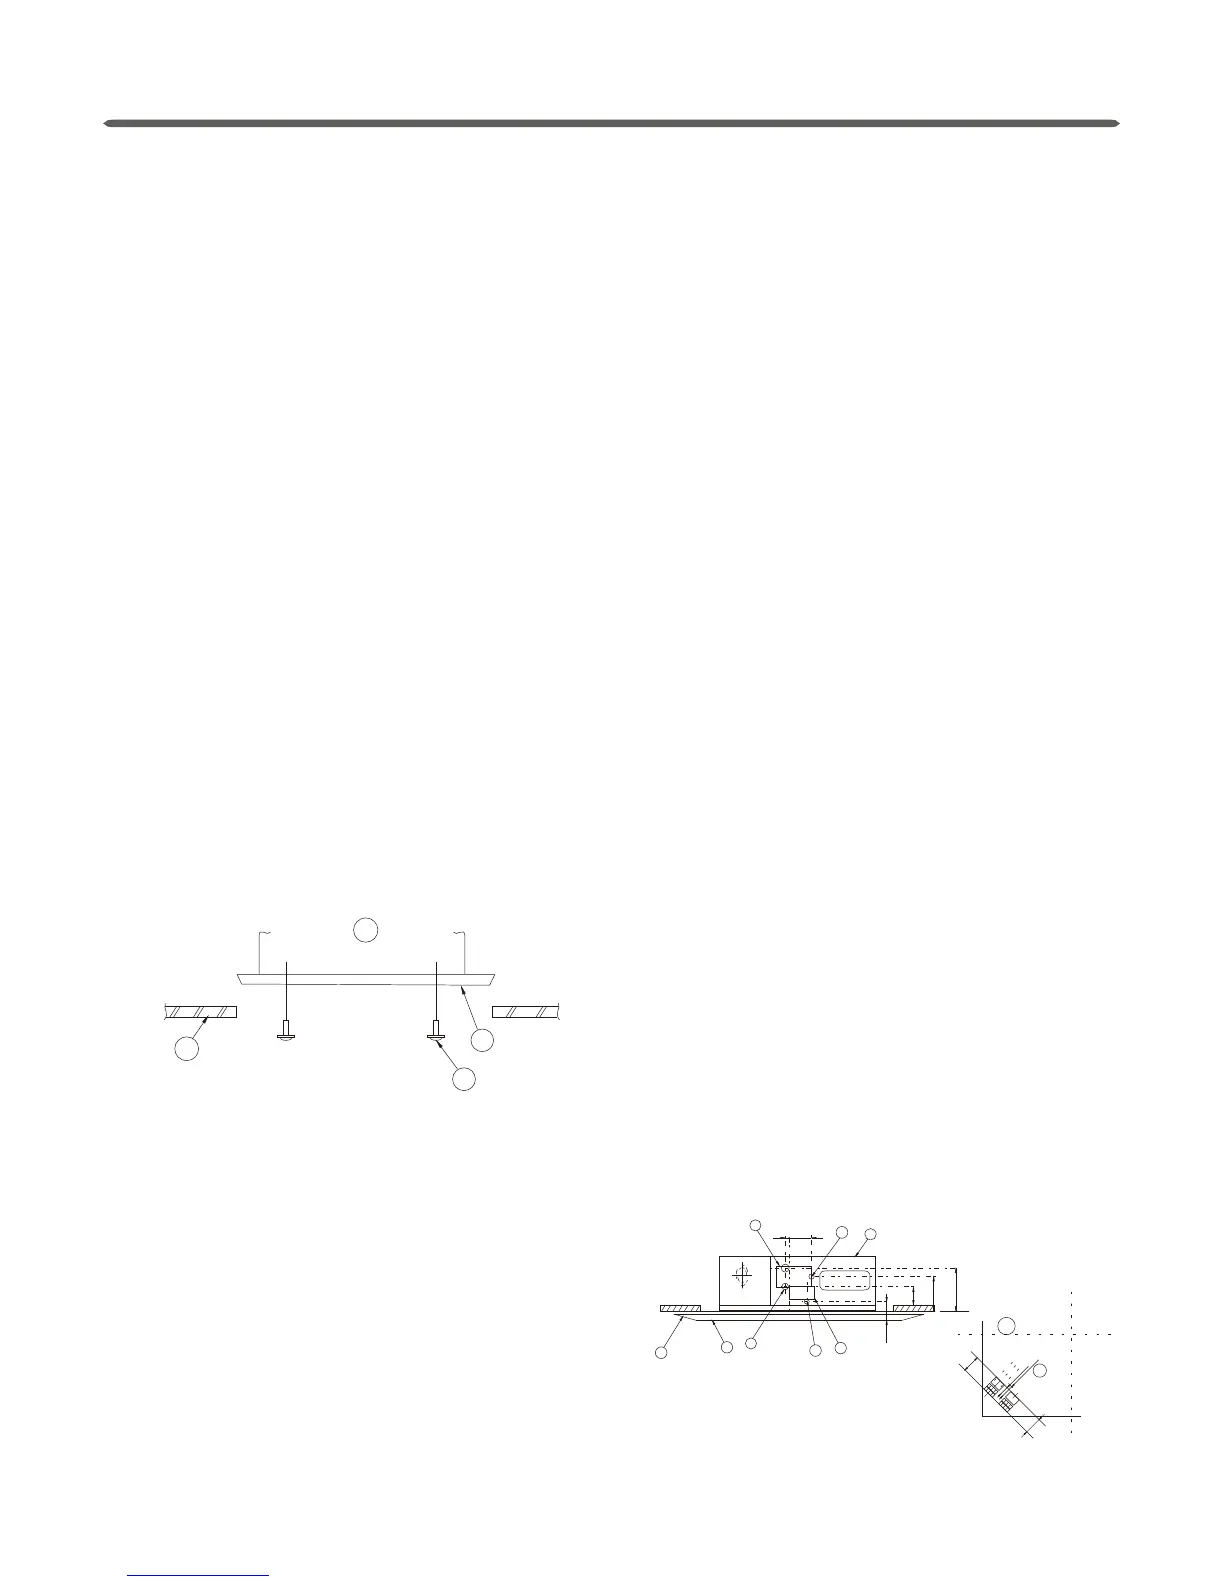
Adjust the indoor unit horizontally by level ruler or ethylene tube filled up with
water (Please balance by screwing tight or loosening the following two nuts).
Ensure there is no clearance between the ceiling inlaid board and the panel,
no clearance between the indoor unit and the panel.
Aim the bottom of the indoor unit at the center of the opening of the ceiling,
so as to ensure the same distance between the symmetry side of all direction
with the edge of the ceiling. Once determining the position of the indoor unit,
screw tight both the upper and bottom screw of the bolt and fix the indoor unit.
A. The indoor unit
B. The ceiling inlaid board
C. Cardboard for measurement
D. Four screws with washer
FIXATION OF THE INDOOR UNIT.
AA
DD
CC
BB
POSITION OF REFRIGERANT PIPE AND DRAIN PIPE
(UNIT: MM)
A. Drain pipe B. The ceiling inlaid board
C. Panel D. Liquid pipe of refrigerant
E. Gas pipe of refrigerant F. Drain plug
G. Water pump H. The indoor unit
I. Top view J. Length of inserted drain pipe
3535
7575
DD
HH
GG
FF
EE
CC
BB
AA
160160
220220
250250
6262
7
2
7
2
6666
3
0
3
0
6060
JJ
II
Notice: if there is no panel to fix on the indoor unit, please use the mounting
plate as substitution for dustproof panel.
FIXATION OF THE INDOOR UNIT PANEL.
For models of 24K, 36K, 42K and 48K, please fix the panel to the indoor unit
with the hooks on it.
For model of 18K, please fix the panel with the screws in it.