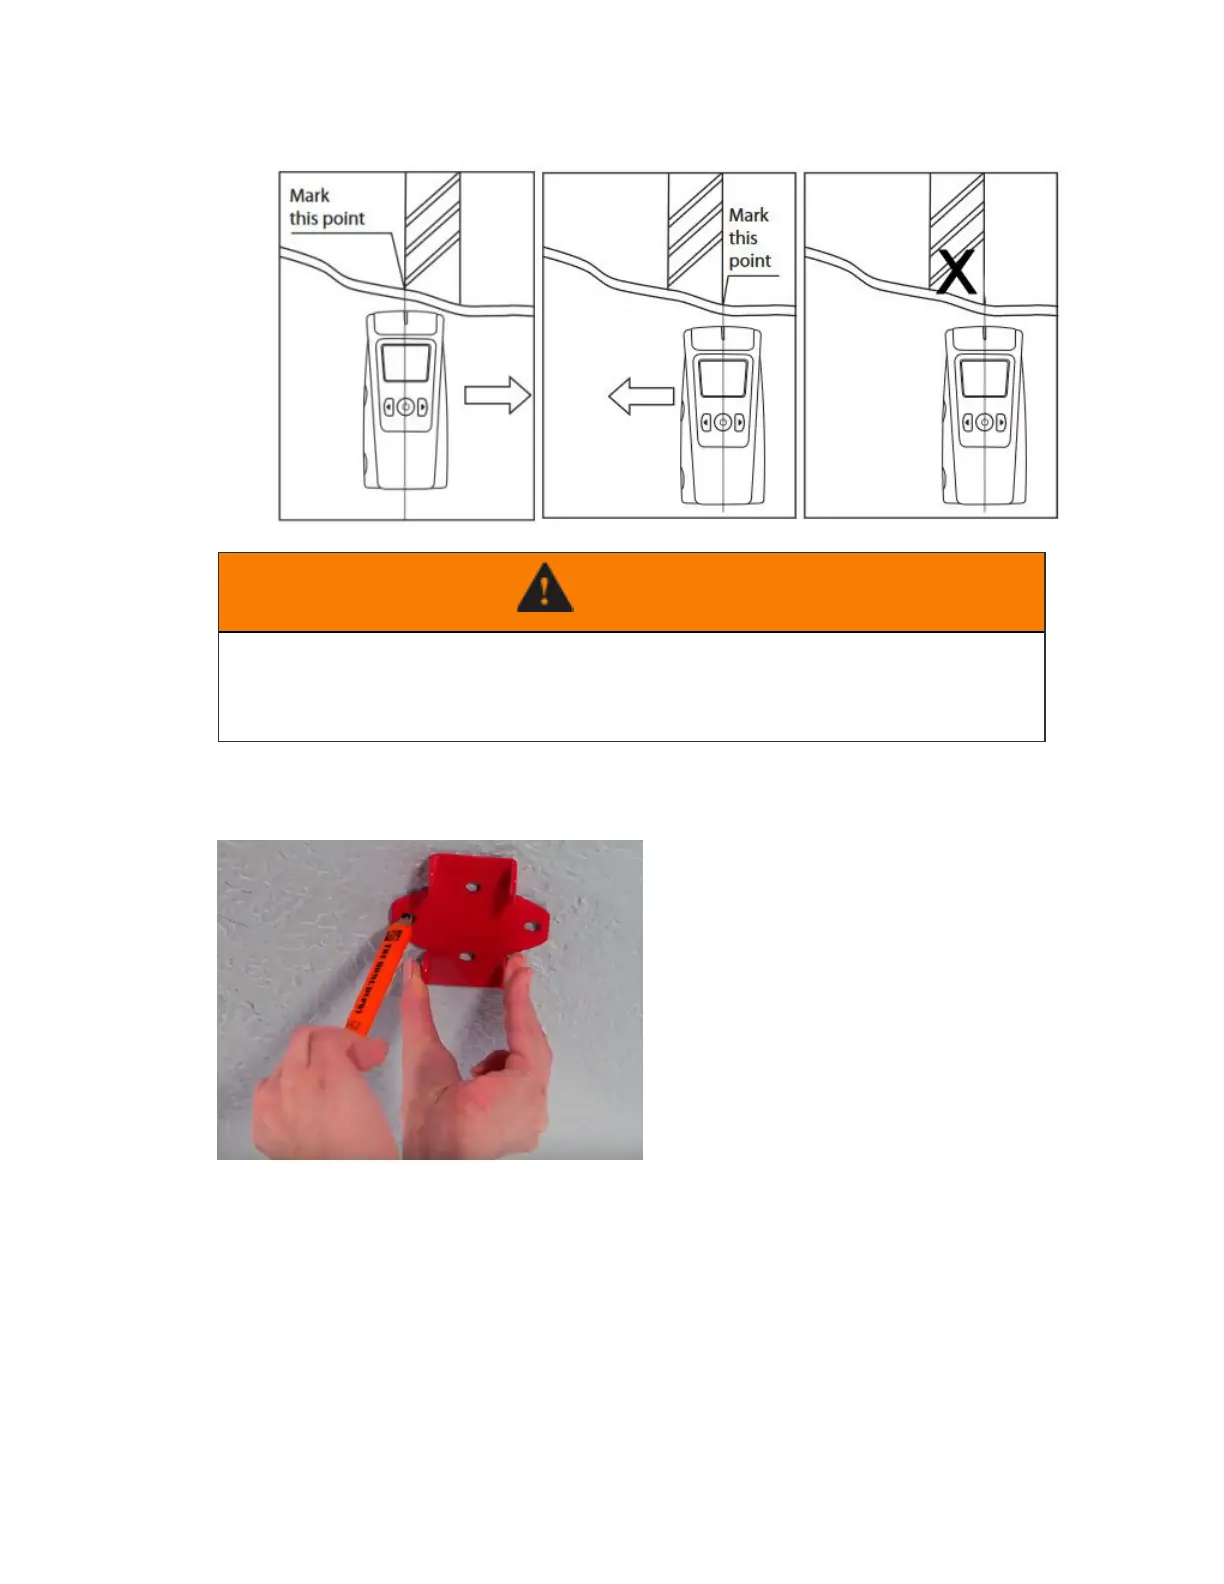
a. Mark the left edge of the stud.
b. Mark the right edge of the stud.
c. Draw an X to mark the center of the stud.
WARNING
If your garage ceiling is textured, triple check the center marks you made to ensure
that you have found the center of each stud. Failure to secure the Smart Tracks to
the center of each stud could cause property damage, personal injury, or death.
5. Place the mounting bracket over the center mark you made for the ceiling stud
and use a pencil to mark where you will drill the pilot holes for the lag screws.
6. Using the included drill bit and the marks you made, drill pilot holes at least
three inches into the center of the stud.