16 17
Assembly
WARNING: Stop the engine and unplug the spark plug before any
repairs or maintenance operations.
WARNING: DO NOT attempt to start this mower without rst adding
0.35L of SAE 10W/30 engine oil to the Engine.
WARNING: Do Not attempt to start this mower without the mower
rst being FULLY assembled.
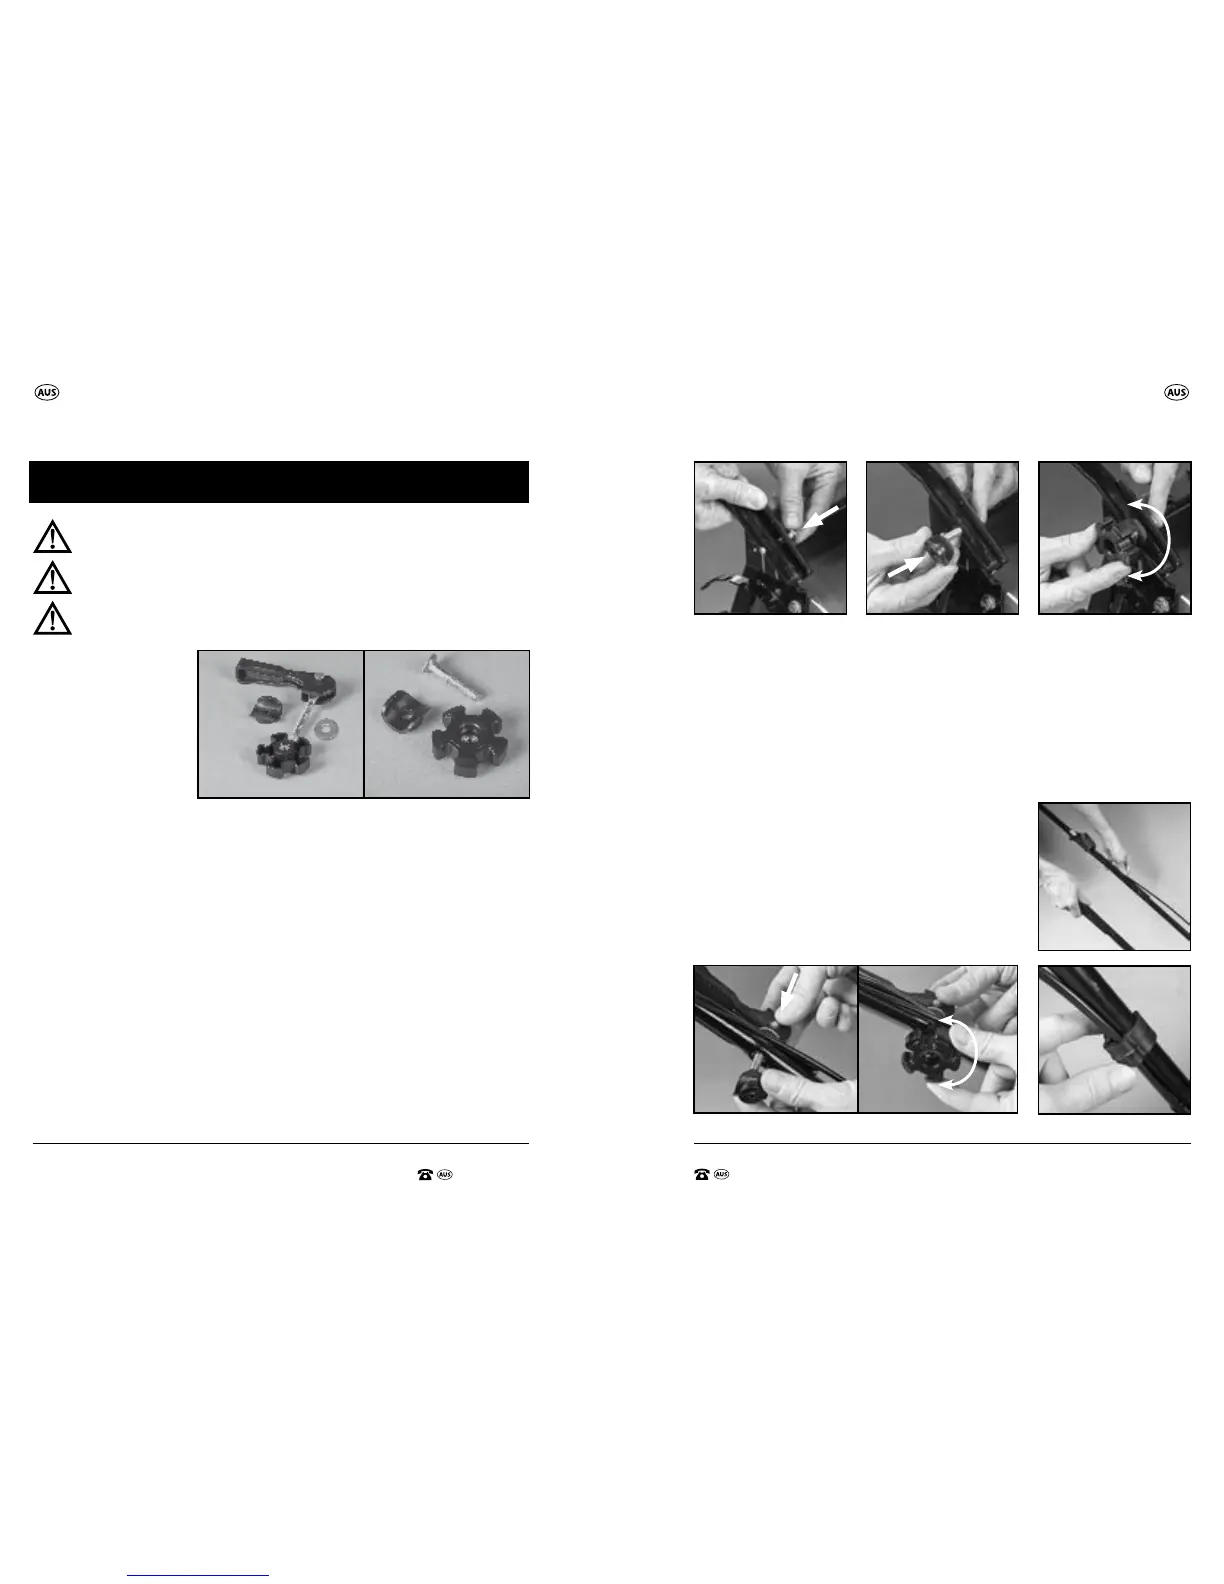
It is necessary to t the
2 x lower handles (6),
upper handle bar (1),
and hard catcher (7) to
the mower. (Fig A)
Attaching the Lower Handles
NOTE: The on/o switch cable (3) is connected to the upper handle bar (1).
Be careful not to tangle the cable when removing the lawn mower from the
box, and during the upper and lower handle assembly.
1. To attach the 2 x lower handles (6), rst remove the 2 x lower handle
locking knobs (+ bolt/s & curved washer/s) (8) from your accessory bag.
Place the lower handle/s in position by rst aligning one of the lower
handle ends on the inner side of the lower handle mounting plate (9).
2. Once in position, insert the bolt on each side through the lower
mounting plate (9) (Fig B) and then through the lower handle (6). (Fig C)
Repeat with the opposite side handle.
3. Once the bolts are loosely in position, t the plastic curved washer, then
screw the lower handle locking knob (8) over the plastic curved washer
and secure by turning clockwise until tight and secure. (Fig D)
Attaching the Upper Handle Bar to the Lower Handles
1. Before positioning the upper handle bar (1), check the orientation of
the upper handle bar allows the on/o switch cable (3) to run down the
upper and lower handles to the engine. Ensure the cable is not tangled in
any way. (Once assembly of the upper handle bar is complete, the cable
clip can be used to secure the on/o switch cable into position). (Fig E)
2. Once the upper handle bar is correctly orientated for assembly to
the lower handles (6), apply the upper handle locking levers (5) (from
accessory bag) into position on the outer sides
of the upper handle bar (1) loosely (Fig F). When
both upper handle locking levers (5) are both in
position, secure and tighten.
3. Apply the cable clip (4) (from your accessory
bag) to ensure the cable is secure in position
and not tangled. (Fig G)
G.
E.
C.B. D.
TIGHTEN
LOOSEN
Assembly Assembly
A.
2 X SETS OF UPPER
HANDLE LOCKING LEVERS
2 X SETS OF LOWER
HANDLE LOCKING KNOBS
F.
TIGHTEN
LOOSEN





 To Next Page