26 27
Maintenance
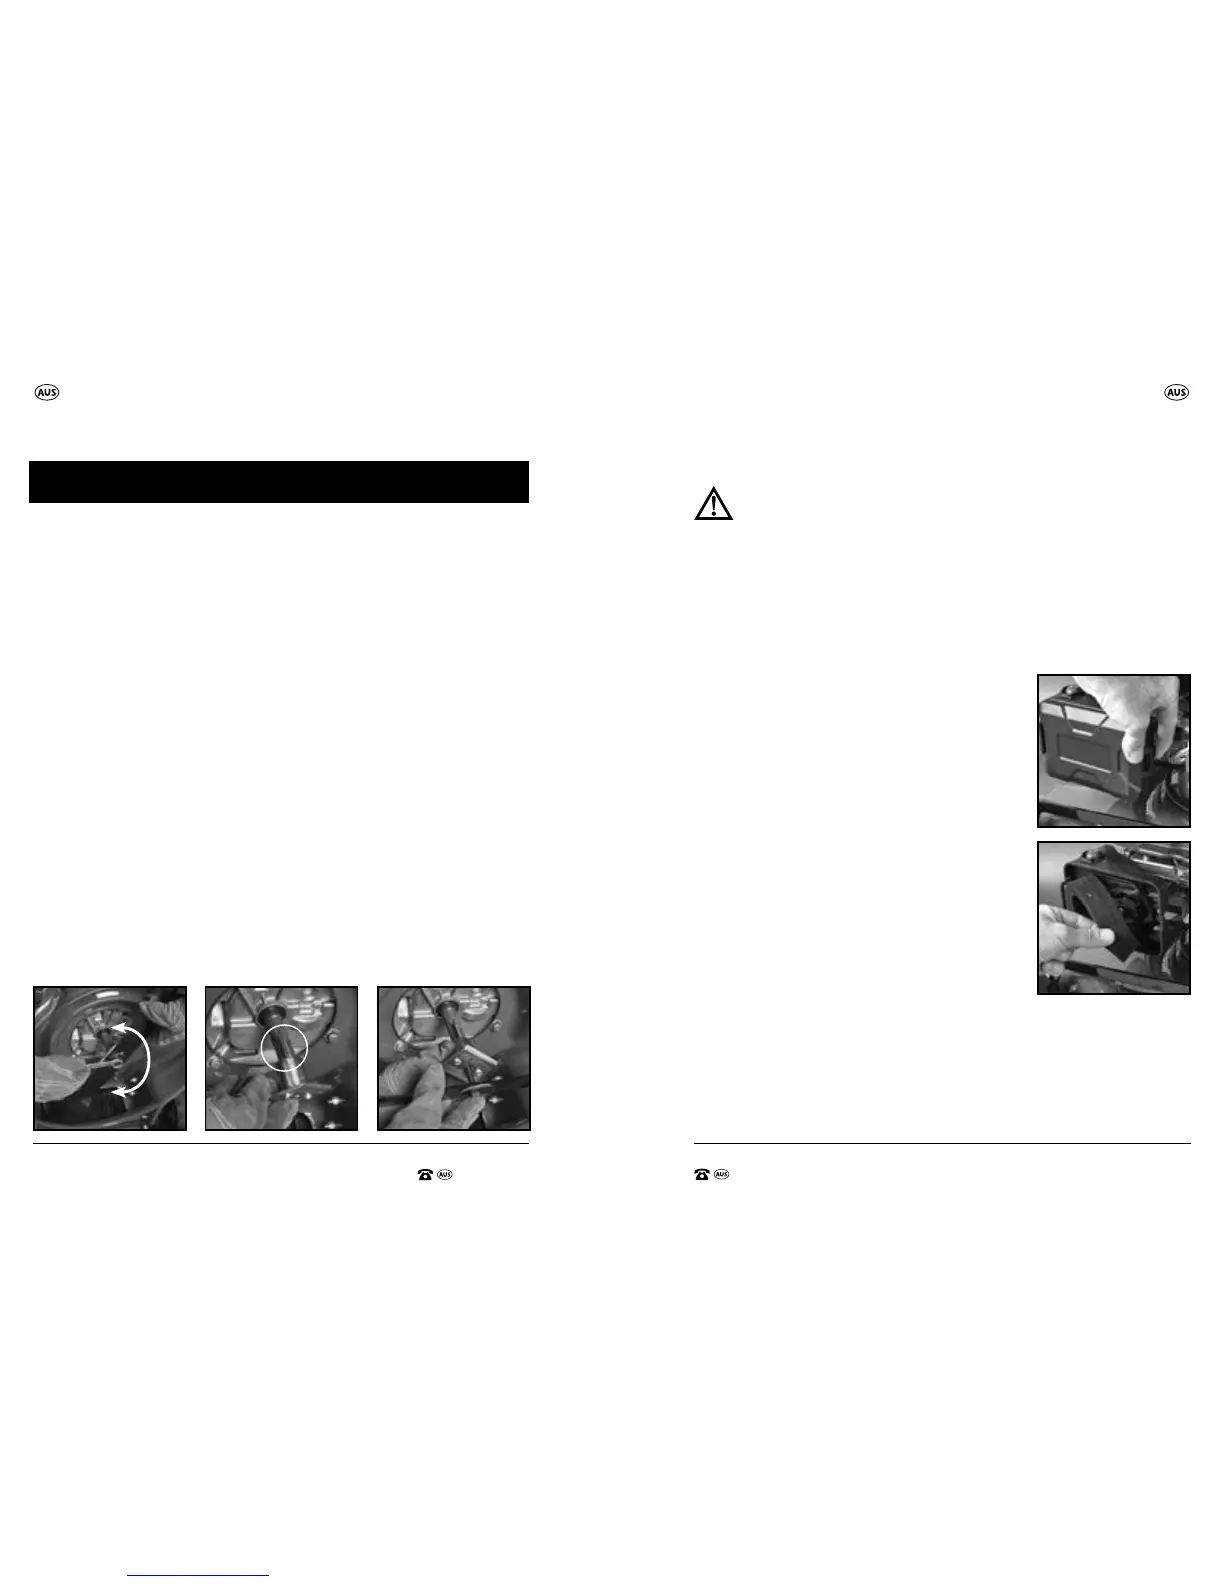
Replacing the Blades
Note. Before making any adjustment or maintenance procedures to the
mower ensure it is turned o and the spark plug lead is removed.
Note. Wear heavy gloves to protect your hands.
1. Tilt the mower back (Fig U) so the spark plug (24) is facing up, and
disconnect the spark, by pulling spark plug cover (24) o.
2. Whilst securely holding the bar blade (26) with gloves on, use a 17mm
spanner (not supplied) to undo the blade bolt (27). (Fig V)
3. Remove the bar blade (26), and be careful not to slide the blade adaptor
o and dislodge the key on the shaft. (Fig W)
4. Clean dirt and grass from around the blade mounting area.
5. Replace the bar blade (26), ensuring you hold onto the adaptor whilst
tightening the blade bolt.
IMPORTANT: Ensure the two drive lugs on the adaptor are engaged in the
two holes in the blade. (Fig X)
6. Tighten the blade bolt tightly (40-50Nm). (Fig V)
Check lawn mower blades regularly. Look for damage, bends and dullness.
Blades should be replaced every year or two depending on usage, or when
they become worn and no longer cut the grass cleanly.
The performance of grass catching can also reduce if the blade become
worn. Replacement blades are available for purchase from
https://help.tools/ or by calling 1800 909 909.
X.W.V.
TIGHTEN
LOOSEN
Maintenance Maintenance
Air Filter Maintenance
WARNING: Ensure the motor is switched o
before undertaking this task.
IMPORTANT: A dirty air lter (20) will restrict air ow to the carburettor.
To prevent carburettor malfunction, service the air lter (20) regularly.
Check that the air lter (20) is clean and dry of dirt.
Filters thick with debris will not allow the engine to breathe and result in
dicult starting and poor engine performance.
The air lter (20) should be checked after approximately 25-50 hours of use,
or annually.
1. Open the air lter cover (21) by pushing in the rear
tab to release the clip, and then pushing the cover
back and away to release the 2 front clips and the
full air lter cover (Fig Y).
2. Remove the foam element (Fig Z).
3. If the air lter (20) is excessively dirty, replace with
a new lter.
4. Wash the air lter (20) in liquid detergent and
water. Then allow it to thoroughly air dry.
5. Re-install the air lter (20) and put the air lter
cover (21) back on ensuring the clips are securely
in place.
CAUTION: Never use fuel or low burning paint
solvents to clean the air lter (20). A re or explosion
could result.
CAUTION: Ensure the air lter (20) is dry before
re-tting.
Replacement air lters are available from https://help.tools/
or by calling Customer Service on 1800 909 909.
Y.
Z.




 To Next Page