Mealstream Ovens Pt. No. 32Z3403 Issue 16
Page 33
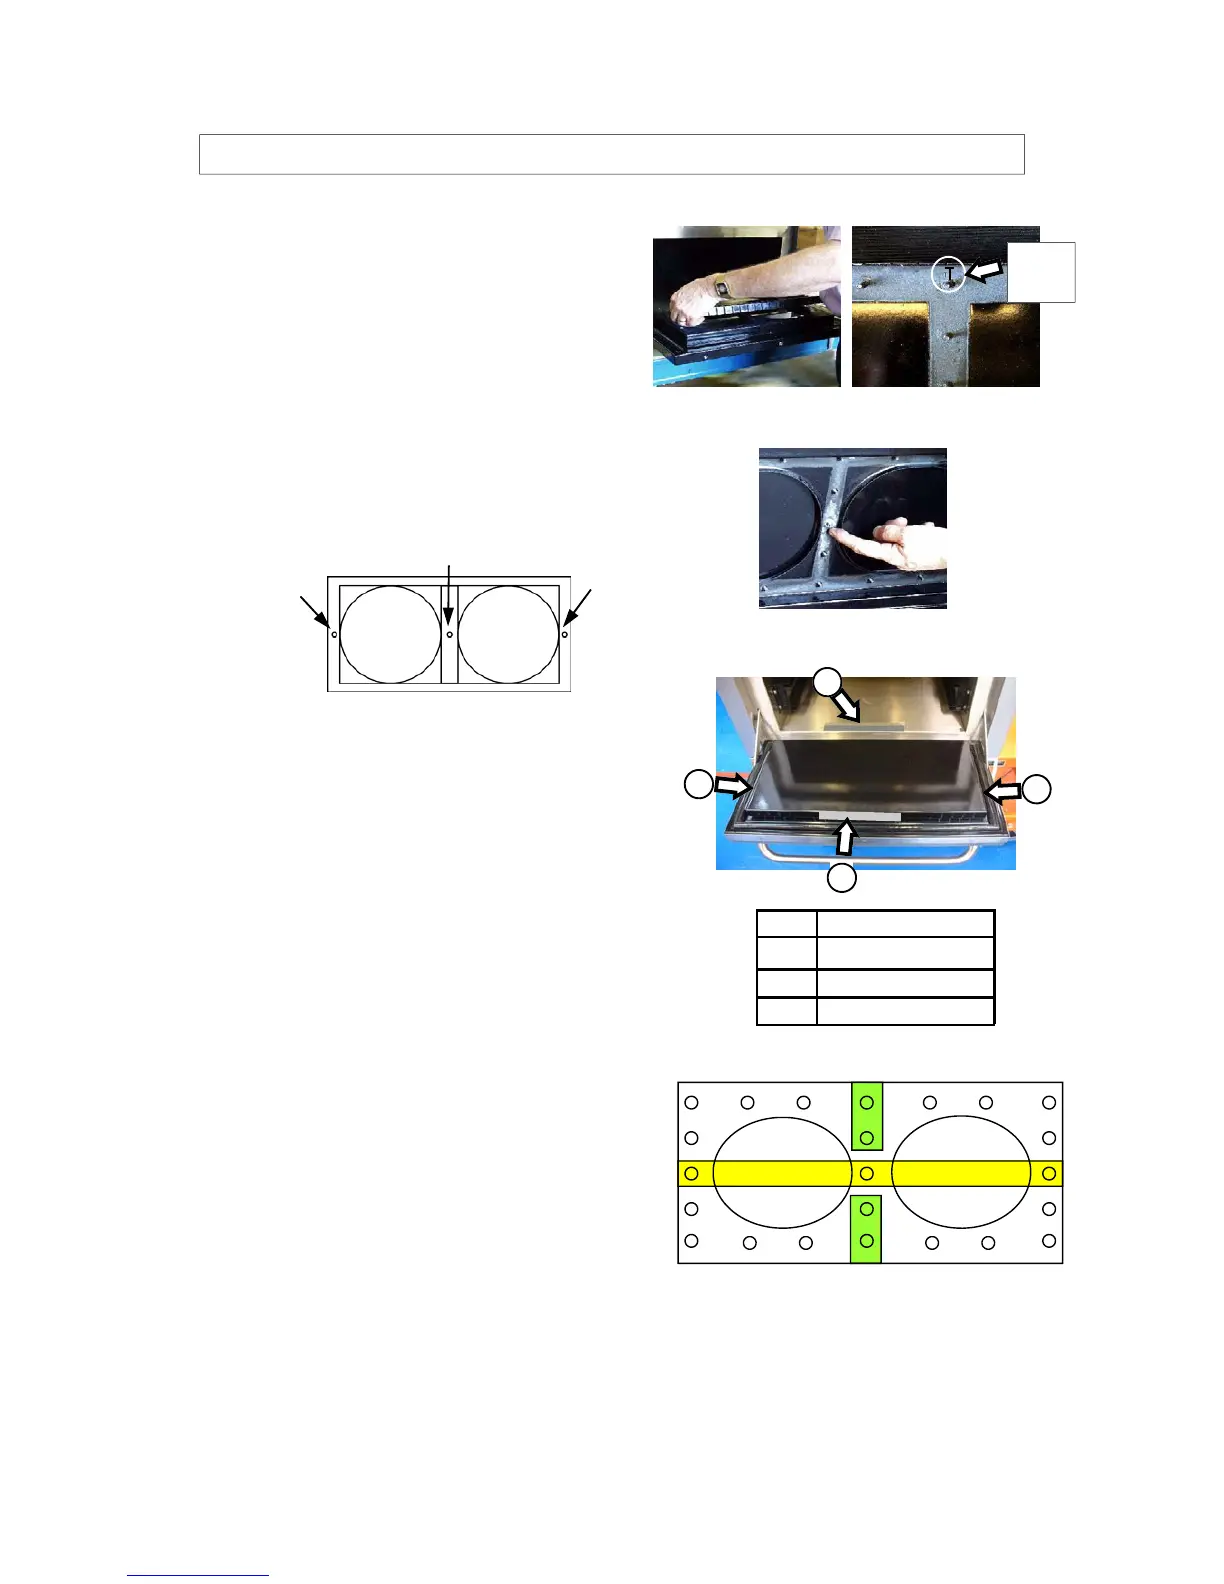
PROCEDURE FOR BUILDING AND FITTING MEALSTREAM DOOR (4)
A
Cavity base
B
Choke fingers Right
C
Choke fingers Left
D
Choke fingers top
Stage 2
10. Fit door shim plate Pt. No. 40C1084.
Position door choke to door frame assy
making sure it is in the correct orientation
(the top of door choke is marked with ‘T‘ on
the underside).
11. Loosely fit the choke plate in the three central
locations using M5 full nut, M5 Ext Shake-proof
washer, 3x M5 plain washer ensure that the studs
are central in the holes in the shim plate and door
choke plate.
12. To set the position of the door choke plate
tape choke spacer S325 to the cavity base
( A ) and choke spacers S215 to the top and
each side of the door choke ( B, C & D )
13. Remove spacing pieces and check door
operation.
‘T’ Mark
Stage 1
Yellow are tightened at setup of choke,
green are tightened after initial setup
and the remaining nuts are tightened in
numerical order.
10 6 2 1st 5 9 13
12 8 4 1st 3 7 11
16 14
17 15
Close the door and centralise the door choke.
Push down on the choke plate and secure
the three central locations
( shown in yellow in diagram )
Fit the remaining studs with 20x M5 Mag-nuts
and tighten fixings evenly.
Note: See diagram for recommended
tightening sequence.
C
B
A
D
 Loading...