SETUP
3. ATTACH CRIMPER TO SECURED
OPTIONAL STAND OR BENCH.
Place crimper on stand bolted to floor or on a
secured bench capable of supporting over 660 lbs.
Proper crimping height is approximately 32".
Position crimper so operator may feed hose
assemblies into the rear or front of crimper head. If
using the stand, bolt crimper using the four 6mm
Allen head bolts (included) through predrilled
holes. If mounting to a bench, drill four ½” holes
aligning with holes in crimper and bolt together.
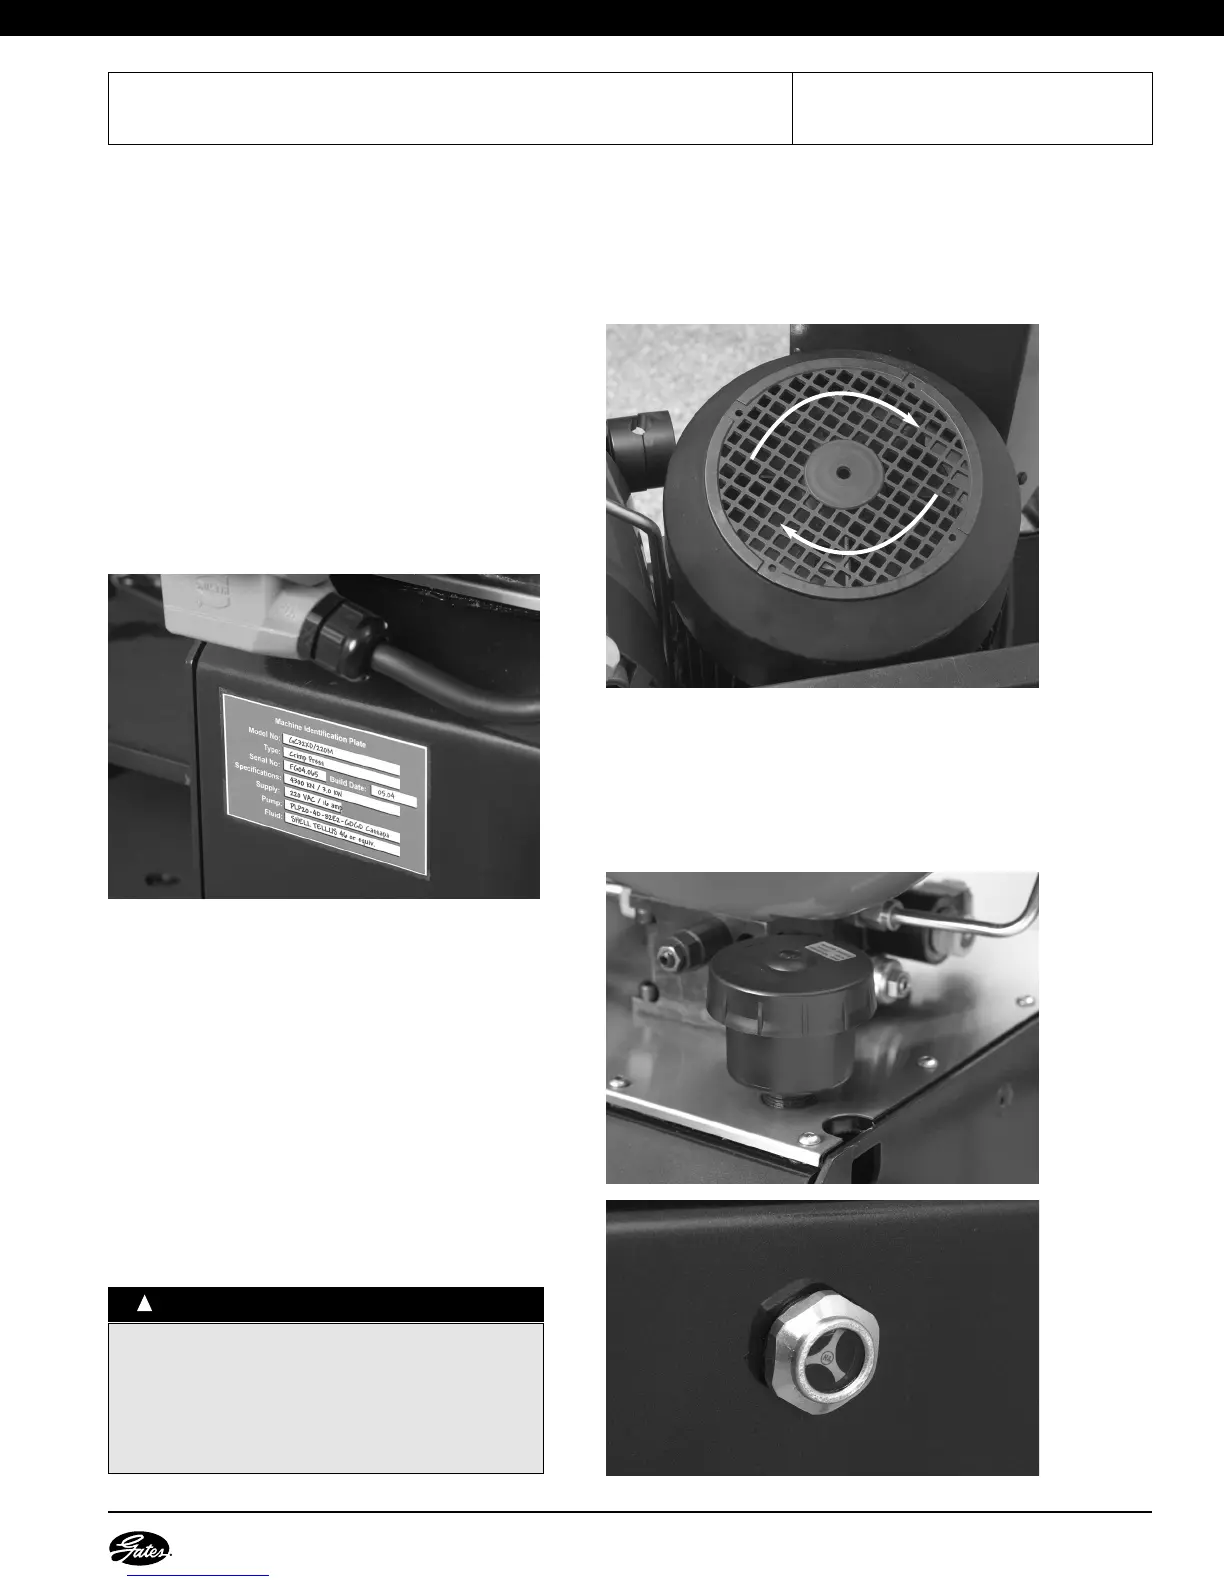
4. RECORD SERIAL NUMBER.
Locate serial number assigned to crimper on back of
reservoir and record on Page 1 for future reference.
5. POWER CORD PLUG.
The GC32-XD crimper can accept any power source
208-264 volt, 45-65 hz, 1 or 3 phase. The converter
on the crimper will change the input voltage to
220V, 3 phase. The GC32-XD crimper comes with a
North American 20 amp, 250 volt, 2-pole, 3-wire
grounding plug already assembled. If this will not
work for your local power source, install the proper
electrical circuit that is within the listed range. Be
sure circuit is grounded and complies with all local
electrical codes.
NOTE: Incorrect power cord installation will void
your equipment warranty.
Turn power switch on. Press top blue CRIMP button
to check rotation of pump motor. It should be rotating
clockwise (see figure 1). If motor is rotating
counterclockwise, the colored phase wire connections
need to be reversed.
6. OIL PLUG.
Oil reservoir is shipped full. Remove plug and
replace with cap. Check the sight glass to make sure
oil level is full. (See Maintenance for checking oil
level.)
5
Gates Corporation
•• CCoonnssuulltt wwiitthh aa qquuaalliiffiieedd eelleeccttrriicciiaann ffoorr tthhee ccoorrrreecctt
pplluugg aanndd oouuttlleett ffoorr yyoouurr ppoowweerr ssuuppppllyy..
•• IInnccoorrrreecctt eelleeccttrriiccaall ccoonnnneeccttiioonn ccaann ccaauussee ddaammaaggee
ttoo ccoommppoonneenntt oorr aann eelleeccttrriiccaall hhaazzaarrdd ffoorr
ppeerrssoonnnneell..
WWAARRNNIINNGG
::
!