4
Table of contents
1. Introduction 7
1.1. Product description 7
1.2. Glossary of Terminology 8
1.3. Used symbols 8
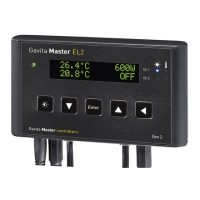
2. Product specifications 9
2.1. General product information 9
2.2. Technical specifications 9
2.3. Environment 9
2.4. Required tools 9
2.5. Components 10
2.6. Controls 10
2.7. Indications 11
2.8. Connections 12
2.9. Accessories 13
2.10. Compatible ballasts 13
3. Safety guidelines and measures 14
4. Installing the controller 14
4.1. Placing the controller 14
4.2. Installing and connecting the temperature sensor(s) 15
4.2.1. Installing the temperature sensor in “Follow mode” (one room) 16
4.2.2. Installing the temperature sensors in “Inverse mode” (two rooms) 17
4.3. Connecting the controller to the ballasts 18
4.3.1. Connecting the controller to remote ballasts 18
4.3.2. Connecting the controller to complete fixtures 19
4.3.3. Shortening RJ cables 20
4.4. Connecting the controller to External Contactor Modules (ECMs) to
control auxiliary equipment 20
4.4.1. Connecting the signal cable to the controller and the ECM(s) 21
4.4.2. Controlling auxiliary equipment in “Follow mode” (one room) 22
4.4.2.1. Connecting equipment which must be used during lights-on periods 22
4.4.2.2. Connecting equipment which must be used during lights-off periods 23
4.4.3. Controlling auxiliary equipment in “Inverse mode”
(two rooms 12h/12h) 23
4.4.3.1. Connecting equipment which must be used during lights-on periods 24
4.4.3.2. Connecting equipment which must be used during lights-off periods 24
4.5. Connecting a temperature shutdown, sensor failure or
power-off alarm to the controller 24
4.5.1. Connecting an alarm wire to the controller 25
4.6. Connecting the controller to the mains 26
 Loading...