EasyManua.ls Logo

Gazelle SPRINTER - User Manual

Gazelle SPRINTER
18 pages
Print Icon
To Next Page IconTo Next Page
Loading...
Occasionally our products contain components that are pre-lubricated at the
factory. We recommend that you protect ooring, or anything else the parts
may contact, with newspaper or cloth.
axle tube bolts
(crossbar bolts)
wrenches
allen wrench +
screwdriver
spare C
washers
wire
holders
spare bolts
for handle
screws
for wheels
Tools Required for Assembly:
1 Allen Wrench & Screwdriver (provided)
2 Wrenches (provided)
fastener pack
ASSEMBLY INSTRUCTIONS
A. Laythetwoframeassemblies&swingarmassembliesontheoor
as shown. Make sure the rear frame is on top & that the cables pass
freely above all the frame tubes.
Note: Be careful you do not allow the cables to get behind
the swing arms.
B.
Remove all the bolts from the bottom of the frame assembly.
Note: There are two on the rear frame & two on the
underside on the front frame.
C.
Slide the left & right wheel holder onto the rear frame as shown,
line up holes & insert the screws (tighten).
D.
Slide the right & left bottom frame assemblies together
& hand tighten only the bolts removed in Step B.
cables
B
front
frame
rear frame
(curved)
© 2022, 2017 Gazelle Home, LLC. Gazelle® is a registered trademark. All rights reserved.
No part of this document may be reproduced or utilized in any form, by any means electronic, mechanical or otherwise without the express written consent of the copyright holder.
GAZSPRINTERASBLY1022
cover
cover
When the two halves of the cover are placed
together & fastened to the frame tubes, the
locking tab will automatically lock together.
This view shows tab on the inside cover.
Attach the covers to the top & bottom of the
frametube.Makesureallsurfacestsnugly
around the tubes.
Front & back cover used on both the left & right
swing arm. Note the locking tab.
This is how the covers look after
installation. Installation is the same
for the left & right side of the frame.
locking tab
front cover
back cover
locking tab
cover ts snug
to frame
COVER INSTRUCTIONS FOR SWING ARM LIMITER
WARNING: The covers must be attached to the frame to shield your ngers
from the swing arm limiter. Failure to do so could result in crushed ngers.
Tools Required: Phillips Screwdriver Parts Included: Covers for Limiter (4 pieces)
4 Screws
1
2
3
4
left
swing arm
assembly
right
swing arm
assembly
wheels
handgrips
axle tube
tness
computer
device
holder
left
frame
assembly
right
frame
assembly
hydraulic
storage clips
covers
insert
screws
TOP OF UNIT
BOTTOM
wheel
holders
C
B
D
C
C
D
Question and Answer IconNeed help?

Do you have a question about the Gazelle SPRINTER and is the answer not in the manual?

Summary

Swing Arm Limiter Cover Installation

Gazelle Sprinter Assembly Instructions

Frame Assembly and Initial Connections

Guides on positioning frame assemblies, removing bolts, and connecting bottom frame parts.

Axle Tube and Frame Assembly

Installing Axle Tube

Details sliding the axle tube through swing arms and inserting bolts.

Standing the Unit Up

Guides on locking cable holders, lifting the unit, and tightening frame cables.

Tightening Frame Bolts

Instructs to tighten axle tube, front, and rear frame bolts securely.

Handgrip and Hydraulic Cylinder Installation

Attaching Handgrips

Details removing and reinserting bolts for handgrip attachment to swing arms.

Attaching Hydraulic Cylinders

Guides on raising, extending, and connecting hydraulic cylinders to swing arms.

Storing and Safety of Cylinders

Explains cylinder storage and warns about their heat during use.

Fitness Computer Installation

Installing Magnet Cluster

Guides on pushing the magnet cluster onto the tubing and into its mating hole.

Separating and Connecting Computer Housing

Details opening the computer and connecting the electronics plug between housings.

Installing Batteries

Guides on installing AAA batteries into the computer housing, noting polarity.

Mounting and Securing Computer

Describes placing the computer case and securing it to the axle tube.

Connecting Handlebar Wires

Explains connecting handlebar wires to the computer's electronic connectors.

Computer Operating Instructions

Auto On;Off and Function Control

Explains automatic power functions and how to scan or select display features.

Resetting Computer Values

Instructions for resetting all displayed values to zero.

Battery Replacement

Battery Replacement Procedure

Guides on opening the case, replacing batteries, and troubleshooting display issues.

Device Holder Attachment Installation

Preparing the Device Holder

Guides on passing the screw through the holder and adding the metal sleeve.

Aligning and Securing Holder

Details aligning the holder's screw hole with the computer and securing it.

Important Safety Tips

Physician Consultation

Advises consulting a physician before starting any exercise program.

Gradual Progression and Heart Rate Monitoring

Recommends starting slowly and monitoring heart rate within the target zone.

Avoiding Overexertion and Safe Entry;Exit

Advises listening to the body and using caution when stepping on/off.

Clearance, Attire, and Child Safety

Ensures adequate clearance, proper attire, and keeps product away from children.

Manual Review and Critical Warning

Reminds to review manual and highlights critical safety warnings.

Specifications and Parts

Workout Phases

Aerobic and Muscle Toning Workout

Details the main workout phase for health and fitness benefits.

Exercise Guidelines

Specific Stretches

Warm-Up and Cool Down Stretches

Target Heart Rate Zone

Determining Estimated Heart Rate

Getting Started with Gazelle Sprinter

Foot and Hand Position Guidance

Workout Guidelines

Gazelle Sprinter Exercises

Gazelle Sprinter Exercises (Continued)

Care, Storage, and Resistance

Hydraulic Cylinder Safety Warning

Warns that hydraulic cylinders become very hot during use.

Overview

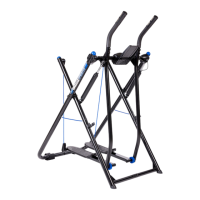
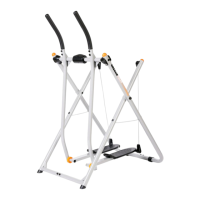
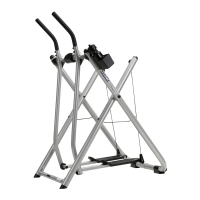
The Gazelle Sprinter is an exercise machine designed for cardiovascular fitness and muscle toning. It allows users to perform a variety of gliding exercises that engage both the upper and lower body. The machine is designed for household use and is not intended for children.

Function Description

The Gazelle Sprinter provides an aerobic and strength conditioning workout. Users stand on foot platforms and move their legs and arms in a gliding motion, which helps to burn calories, firm muscles, and improve cardiovascular endurance. The machine includes hydraulic cylinders that can be engaged to add resistance, allowing users to progress to a more efficient workout as their fitness level improves. A fitness computer tracks various metrics such as speed, distance, time, calories burned, and pulse rate. The device also features a swing arm limiter to prevent over-extended strides, enhancing safety during use.

Important Technical Specifications

  • Product Weight: Approximately 40 lbs.
  • Max. User Weight: 300 lbs.
  • Length: 43"
  • Width: 28"
  • Height: 53.75"
  • Power Source for Fitness Computer: Two AAA batteries.
  • Included Tools for Assembly: 1 Allen Wrench, 1 Screwdriver, 2 Wrenches.
  • Clearance Requirement: Minimum of 3 feet of clearance in front and behind the swinging foot platforms.

Usage Features

Assembly and Setup:

The manual provides detailed instructions for assembling the Gazelle Sprinter, including attaching covers for the swing arm limiter, assembling the frame and swing arm components, installing the axle tube, handgrips, and hydraulic cylinders. It also covers the installation of the fitness computer and an optional device holder attachment. Users are advised to protect flooring during assembly as some components may be pre-lubricated.

Getting Started:

Before use, the unit should be placed on a solid, level, carpeted surface with ample clearance. Beginners are encouraged to practice getting on and off the unit until comfortable and balanced. The "Basic Glide" movement is the starting point, performed by standing upright, holding the front crossbar, and moving feet back and forth in a small, controlled glide.

Workout Intensity Control:

The intensity of the workout can be controlled by three variables:

  • Range of Motion: A wider glide and bent knees increase intensity.
  • Hand Position: High or low hand grips make arms/legs work harder, while a neutral grip distributes the workload evenly.
  • Speed: Faster tempos increase effort.

Hand Positions:

Four hand positions are described to vary workout intensity and emphasize different muscle groups:

  • Front Bar Grip: Used for basic glide, learning, warm-up, and cool-down. Hands are placed on the front crossbar, just inside the handlebars, with a firm grip.
  • Low Grip: Hands at the bottom of the handlebars to decrease upper body work.
  • Neutral Grip: Hands midway between bottom and top of handlebars for equal upper and lower body work.
  • High Grip: Hands at the top of the handlebars to increase upper body work.
  • Hands Free (Advanced Position): For advanced users, hands are released from the crossbar and brought to a bent elbow position, mimicking running or power walking. This position requires good balance and is to be done with care due to increased risk of falling.

Workout Phases:

A total fitness program consists of three phases:

  • Warm-Up: 5-10 minutes of gradual exercise to increase heart rate and warm muscles, including basic gliding movements and stretching.
  • Aerobic & Muscle Toning Workout: 15-20 minutes of gliding exercises, gradually increasing duration to 30 minutes and frequency to 5-6 days per week for weight loss and fitness benefits.
  • Cool Down & Stretching: 10-12 minutes of stretching after the workout to improve flexibility and relieve muscle tightness.

Exercises:

The manual details eight exercises:

  1. Basic Glide: Neutral hand position, controlled back-and-forth motion.
  2. Wide Glide: Increased stride length, neutral or low hand grip.
  3. Low Glide: Deeper knee bend, increased glide length, neutral or low hand grip, emphasizes thighs.
  4. High Glide: Heels lifted (on toes), upright posture, neutral or low hand grip, emphasizes calf muscles.
  5. Forward Push (Advanced): High grip, lean forward, press forward with alternating arms, emphasizes chest, front shoulder, and upper arm. Requires proficiency in basic exercises.
  6. Backward Lean (Advanced): High grip, lean back, pull back with alternating arms, emphasizes upper back, back shoulders, and biceps. Requires proficiency in basic exercises.
  7. Power Glide (Advanced): Wide glide, neutral or high grip, torso rotation, pressing and pulling with arms. Requires proficiency in basic exercises.
  8. Power Jog (Advanced): Basic glide, hands in a "jog" position, arms pump naturally. Requires proficiency in basic exercises.

Resistance:

The hydraulic cylinders provide added resistance. To engage, lift cylinders to the top of the swing arms and lock them into place. Users are warned that cylinders get very hot during use and should not be touched.

Fitness Computer:

The computer features an auto on/off function and tracks:

  • Speed: Current exercising speed.
  • Distance: Distance traveled (miles or kilometers, switchable).
  • Auto Scan: Scans through functions every 6 seconds.
  • Time: Workout session length.
  • Odometer: Total accumulated distance (retained unless batteries are replaced).
  • Calorie: Estimated calories burned (display is half of estimated).
  • Pulse Rate: Estimated heart rate (beats per minute) using metal pulse sensors on handlebars.

Heart Rate Monitoring:

Users are advised to monitor their heart rate and stay within their Target Heart Rate Zone (50%-80% of maximum heart rate). A chart provides age-adjusted minimum and maximum heart rates. Methods for determining heart rate include taking a manual pulse or using an electronic heart rate monitor.

Safety Tips:

  • Consult a physician before starting any exercise program.
  • Start slowly and progress sensibly.
  • Listen to your body and stop if experiencing pain, irregular heartbeat, or shortness of breath.
  • Use care when stepping on and off.
  • Ensure adequate clearance around the unit.
  • Wear appropriate athletic clothing.
  • Not intended for use by children.
  • The swing arm limiter prevents over-extended strides; avoid contact with it to prevent falls and serious injury.
  • Drink plenty of water before, during, and after workouts.

Maintenance Features

Cleaning:

  • Wipe sweat, dust, or residue off with a soft, clean cloth after each use.
  • Wipe handlebar grips frequently with a soft, damp cloth.

Lubrication:

  • Lubricate all moving parts with white lithium grease or clear household grease (e.g., petroleum jelly) on the axle tube if squeaks or noises develop.
  • Spray cable holders (top & bottom) with WD-40® or equivalent.

Fastener Checks:

  • Check to ensure screws on the bottom of the foot platforms are tight.

Storage:

The unit folds down for easy storage.

  1. Disconnect hydraulic cylinders and clip them into storage clips.
  2. Fold foot platforms and lock them into place by snapping lower cable holders onto swing arms.
  3. Place foot on the rear frame tube and slide the front frame tube toward you by grabbing the front swing arms.
  4. Carefully lower the unit to the ground until the wheels engage, allowing it to be rolled away. Store in an area away from children and high traffic.

Warranty:

A 12-month limited warranty from the date of receipt covers defects in materials and workmanship for personal and household use. It does not cover damage from accidents, unauthorized repairs, misuse, or use of non-approved parts. Warranty is valid only for the original owner in the U.S. and Canada. Customer service contact information is provided for warranty claims.

Gazelle SPRINTER Specifications

General IconGeneral
BrandGazelle
ModelSPRINTER
CategoryFitness Equipment
LanguageEnglish

Related product manuals