Page 9
Upload Mainboard Firmware (Marlin 2.x)
The gMax 2 Pro uses the popular Marlin 2.x open-source firmware and it has been tailored for the
machine. Our edits to the firmware can be found on our forum or download pages. We offer pre-
compiled .bin files for the printer so updating is
quick and easy.
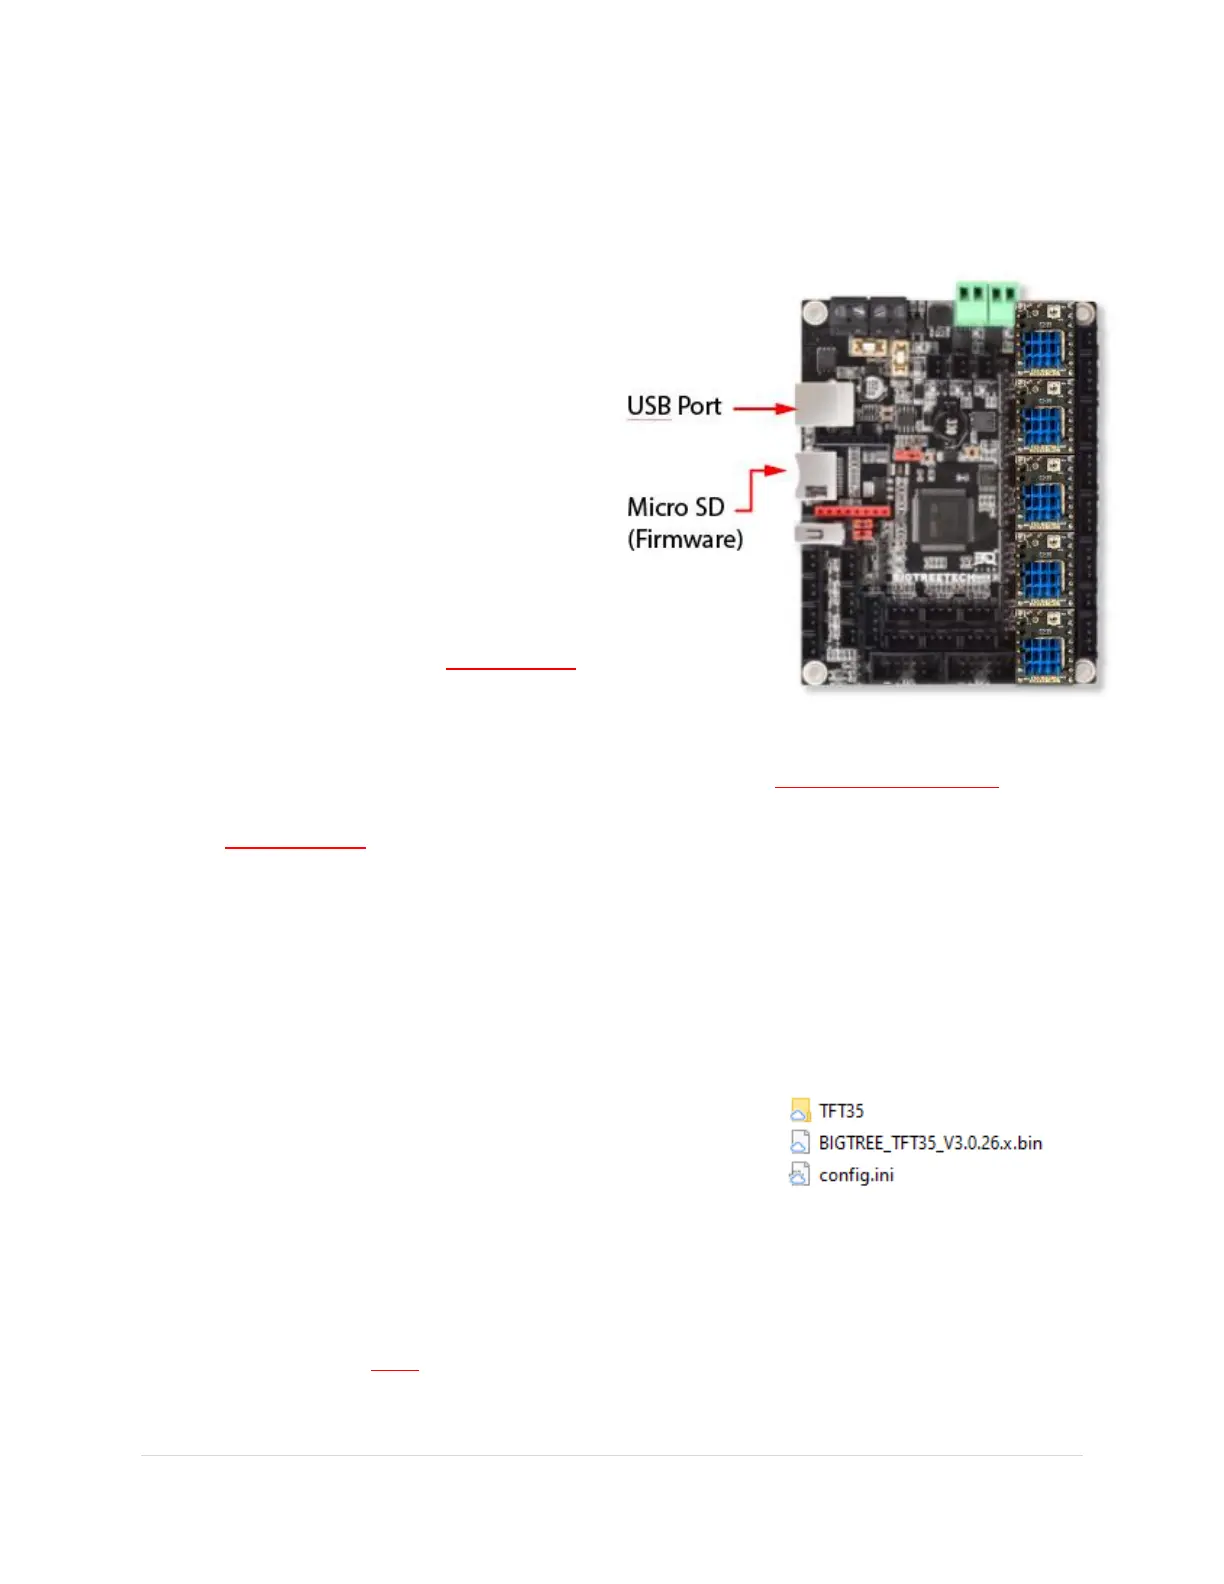
1. Option #1: Connect the printer to your
computer via a USB cable. You should then
see an external micro SD show up.
2. Option #2: Take out the micro SD card that
can be found inside the printer and put in
in your computer.
3. From your computer, download the
correct .bin file for your machine and put
it on the SD card (from option #1 or #2).
The file much be named “firmware.bin”
or the printer won’t recognize it.
4. Once you have transferred the file, put the card back inside the printer and turn it on. The
update will happen quickly and the way to check it is to go to “Menu > Settings > Info” to
check the date of the build. After the upload the file on the SD card will be named
“firmware.CUR”. If it isn’t then, the firmware didn’t upload.
Upload LCD Screen Firmware
The LCD screen has its own firmware, configuration file and graphics themes (with graphics and fonts).
We recommend updating all 3 whenever you update the firmware. Note the LCD screen can load
independently of the main board so make sure the mainboard firmware is properly installed before the
screen.
1. Download the correct zip file from our forum or website and
unzip to a spot on your computer. You should see a firmware
file, a config.ini file and a folder containing the graphics
theme.
2. Put all of these on the formatted SD card that came with your printer. Not the micro SD card.
3. Put this SD card in the LCD screen just like you are going to start a print and turn on the printer.
You will see the firmware, config files, fonts, and all the graphics update. It should take a few
minutes to complete. Once finished put the SD card back in the computer to see if the files are
renamed with a “.CUR” extension at the end. If not, format the card and try the installation
again.