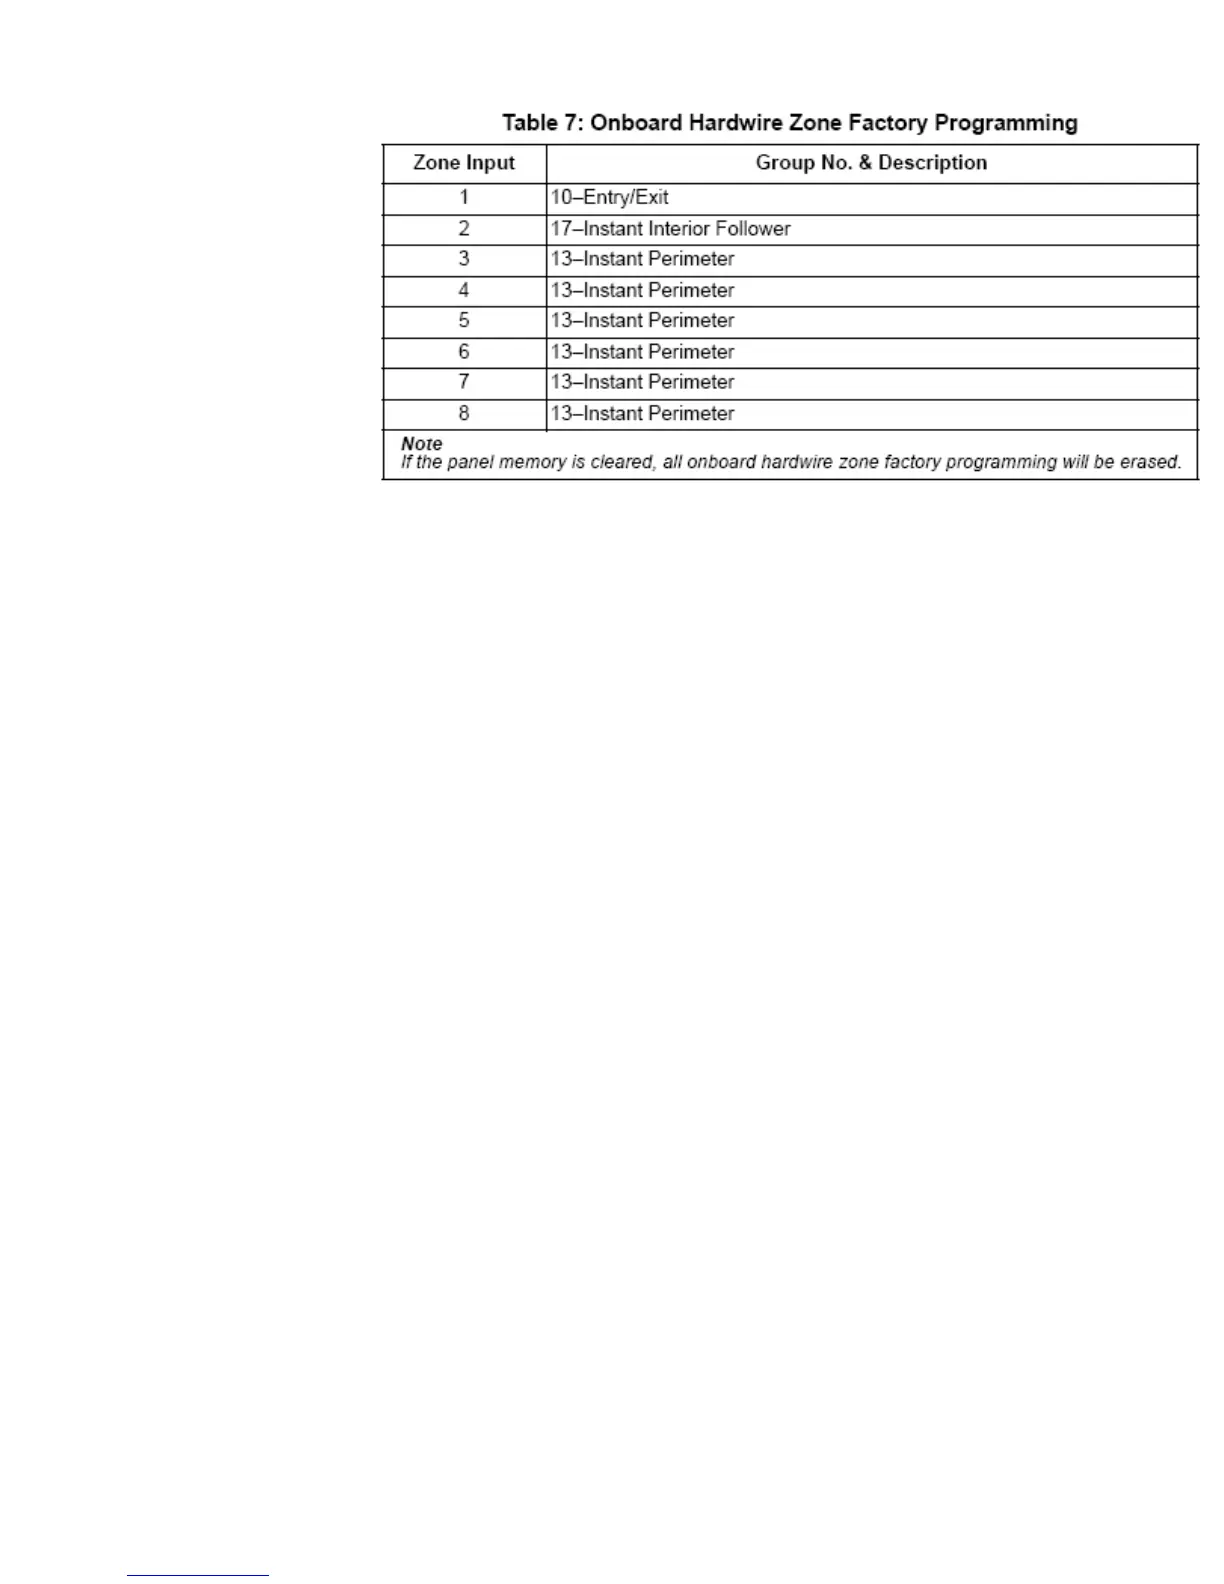
b. Programming Hardwired Zones
i. Zone Groups are pre-programmed for the 8 hardwired zones.
1. Entry Exit Delay – For Doors that require a delay for entry or
exit
2. Instant Interior Follower – For motion detectors that will
arm instantly.
3. Instant Perimeter – For all doors/window sensors, glass
break detectors that do not require a delay.
ii. **Change the “Pre-Programmed” Zone Settings:
1. Once you are in the programming mode, press B until the
display shows “Sensors”, and press # to select
2. Now Press B until the display shows “Edit”, and press # to
select.
3. Press A or B to scroll to the zone number you desire to change
press # to select
4. Enter the desired partition number, and then press #. (Most Applications the
Partition is always 1) The display shows the new partition assignment.
5. Press A or B and the display shows SENSOR GROUP nn (current group
assignment)
6. Enter the desired group number, (See appendix B in Installation Manual) then
press #. The display shows the new group assignment.
c. Programming Wireless Zones
i. With the display showing SENSORS, press # and the display shows “Learn Sensors”
ii. Press # and the display shows Sensor PTN 1
iii. Press # to select partition 1 or press 2, 3, 4, 5, or 6 + # to select the desired partition
(Typically is always Partition 1). The display should show “Sensor Group 0”
iv. Enter the desired sensor group number and press # to select (see Table B1 in “Appendix
B” for a description of all sensor group characteristics). The display shows TRIP
SENSOR nn, where nn is the displayed (next available) sensor number.
v. To change the displayed sensor number, enter the desired sensor number + #. The desired
sensor number is displayed.
vi. With the desired sensor number displayed, use the guidelines in Table 6 to force the
sensor or zone you are adding (learning) into the panel memory to send a signal to the
panel.
vii. To add another sensor to the same sensor group and partition, go back to step 5.
viii. To add sensors to another sensor group or partition, press * twice and go back to step 1
(LEARN SENSORS).

 Loading...