3.3 INSTALLATION PROCEDURE
The UPS can be used in a stand alone tower format using the two supporting stands (section 3.3.2), or can
be mounted in a 19 inch rack using the two mounting brackets (section 3.3.1). All required items are
included in the delivery, except rails – available as railkit option.
NOTE
The UPS output sockets are live as soon as the UPS is connected to the mains, even if the UPS
has not been switched on via the front panel.
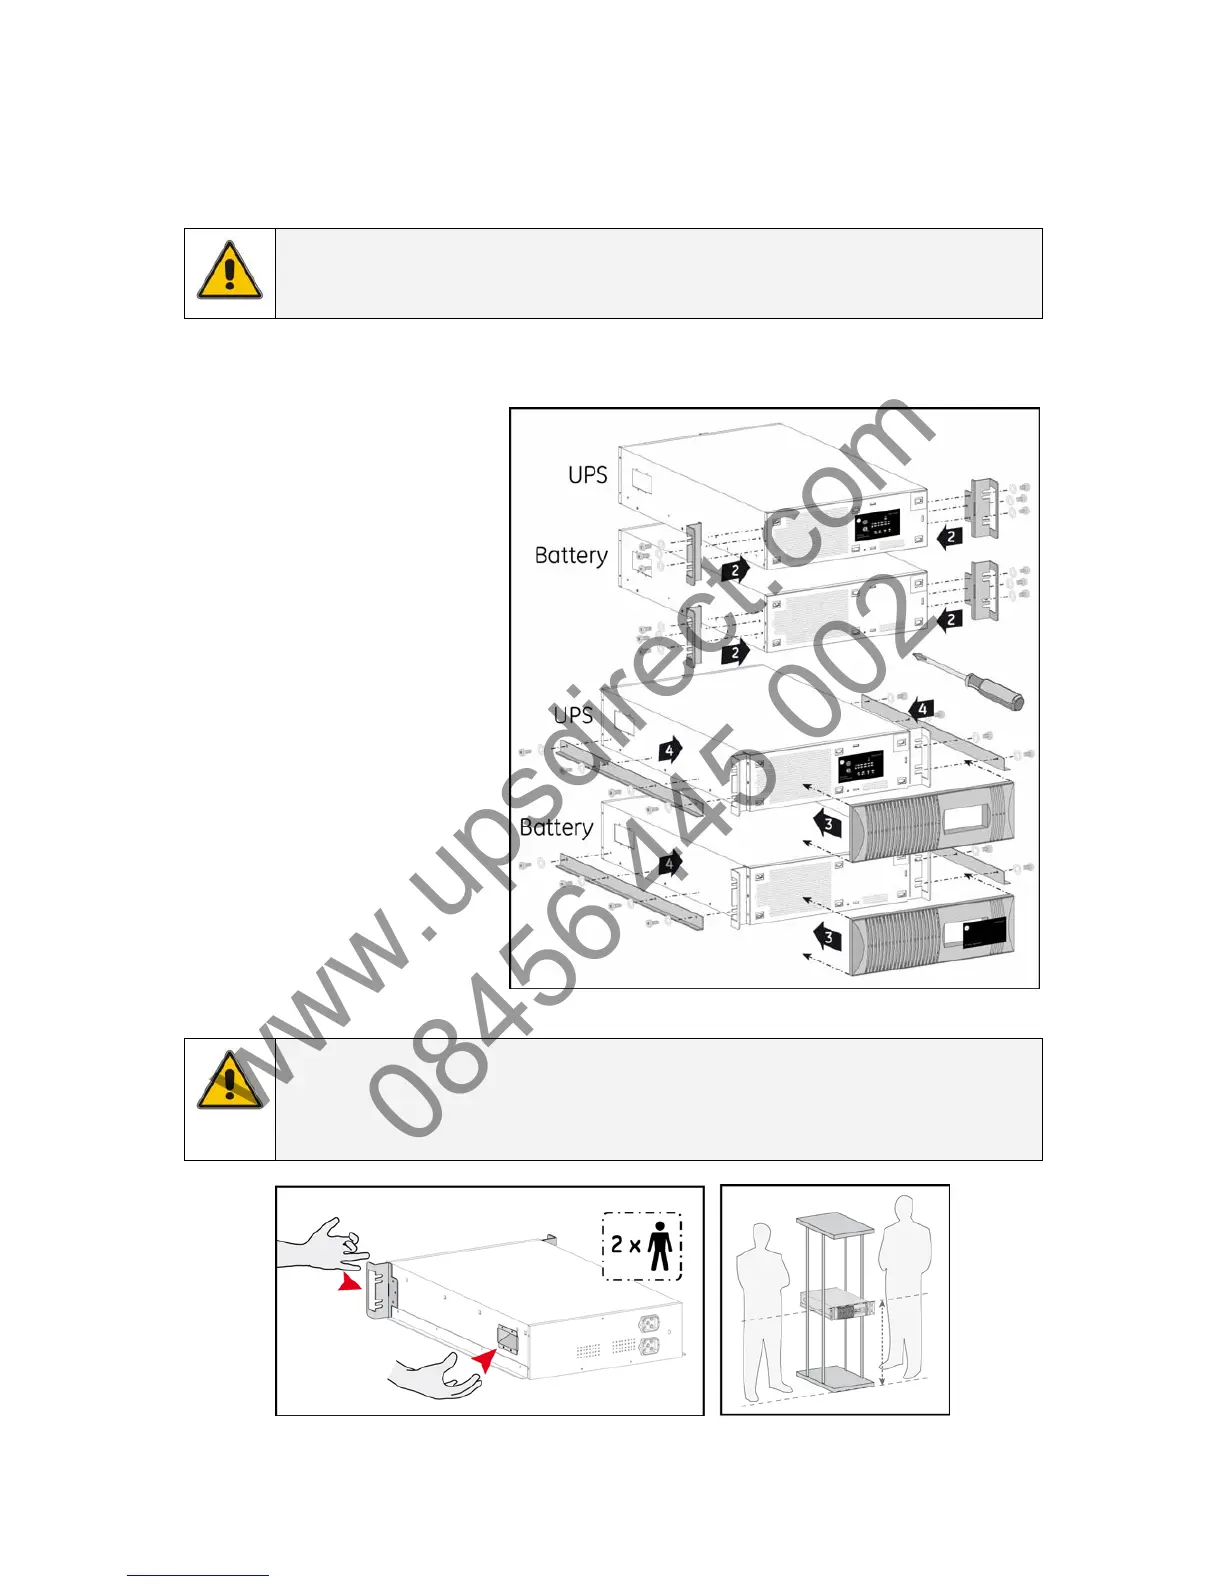
3.3.1 Rackmount installation – preparations
1. Place the UPS and matching
battery cabinet horizontally on
a flat surface.
2. Install the two mounting
brackets that came with the
unit using the provided screws
(2, fig. 3.3.1).
3. Mount the front panel by
pushing the plastic part into
the appropriate holes (3, fig.
3.3.1).
4. Install the UPS into a 19’ rack.
The UPS cabinet must be
supported by mounting rails,
do not mount it by using the
mounting brackets only. Fix
the mounting brackets on the
19 inch enclosure with screws.
fig. 3.3.1
NOTE
Please consider the weight of the UPS (see section 9) prior to installation to ensure the rack or
floor are capable of supporting the weight. For rack installation we recommend that the UPS
is placed in the lower section of the rack. Fit the unit and the battery into the rack cabinet with
the help of a second person.
The GT Series UPS is now ready for further connections. Please proceed with section 3.3.3.
modifications reserved 7 User manual GT Series 6 - 10 kVA UPS 1.0 (GB)
 Loading...