FHSD700C Series Product Guide
GE Security
5 Setup and Button Functionality
The configuration of the detector is achieved by using a PC loaded with GE Security configuration
software or through the display panel. This section provides information on the button functionality in the
display panel, and how to setup the detector and navigate through the Main Menu options. A flow chart
that shows a summary of these navigation options may be found in Display Panel Navigation on page
35.
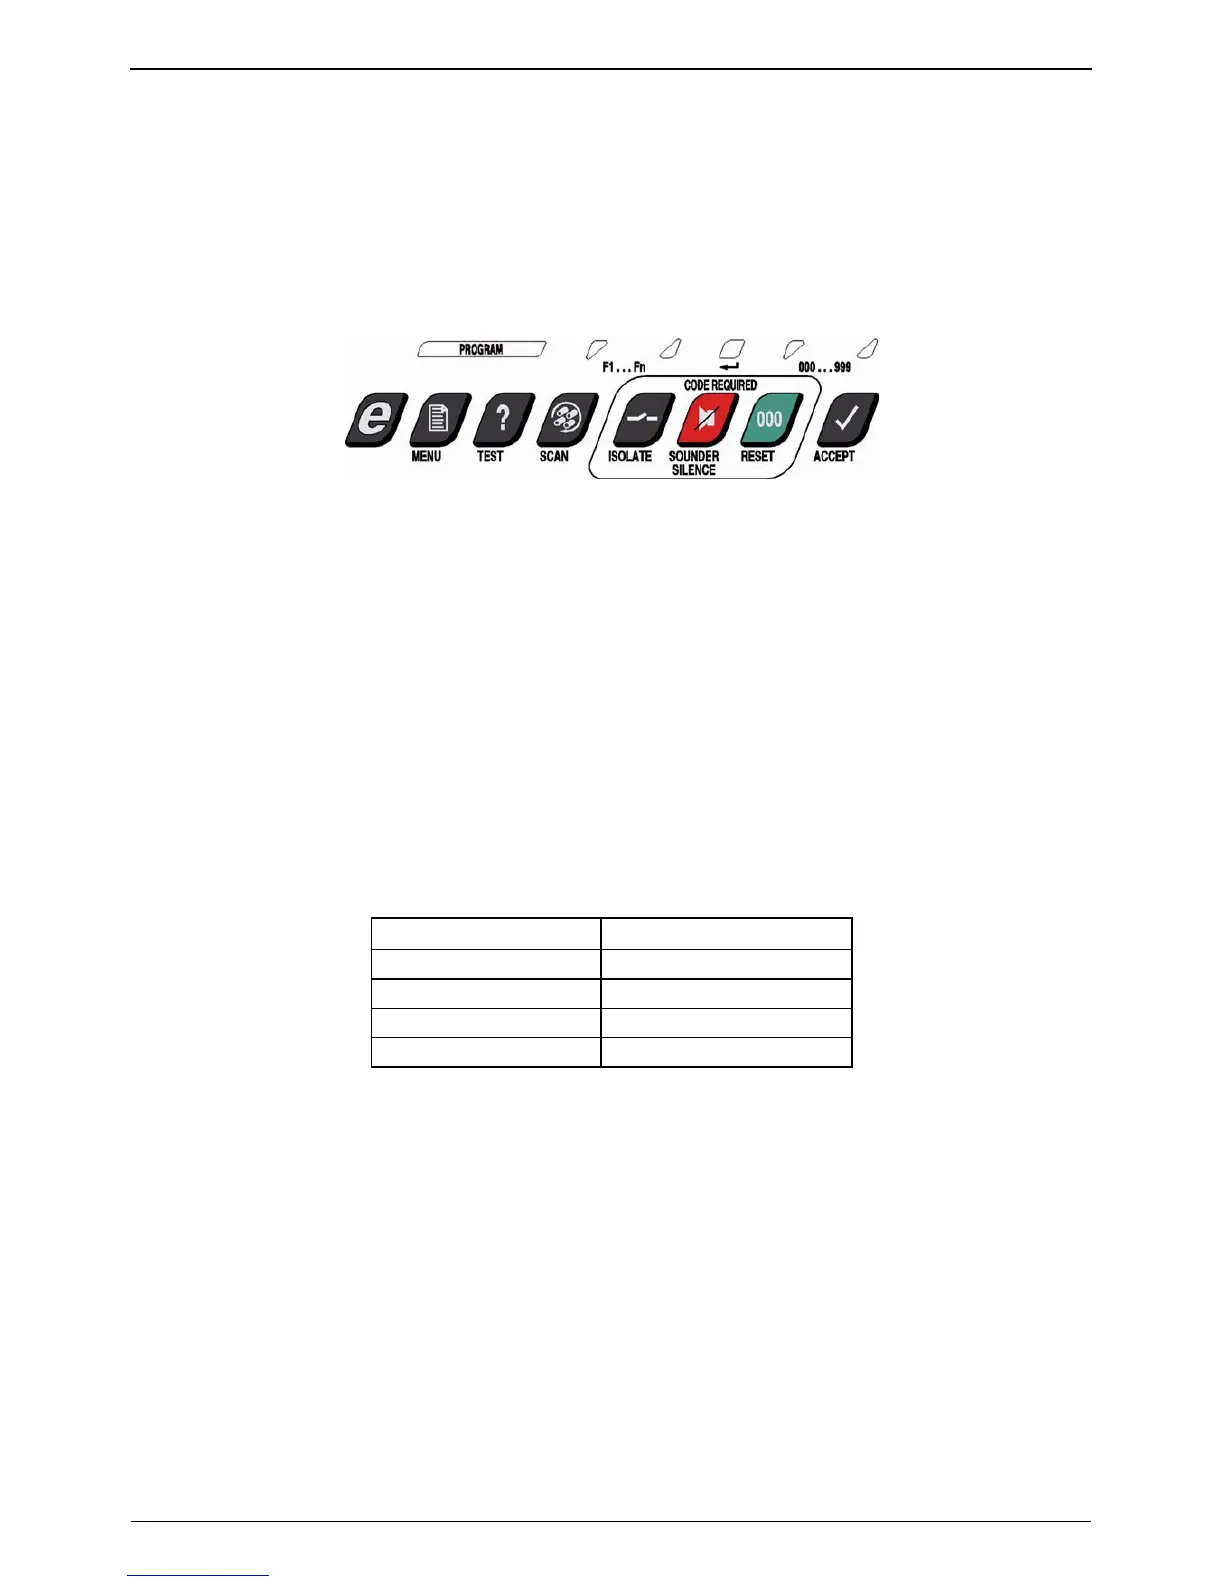
Figure 5-1: FHSD700C detector buttons for user functions
5.1 Access Codes
Access to some modes in the Main Menu and other configuration and control functions require the user
to enter an Access Code. There are several levels of access:
1. Operator
2. Level 1
3. Level 2
4. Level 3
Access Code Levels are downwards applicable - for example if a User enters the Level 2 Code, they
have access at the Operator Level and Level 1. The Operator Access Code is changeable as a
parameter in Configuration Mode, which requires Level 1 Access. The default Access Codes are shown
below.
Table 5-1: FHSD700C Detector Access Codes
Access Level Access Code
Operator 0
Level 1 260
Level 2 693
Level 3 Factory Use Only
5.1.1 How to Enter an Access Code
When entering an Access Code, the alternative function LEDs above the ACCEPT and RESET buttons
will be lit, enabling these buttons to be used as UP and DOWN buttons to enter a 3-digit number.
If the UP or DOWN buttons are continually pressed, the 'units' digit on the Status Display will be
activated, then the 'tens' digit, then the 'hundreds' digit. If the button is released, the flashing digit (units,
tens or hundreds) is the one that will change with further use of the UP and DOWN buttons. When the
hundreds digit is correct, wait about five seconds for the flashing digit to move to the tens digit, then set
the tens to the required value. Repeat for the units digit.
18
www.gesecurity.net