– 39 –
Dispenser Assembly Removal
1. Remove the top panel and control panels. (See
the Washer Components, Top Panel and
Control Panel sections in this guide.)
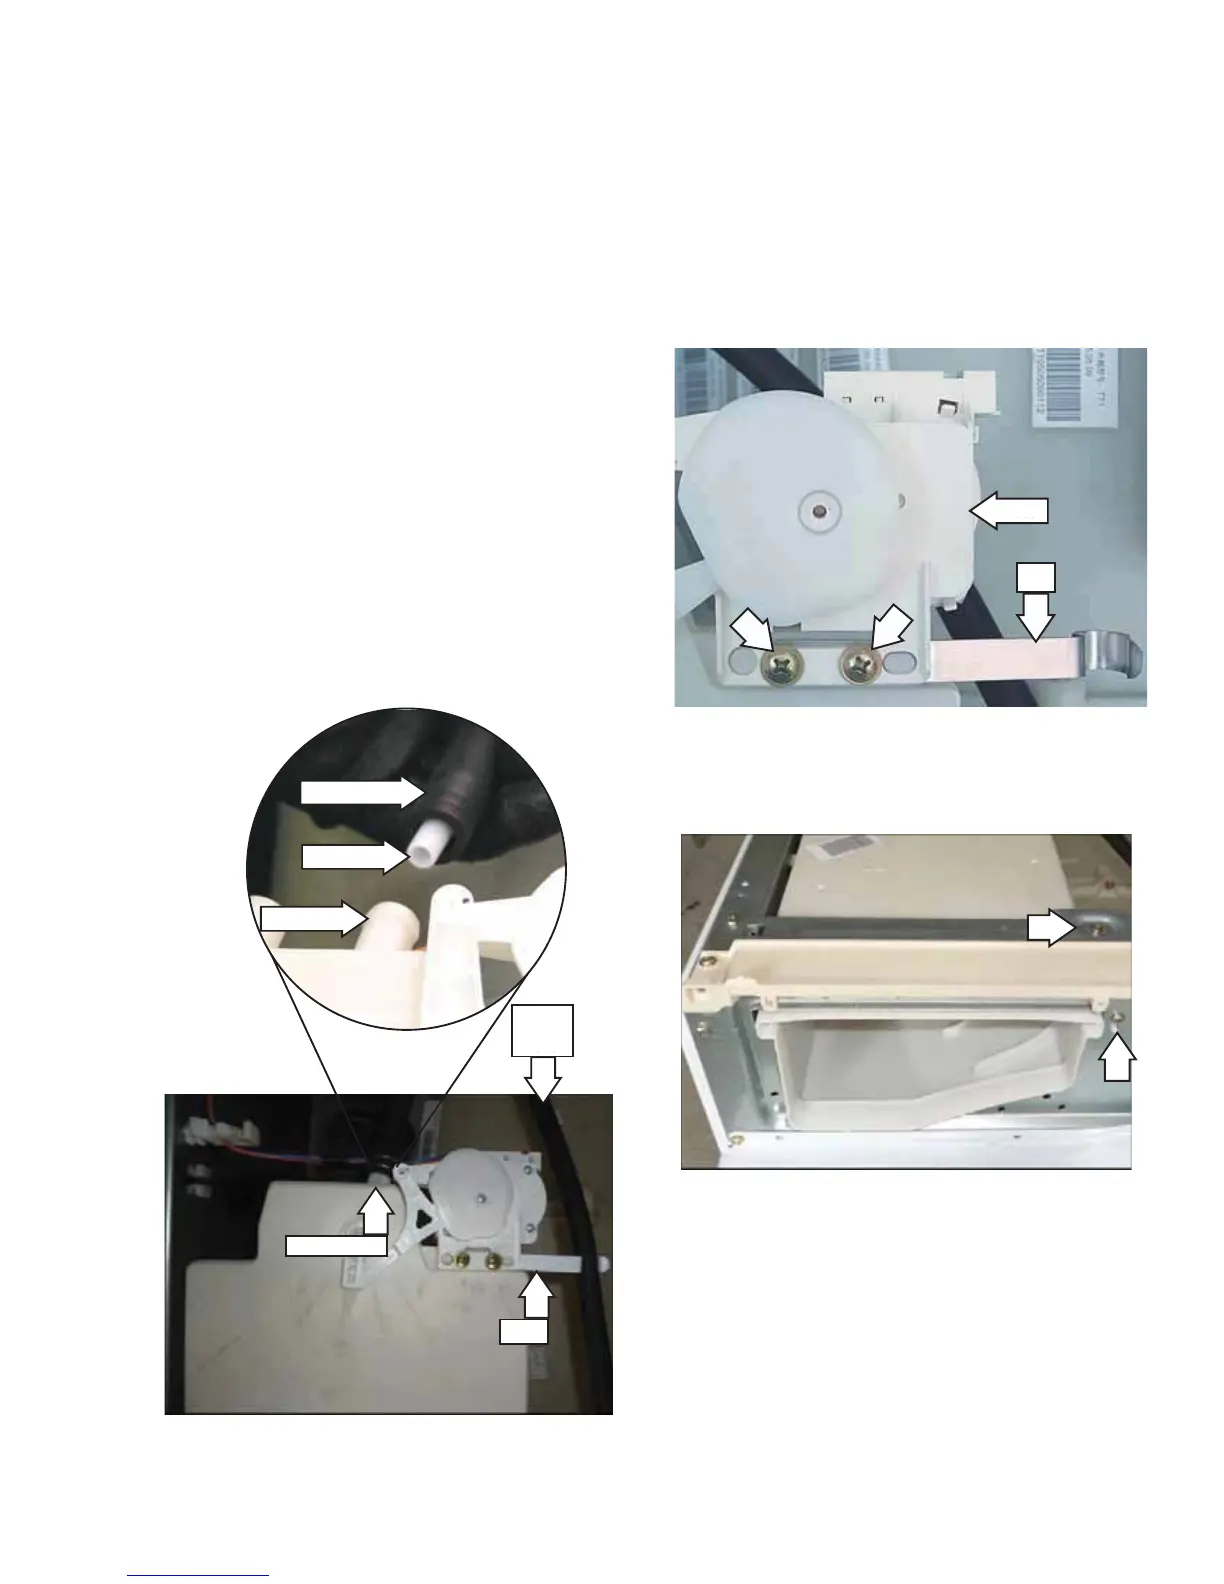
2. Remove the inlet and the tub vent hoses from
the dispenser:
NOTE: The inlet and the dispenser vent
KRVHVDUHGLȻFXOWWRUHPRYH
a. Squeeze each clamp and slide it back.
b. Carefully break each hose loose by inserting
DVPDOOÀDWEODGHVFUHZGULYHUXQGHUWKH
hose to break the seal.
c. Remove the hoses.
NOTE: An inlet tube is placed between the inlet hose
and the dispenser tank. The inlet tube provides
proper water pressure to the dispenser and nozzle.
When removing the inlet hose, the inlet tube may
remain in the hose. Ensure the inlet tube is fully
inserted into the tank inlet upon reassembly.
Caution: A small retainer for the dispenser motor
wiring, located underneath the unused inlet, is
fragile. To avoid breakage, use minimal outward
pressure when releasing wiring.
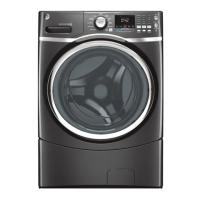
3. Release the dispenser motor wiring from the
retainer.
4. Remove the 2 Phillips head screws that attach
the motor and clip to the dispenser tank. Place
the motor and clip aside.
5. Remove the 2 Phillips head screws that hold the
dispenser to the front bracket.
Clip
Inlet hose
Inlet Hose
Inlet Tube
Tank Inlet
Gasket
Inlet
Hose
Inlet Hose
Inlet Tube
Tank Inlet
Gasket
Inlet
Hose
Inlet Hose
Clip
Motor
Clip
Motor
Clip
 Loading...