EasyManua.ls Logo

GE GTX42GASJWW User Manual

GE GTX42GASJWW
40 pages
To Next Page IconTo Next Page
Page #1 background imageLoading...
Page #1 background image
BEFORE YOU BEGIN
Read these instructions completely and carefully.
IMPORTANT Save these instructions for local
electrical inspector’s use.
IMPORTANT Observe all governing codes and
ordinances.
Install the clothes dryer according to the manufacturer’s
instructions and local codes.
Note to Installer – Be sure to leave these instructions
with the Consumer.
Note to Consumer – Keep these instructions for future
reference.
Clothes dryer installation must be performed by a
qualified installer.
This dryer must be exhausted to the outdoors.
Before the old dryer is removed from service or
discarded, remove the dryer door.
Service information and the wiring diagram are located
in the control console.
Do not allow children on or in the appliance. Close
supervision of children is necessary when the appliance
is used near children.
Proper installation is the responsibility of the installer.
Product failure due to improper installation is not
covered under the Warranty
.
Install the dryer where the temperature is above 50°F
for satisfactory operation of the dryer control system.
Remove and discard existing plastic or metal foil duct
and replace with UL-listed duct.
Questions? Call 800.GE.CARES (800.432.2737) or visit our Web site at: GEAppliances.com
- Fire Hazard
WARNING
Clothes dryer installation must be performed by a
qualified installer.
Install the clothes dryer according to these
instructions and local codes.
DO NOT install a clothes dryer with flexible plastic
venting materials. If flexible metal (semi-rigid or
foil-type) duct is installed, it must be UL-listed and
installed in accordance with the instructions found
in “Connecting the Dryer to House Vent” later in
this manual. Flexible vent materials are known to
collapse, be easily crushed and trap lint. These
conditions will obstruct dryer airflow and increase
the risk of fire.
DO NOT install or store this appliance in any
location where it could be exposed to water or
weather.
To reduce the risk of severe injury or death, follow
all installation instructions.
Save these instructions. (Installers: Be sure to leave
these instructions with the customer.)
Installation Dryers
Instructions
01
This is the safety alert symbol. This symbol alerts you to potential hazards that can kill you or hurt you and others.
All safety messages will follow the safety alert symbol and the word “DANGER”, “WARNING”, or “CAUTION”. These
words are defined as:
Indicates a hazardous situation which, if not avoided, will result in death or serious injury.
Indicates a hazardous situation which, if not avoided, could result in death or serious injury.
Indicates a hazardous situation which, if not avoided, could result in minor or moderate injury.
DANGER
WARNING
CAUTION
31-16767-2 06-15 GE
Printed in Mexico
234D2318P001
Question and Answer IconNeed help?

Do you have a question about the GE GTX42GASJWW and is the answer not in the manual?

GE GTX42GASJWW Specifications

General IconGeneral
BrandGE
ModelGTX42GASJWW
CategoryDryer
LanguageEnglish

Summary

Before You Begin

Duct Replacement and Fire Hazard

Replace old duct with UL-listed; avoid flexible plastic for venting to prevent fire.

Fire Hazard Warning

Qualified Installer & Venting

Installation by qualified installer; use UL-listed metal or semi-rigid duct for venting.

Alcove, Closet, and Mobile Home Installation

Mobile Home Installation Standards

Conform to standards, use metal ducting, vent outdoors, and ensure proper airflow.

Gas Dryer Requirements and Supply

Gas Supply Safety and Connection

Use new CSA approved line, install shut-off valve, tighten connections, and ensure proper pressure.

Connecting Dryer to Gas Supply

Gas Dryer Leak Test and Electrical Connection

Test for Gas Leaks

Use soapy solution to check all gas connections for leaks; avoid ammonia.

Electrical Grounding Requirements

Dryer must be grounded per codes; use 120V, 60Hz circuit protected by 15/20A breaker/fuse.

Electrical Connection Safety

Plug into grounded outlet, do not remove ground prong, use adapters, or extension cords.

Electric Dryer Electrical Connections

Power Cord Connection Procedure

Connect neutral, ground, and supply wires securely using a UL-listed cord and strain relief.

Cord-Connected Dryer Grounding

Dryer must be grounded via cord and plug into a properly installed outlet.

Direct Wire Connection Procedure

Connect neutral, ground, and supply wires using 10 gauge copper wire and strain relief.

Permanently Connected Dryer Grounding

Connect to a grounded metal wiring system or use an equipment-grounding conductor.

Electric Dryer Wiring Connections

4-Wire Connection for Mobile Homes

Use 4-wire for mobile homes and new construction; describes wire connections and grounding.

3-Wire Connection Guidelines

Describes 3-wire connection, restrictions (not for mobile homes/new construction), and grounding.

Exhausting the Dryer: Safety and Components

Venting Safety Warnings

Dryer must be vented outdoors; use rigid metal or UL-listed duct; avoid plastic and specific locations.

Transition Duct Recommendations

Recommends rigid metal duct; UL-listed flexible metal is alternative; specifies length and elbow use.

Exhaust System Length and Configuration

Exhaust Length Impact

Longer exhaust increases drying time, energy cost, and fire hazard.

Calculating Maximum Vent Length

Length depends on duct type, elbows, and hood; includes tables and reduction rules.

Exhaust System Checklist and Standards

Side or Bottom Dryer Venting

Final Venting Adjustments and Setup

Leveling and Anti-Tip Legs

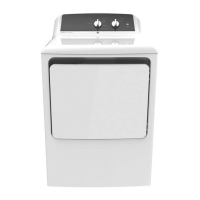
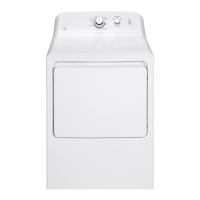
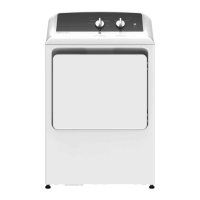
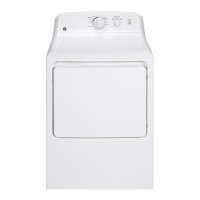
Ensure dryer is level side-to-side and front-to-back using leveling and anti-tip legs.

Reversing the Dryer Door: Preparation

Reversing the Dryer Door: Solid Door Models

Reversing the Dryer Door: Glass Panel Models

Reversing the Dryer Door: Glass Panel Assembly

Related product manuals