16
INSTALLATION INSTRUCTIONS
(continued)
INSTALLATION OF RANGE
IMPORTANT: Save these instructions for
the local electrical inspector’s use.
GENERAL
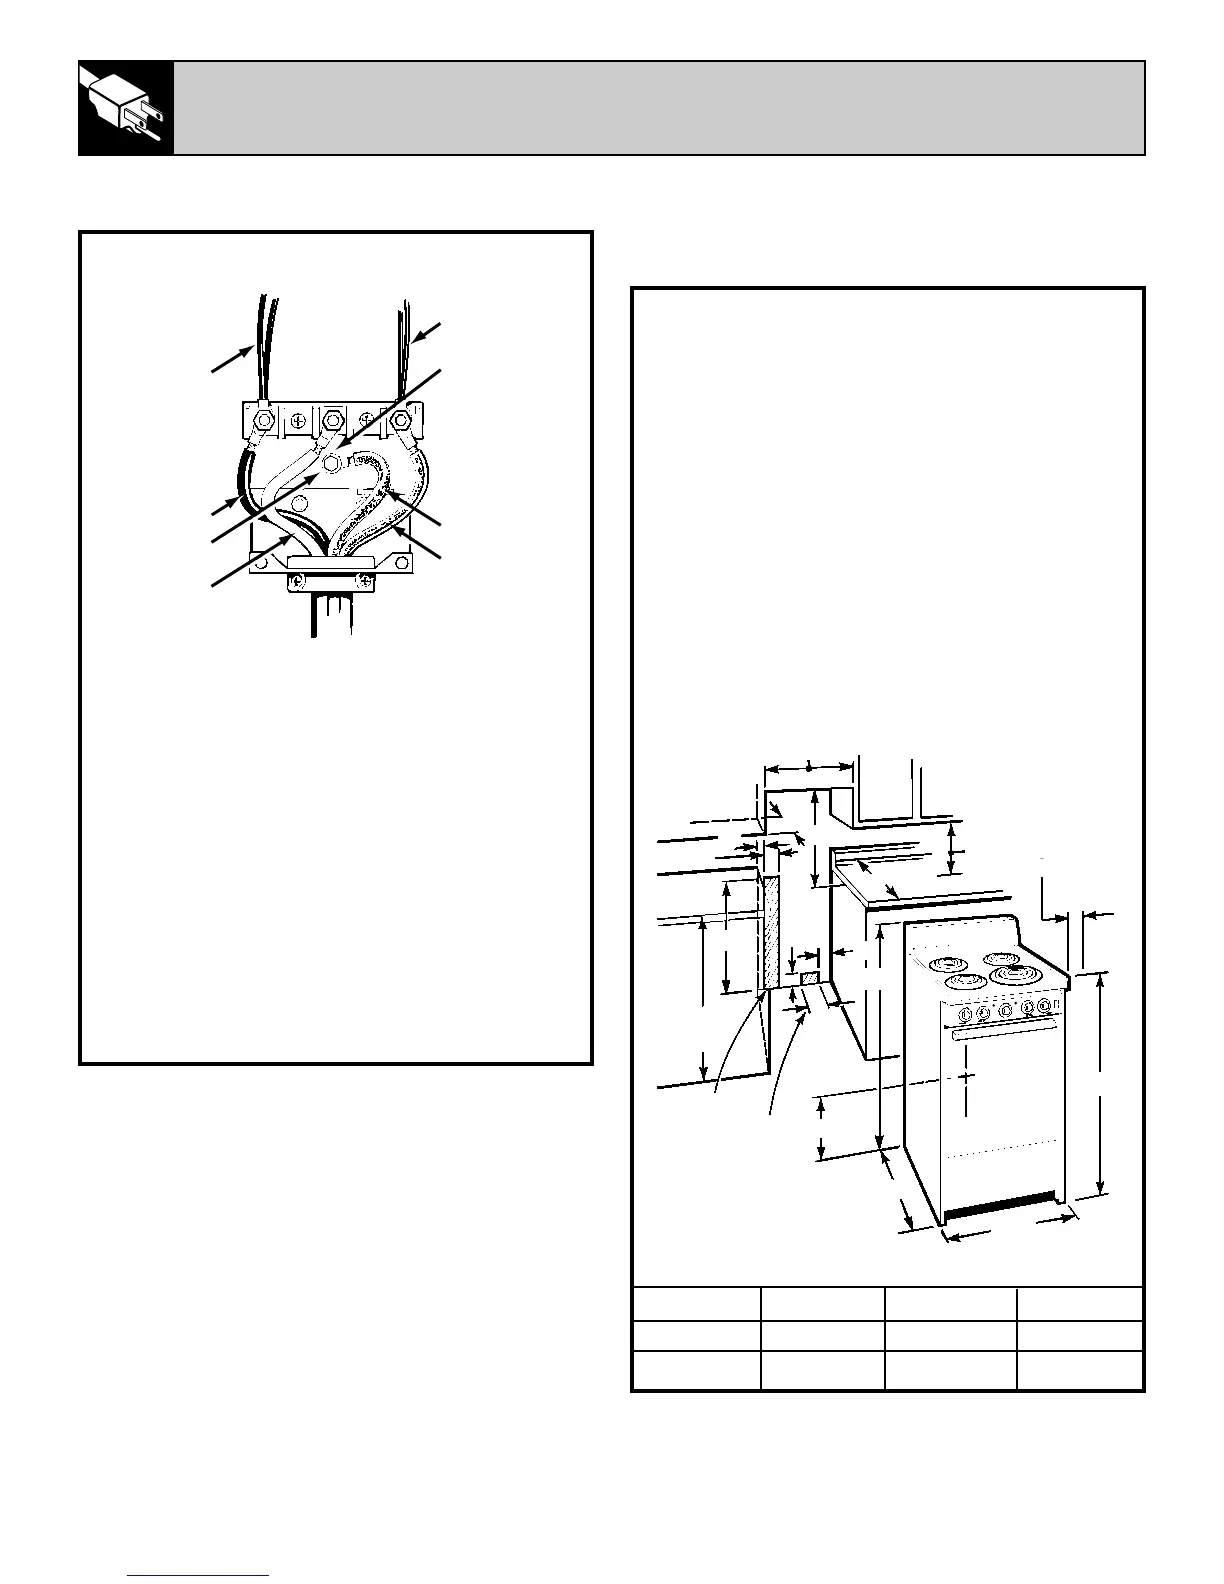
• See the illustration below for all rough-in and
spacing dimensions. These dimensions must be
met for safe use of your range.
• To eliminate the risk of burns or fire when
reaching over hot surface elements, cabinet
storage space above the cooktop should be
avoided. If cabinet storage space is to be
provided above the cooktop, the risk can be
reduced by installing a range hood that sticks
out at least 5″ beyond the front of the cabinets.
Cabinets installed above a cooktop may be no
deeper than 13″.
• The range may be placed with 1
3
⁄
4
″ clearance at
the back wall and 0″ clearance (flush) at side
walls of the range if the front edges of the range
side panels stick out beyond the cabinet fronts at
least 1/4″.
Models A B C
JAS02 20″ 20
3
⁄
8
″ 2″
JAS24 24″ 24
3
⁄
8
″ 0″
20-3/8″
13″
2″
2-1/2″
30″
34″
5″
24″
5″
2″
18″
36″
20″
24″
40-1/2″
5″
36″
5-1/4″
ELECTRICAL CONNECTION (continued)
FOUR-WIRE CORD CONNECTION
1. Remove the top nuts on the junction block
studs.
2. Tighten the back nuts.
3. Remove the ground screw; then remove the
ground strap.
4. Install the four wire cord and strain relief in
the hole in the strain relief bracket.
5. Connect the red and black leads to the
outside terminals and the white lead to the
center terminal.
6. Attach the green lead below the junction
block with the ground screw that was removed
earlier (step 3).
7. Push the strain relief upward (to relieve
strain) while tightening the strain relief clamp.
Green Lead
Black Lead
Ground Strap
Removed
Red
Black
White Lead
Red Lead
Ground Screw
Max.
Min.
B
C
A
From
combustible
walls above
cooking
surface
Counter
height
should not
exceed 36″
Surface
Mount
Outlet
From
bottom
of range
to strain
relief
clamp
Max.
Flush
Mount
Outlet
 Loading...