OPEMTING
THE SELF-CLEANING OVEN
Normal Cleaning Time:
3
hours
k
Only
the upper oven is self-cleaning. The bottom oven is standard
cletin.
See
the
Porcelain
Oven
Interior section.
Before a Clean Cycle
The oven must be completely cool in order to set
the self-clean cycle.
We recommend venting with an open window
or using a ventilation
fan
or hood during the
first
self-cleaning cycle.
1.
2.
Remove the broiler pan, broiler rack, all cookware
and any aluminum foil from the oven—they
cant
withstand the high cleaning temperatures.
NOTE: The oven shelves may be cleaned in
the self-cleaning oven.
However, they will darken.
lose their luster
and
become hard to slide.
Wiue
up
heavy soil
on
the oven bottom. If
YOU
use’ sea;,
rinse thoroughly before self-cleaning
to prevent staining.
—
———
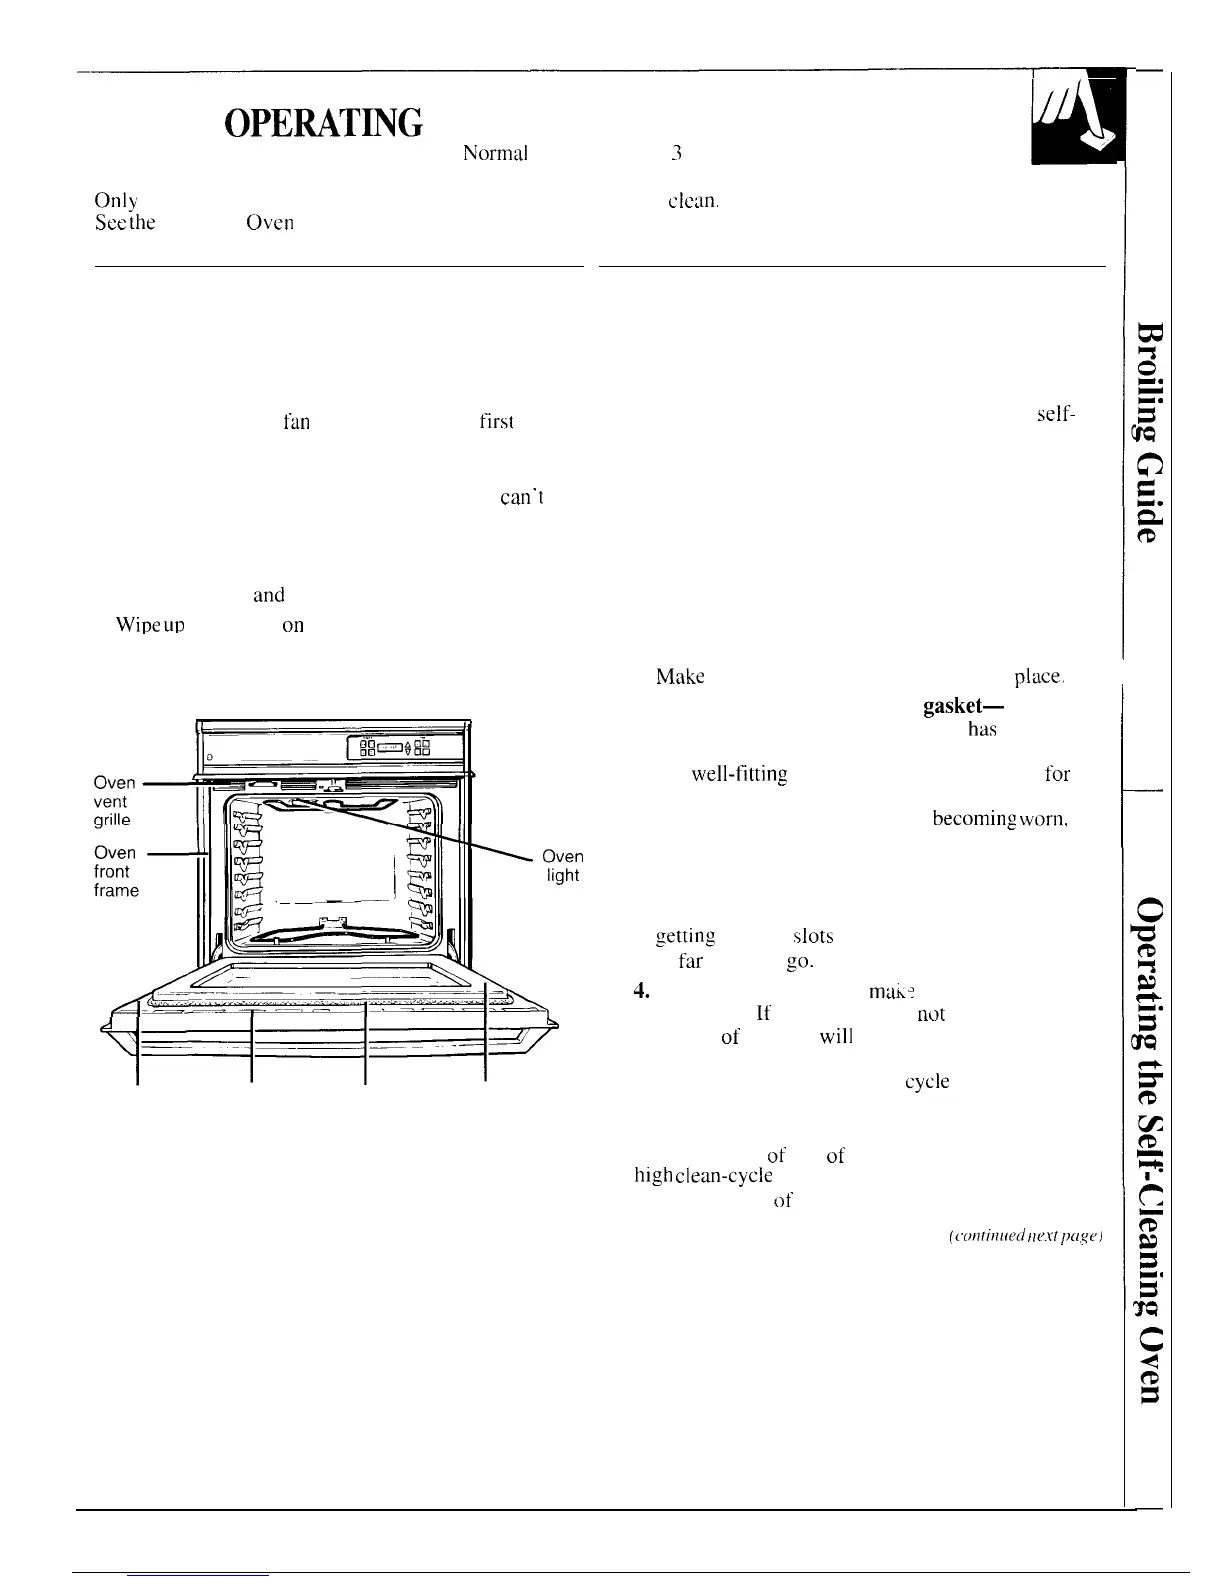
Area
Openings
Oven door
Area
outside the
in door gasket
inside the
gasket
gasket
3. Clean spatters or soil on the oven front frame and
the oven door outside the gasket with a dampened
cloth. The oven front frame and the oven door
outside the gasket do not get cleaned by the
self-
clean cycle. On these areas, use detergent and hot
water or a soap-filled steel wool pad. Rinse well
with a vinegar and water solution. This will help
prevent a brown residue from forming when the
oven is heated. Buff these areas with a dry cloth.
Do not clean the gasket.
Do not use abrasives or oven cleaners.
Clean
the outside front of the oven door with soap and
water. Also use soap and water to clean under the
oven vent grille.
Make
sure the oven light bulb cover is in
place.
Do not rub or clean the door
gasket—
the fiberglass material of the gasket
has
an
extremely low resistance to abrasion. An intact
and
well-fittin&
oven door gasket is essential
for
energy-efficient oven operation and good baking
results. If you notice the gasket
becomin&
worn,
frayed or damaged in any way or if it has become
displaced on the door, you should have it replaced.
Do not let water run down through openings in
the top of the door.
To help prevent water from
getting
in these
slots
when cleaning, open the door
as
far
as it will
go.
4.
Close the oven door and
mak?
sure the oven
light is off.
If
the oven light is
nt)t
turned off,
the life
of
the bulb
will
be shortened or it may
burn out immediately. The door latches
automatically after the clean
cycle
is set.
Do not use commercial oven cleaners or oven
protectors in or near the self-cleaning oven.
A combination
of
any of these products plus the
high
clean-cycle temperature may damage the
porcelain finish
of the oven.
(1’ot7r;t71(cci
/7t’.Yr
/l(i,ye)
19