GE MEDICAL SYSTEMS LOGIQ A1 BASIC SERVICE MANUAL
REV 2 5176463-100
18
2-3-3 Chassis Leakage Current Test (Continued)
Meter Procedures
1. Follow these steps to test the unit for leakage current.
2. Turn the main unit of LOGIQ A1 off.
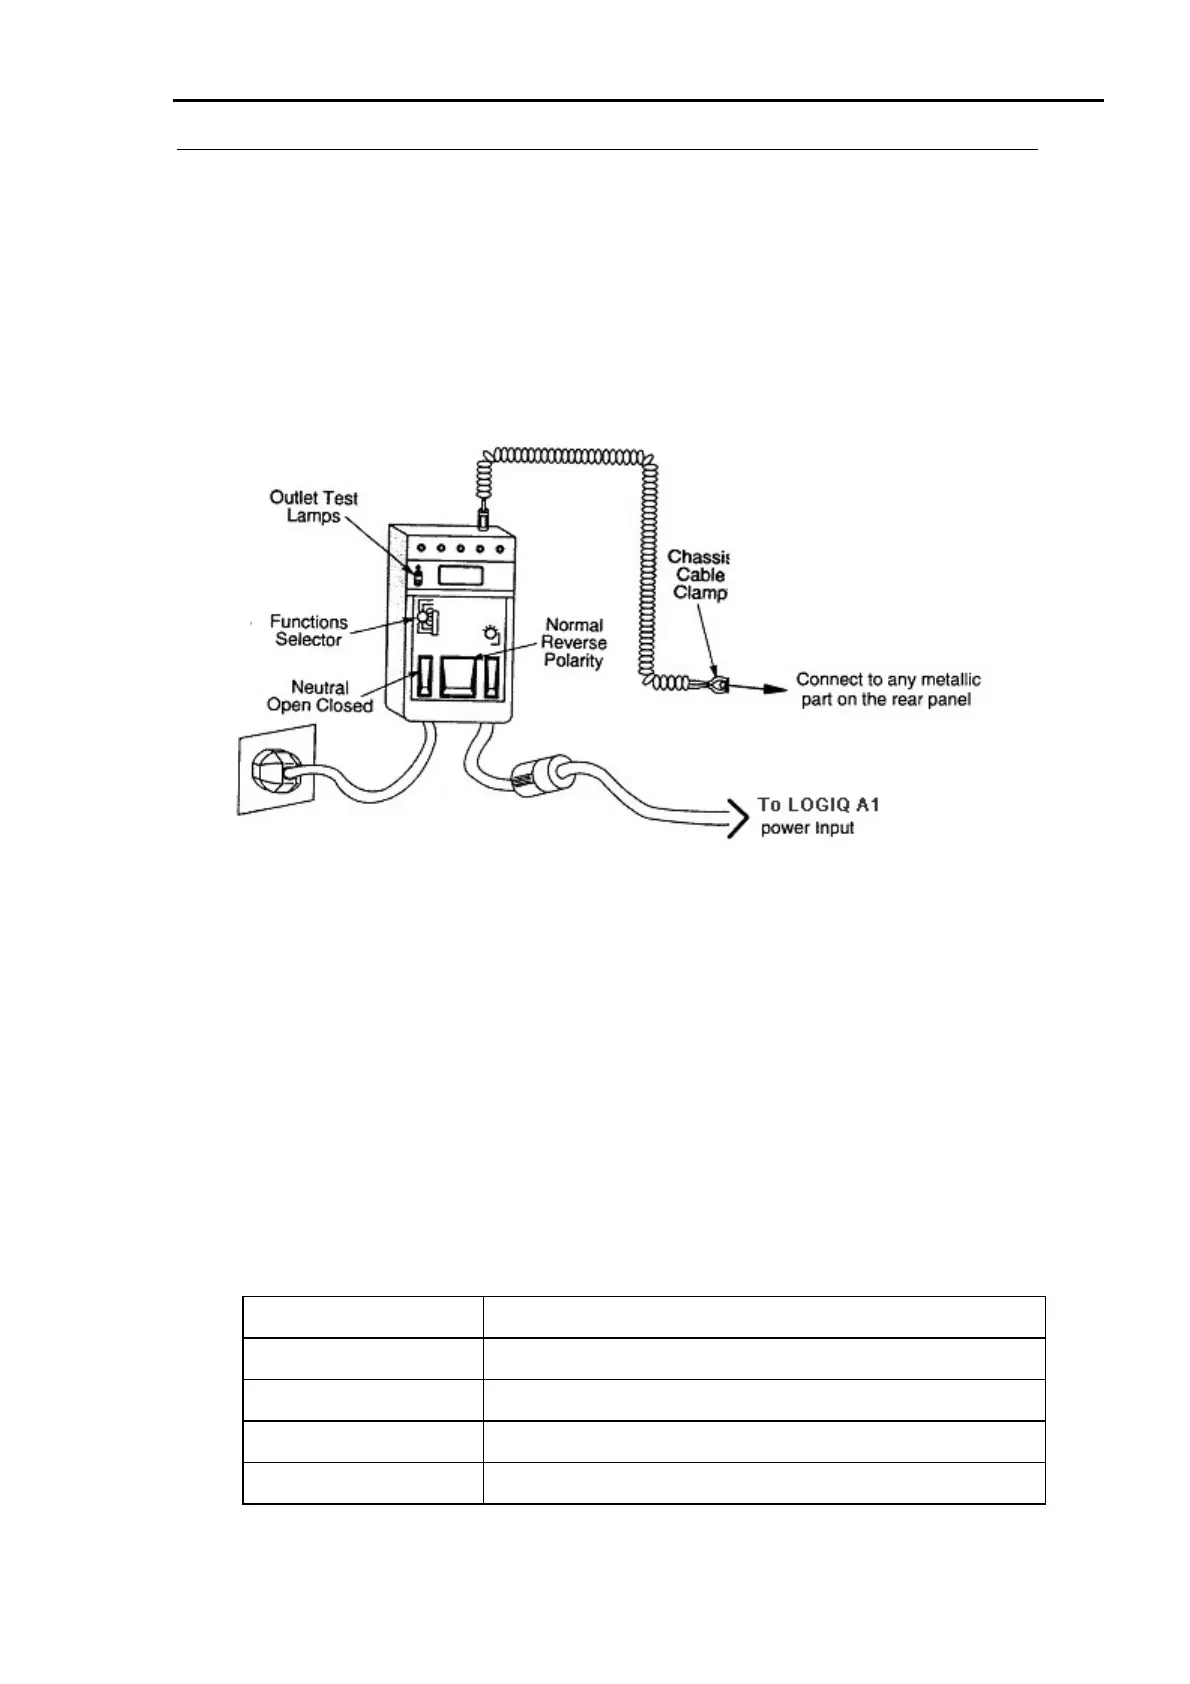
3. Plug the unit into meter, and the meter into the tested AC wall outlet.
GROUND AND CHASSIS LEAKAGE CURRENT TEST
Illustration 2-5
4. Plug the black chassis cable into the meter’s “CHASSIS” connector and attach the
black chassis cable clamp to an exposed metal part of LOGIQ A1. (Refer Illustration
2-4)
5. Set the tester’s “Function” switch to CHASSIS position.
6. Take readings for various locations as mentioned in Table 2-3.
Table 2-3
CHASSIS LEAKAGE CURRENT TEST CONDITIONS
Test Location
1 Mounting screw for probe receptacle
2 Real Panel
3 Mounting screw on the handle
4 Mounting screw for peripheral plugged into unit