Lullaby
TM
Warmer 2042376-001 Rev G ©2012 General Electric Company. All rights reserved. 65
Instructions to replace the front bracket:
1. Remove the front cover by removing the screw caps and unscrewing the M5 screws (Qty 4).
2. Unscrew the front bracket.
3. Separate the front bracket and the Teflon (if provided) sheet.
4. Replace the front bracket with a new one.
5. Fasten the front bracket and the Teflon (if provided) sheet using M3 pan screws, hex nuts (Qty
4) and washers (Qty 8).
6. Fix the bracket assembly to both hood extrusions using M5 Skt screws (Qty 4).
7. Fasten the front cover with screws and replace the screw caps.
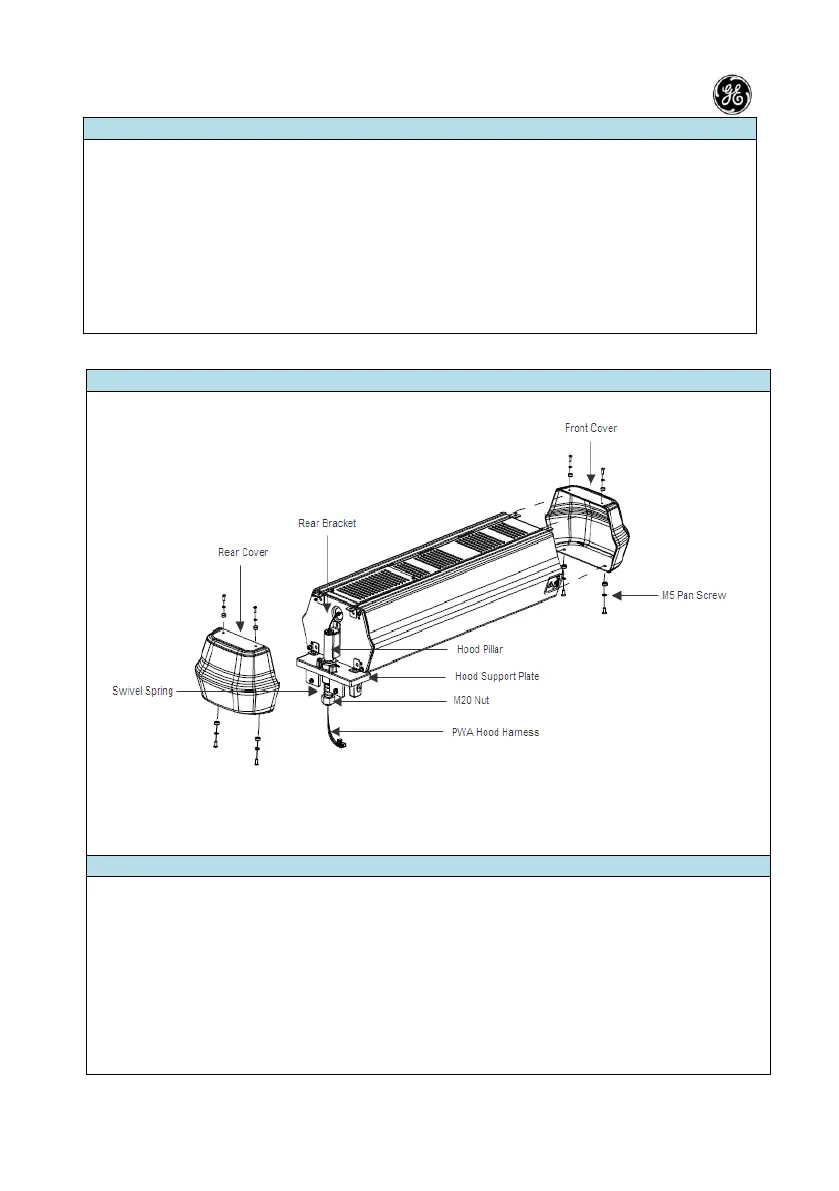
7.1.5 Replacing the Front and Rear Covers
Figure 85: Replacing Rear Covers
Instructions to replace Front cover
Follow the instructions given below to replace the front cover:
1. Remove the front cover by removing the screw caps and unscrewing the M5 pan screws (Qty 4).
2. Assemble the front cover to align with front bracket and fasten with screw caps and M5 pan
screws (Qty 4).
Instructions to replace Rear Cover
1. Remove the rear cover by removing the screw caps unscrewing the M5 pan screws (Qty 4).
2. Align the new rear cover with hood pillar and rear pillar
3. Fasten the rear cover with screw caps and M5 pan screws (Qty 4).
 Loading...


