EasyManua.ls Logo

GE PDT660SSF2SS - User Manual

GE PDT660SSF2SS
16 pages
Print Icon
To Next Page IconTo Next Page
Loading...
Installation Instructions
Built-In Dishwasher
If you have questions, call 800.561.3344 or visit our Website at: GEAppliances.ca.
READ CAREFULLY
KEEP THESE INSTRUCTIONS
FOR YOUR SAFETY
Read and observe all WARNINGS and CAUTIONS shown
throughout these instructions. While performing installations
described in this booklet, gloves, safety glasses or goggles
should be worn.
IMPORTANT – Observe all governing codes and
ordinances.
Note to Installer – Be sure to leave these instructions for the
consumer’s and local inspector’s use.
Note to Consumer – Keep these instructions with your
Owner’s Manual for future reference.
Skill Level – Installation of this dishwasher requires
basic mechanical, electrical and plumbing skills. Proper
installation is the responsibility of the installer. Product
failure due to improper installation is not covered under
the GE Appliance Warranty. See warranty information.
Completion Time – 1 to 3 Hours. New installations require
more time than replacement installations.
IMPORTANT – The dishwasher MUST be installed to
allow for future removal from the enclosure if service is required.
Care should be exercised when the appliance is installed or removed,
to reduce the likelihood of damage to the power supply cord.
If you received a damaged dishwasher, you should immediately
contact your dealer or builder.
Optional Accessories – See the Owner’s Manual for available
custom panel kits.
Your dishwasher is a water heating appliance.
BEFORE YOU BEGIN
Read these instructions completely and carefully.
29-5955-1 09-16 MCC
Printed in China.
persons, the installer must ensure that the dishwasher is
completely enclosed at the time of installation.
FOR PERSONAL SAFETY: Remove house fuse or open
circuit breaker before beginning installation. Do not use an
extension cord or adapter plug with this appliance.
The improper connection of the equipment grounding
conductor can result in a risk of electric shock. Check with
in doubt that the appliance is properly grounded.
If house wiring is not 2-wire with ground, a ground
must be provided by the installer. When house wiring
is aluminum, be sure to use UL-Listed anti-oxidant
compound and aluminum-to-copper connectors.
Do not remove wood base until you are ready to install the
dishwasher. The dishwasher will tip over when the door is
opened if base is removed.
CHECK THE FOLLOWING
Tub trim does not interfere with the door
Dishwasher is square and level at both the top and bottom
of the cabinet opening, with no twisting or distortion of the
tub or door
Drain hose is not pinched between the dishwasher and
CAUTION
WARNING
Question and Answer IconNeed help?

Do you have a question about the GE PDT660SSF2SS and is the answer not in the manual?

Overview

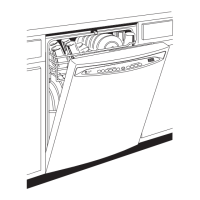
This document provides comprehensive installation instructions for a GE Appliances Built-In Dishwasher, designed for homeowners and professional installers. The manual emphasizes safety, proper preparation, and step-by-step guidance to ensure correct and efficient installation, minimizing the risk of damage or malfunction.

Function Description:

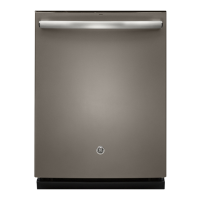
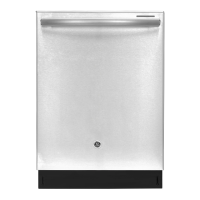
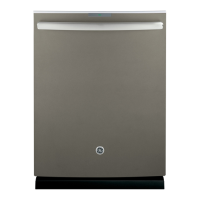
The GE Appliances Built-In Dishwasher is an appliance designed for automated dishwashing within a kitchen cabinet enclosure. Its primary function is to clean and sanitize dishes, glassware, and cutlery using water and detergent, providing a convenient and efficient alternative to manual washing. The installation process ensures the dishwasher is properly integrated into the kitchen's plumbing and electrical systems, allowing for optimal performance and safe operation. The appliance is designed to heat water internally, contributing to effective cleaning.

Usage Features:

The installation manual focuses on preparing the dishwasher for its intended use by detailing the necessary steps to integrate it into a kitchen environment. Key usage features, as implied by the installation process, include:

  • Built-in Design: The dishwasher is designed to be fully enclosed within kitchen cabinetry, providing a seamless and integrated look. This requires precise measurements and clearances during installation to ensure the door opens and closes without obstruction and the appliance sits flush with adjacent cabinets.
  • Water Heating Capability: The dishwasher is explicitly stated as a "water heating appliance," indicating it can heat water to optimal temperatures (120°F to 140°F recommended) for effective cleaning and sanitization. This feature is supported by instructions for connecting to a hot water supply and adjusting the water heater.
  • Drainage System: The installation outlines two primary drainage methods: an "Air Gap with Waste Tee or Disposer" and a "High Drain Loop" with a waste tee or disposer. These options ensure proper wastewater removal, preventing siphoning and maintaining hygiene. The manual stresses the importance of removing the disposer drain plug if connected to a disposer to prevent drainage issues.
  • Adjustable Leveling: The dishwasher features leveling legs (or wheels on some models) that allow installers to precisely adjust its height and ensure it is perfectly level. This is crucial for proper dish rack operation, water circulation, and smooth door opening/closing, preventing the door from hitting the tub or cabinet.
  • Door Balance System: The door balance is a critical feature, with instructions provided to check and adjust spring tension. A properly balanced door will self-close within 20 degrees from vertical, stay in position between 20 and 70 degrees, and fall fully open beyond 70 degrees. This ensures ease of loading and unloading and prevents the door from unexpectedly dropping or springing open.
  • Sound Insulation (on some models): The inclusion of a sound insulation piece indicates a feature designed to reduce operational noise, enhancing the user experience in the kitchen. Proper positioning of this piece during installation is key to its effectiveness.
  • Leak Protection (on some models): The manual mentions a "Floor Protect Pan" and "Leak Sensor" on certain models. These features are designed to detect and contain water leaks, providing an added layer of protection against water damage to the surrounding cabinetry and flooring.
  • Accessibility for Service: The installation instructions emphasize that the dishwasher "MUST be installed to allow for future removal of the enclosure if service is required." This design consideration ensures that maintenance and repairs can be performed without damaging the surrounding kitchen structure.

While the manual primarily covers installation, several points relate to initial setup and preventative measures that contribute to the appliance's long-term maintenance and performance:

  • Proper Grounding: Detailed instructions for both permanent and power cord connections emphasize the importance of proper grounding to prevent electric shock, a critical safety and maintenance aspect.
  • Water Line Flushing: Before connecting the hot water line to the dishwasher, the manual advises flushing the line to "clean out debris." This preventative step helps protect the dishwasher's internal components from sediment buildup, which could otherwise lead to clogs or damage over time.
  • Hose Replacement Recommendation: For flexible braided supply hoses, the manual recommends labeling them with the installation date and replacing them every 5 years. This is a crucial maintenance tip to prevent leaks and ensure the integrity of the water supply connection.
  • Drain Plug Removal: The repeated warning to "Always be sure disposer drain plug has been removed before attaching dishwasher drain hose to the disposer" is a critical maintenance check during installation. Failing to do so would prevent the dishwasher from draining, leading to operational issues and potential damage.
  • Pump Seal Lubrication: The pretest checklist includes adding "1 quart of water to the bottom of the dishwasher to lubricate the pump seal." This initial lubrication helps ensure smooth operation of the pump from the first use, potentially extending its lifespan.
  • Leak Checks: The "Dishwasher Wet Test" step involves running a cycle and checking for leaks under and around the dishwasher door. This immediate post-installation check is vital for identifying and correcting any plumbing issues before they cause significant damage, serving as an initial maintenance verification.
  • Clearance and Routing of Utility Lines: Throughout the installation, emphasis is placed on ensuring that "utility lines so they do not interfere with anything under or behind the dishwasher." This careful routing prevents pinching, kinking, or rubbing, which could lead to leaks, electrical shorts, or noise issues over time, thus contributing to the appliance's longevity and quiet operation.
  • Door Alignment and Tub Trim: Instructions to ensure the "tub trim does not interfere with the door" and that the "door fits and swings back behind cabinet frame" are important for preventing wear and tear on the door and tub, which could lead to premature failure or aesthetic damage.
  • Adjusting Spring Tension: The ability to adjust door spring tension ensures the door operates smoothly, preventing undue stress on hinges and other components, which is a key factor in long-term durability.

GE PDT660SSF2SS Specifications

General IconGeneral
TypeBuilt-In
ColorStainless Steel
Capacity16 Place Settings
Control TypeElectronic
StyleTraditional
Number of Options6
Tub MaterialStainless Steel
Water FiltrationYes
Energy Star CertifiedYes
Third RackYes
Soil SensorYes
Delay StartYes
Upper Rack FeaturesAdjustable
Lower Rack FeaturesAdjustable

Related product manuals