Do you have a question about the GE PDT660SSFSS and is the answer not in the manual?
Instructions for installer and consumer reference regarding installation documentation.
Outlines required skill level and estimated completion time for installation.
Read and observe all safety cautions, wear protective gear during installation.
Ensure dishwasher is fully enclosed to prevent electrical shock risk.
Lists all components included with the dishwasher for installation.
Lists necessary materials like fittings, sealant tape, and wire nuts.
Lists the hand, measuring, and cutting tools needed for installation.
Specifies rough cabinet opening dimensions and required clearances for installation.
Details drain hose length, connection types, and required air gaps or loops.
Warns about improper drain connection affecting dishwasher performance.
Instructions for drilling a 1-1/2 inch hole for the drain hose connection.
Specifies voltage, circuit protection, and safety precautions for electrical work.
Explains correct grounding for electrical safety for direct wired or corded models.
Details routing wiring through the cabinet and creating openings for cables.
Guides connecting the power cord or direct wiring to the dishwasher's junction box.
Details routing the hot water line, installing a shut-off valve, and checking pressure.
Caution about the dishwasher tipping forward if the door is opened prematurely.
How to check and adjust dishwasher door spring tension for proper balance.
How to adjust the dishwasher's leveling legs for proper height and stability.
Instructions for removing the dishwasher's toekick panel for access.
Guide for connecting an optional power cord kit to the dishwasher.
How to install the 90° elbow fitting onto the water inlet valve.
Securing the drain hose with clamps to the dishwasher's drain outlet.
Routing the drain hose through the designated cabinet wall hole.
Partially sliding the dishwasher into the opening, avoiding damage to front panel.
Pushing the dishwasher into the cabinet and ensuring front corners align with frame.
Adjusting leveling legs to ensure the dishwasher is perfectly level for performance.
Fastening the dishwasher to the countertop or cabinet sides using mounting clips/screws.
Connecting the hot water supply line to the dishwasher's inlet valve.
Cutting and connecting the drain hose to the air gap, waste tee, or disposer.
Illustrates methods for connecting drain lines with air gaps or high drain loops.
Crucial reminder to remove the disposer plug before attaching the drain hose.
Wiring the dishwasher's internal wires to the house electrical supply.
Comprehensive checklist for verifying installation before initial operation.
Running a test cycle to check for water entry, leaks, and proper draining.
Reattaching the toekick panel after all installation steps are completed.
Ensuring the consumer receives all necessary installation and operation manuals.
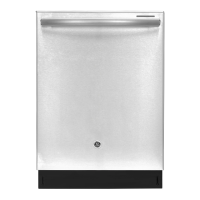
| Door color | Stainless steel |
|---|---|
| Control type | Touch |
| Built-in display | Yes |
| Appliance placement | Undercounter |
| Noise level | 45 dB |
| Delay start (max) | 9 h |
| Dishwashing programs | Auto, Glass/delicate, Eco, Normal, Pre-wash, Quick |
| Number of place settings | 16 place settings |
| Number of washing programs | 6 |
| Current | 9.9 A |
| AC input voltage | 120 V |
| AC input frequency | 60 Hz |
| Water consumption per cycle | - L |
| Energy consumption per cycle | - kWh |
| Annual energy consumption | 249 kWh |
| Sustainability certificates | ENERGY STAR |
| Package weight | 45360 g |
| Depth | 609.6 mm |
|---|---|
| Width | 603.3 mm |
| Height | 847.7 mm |