– 34 –
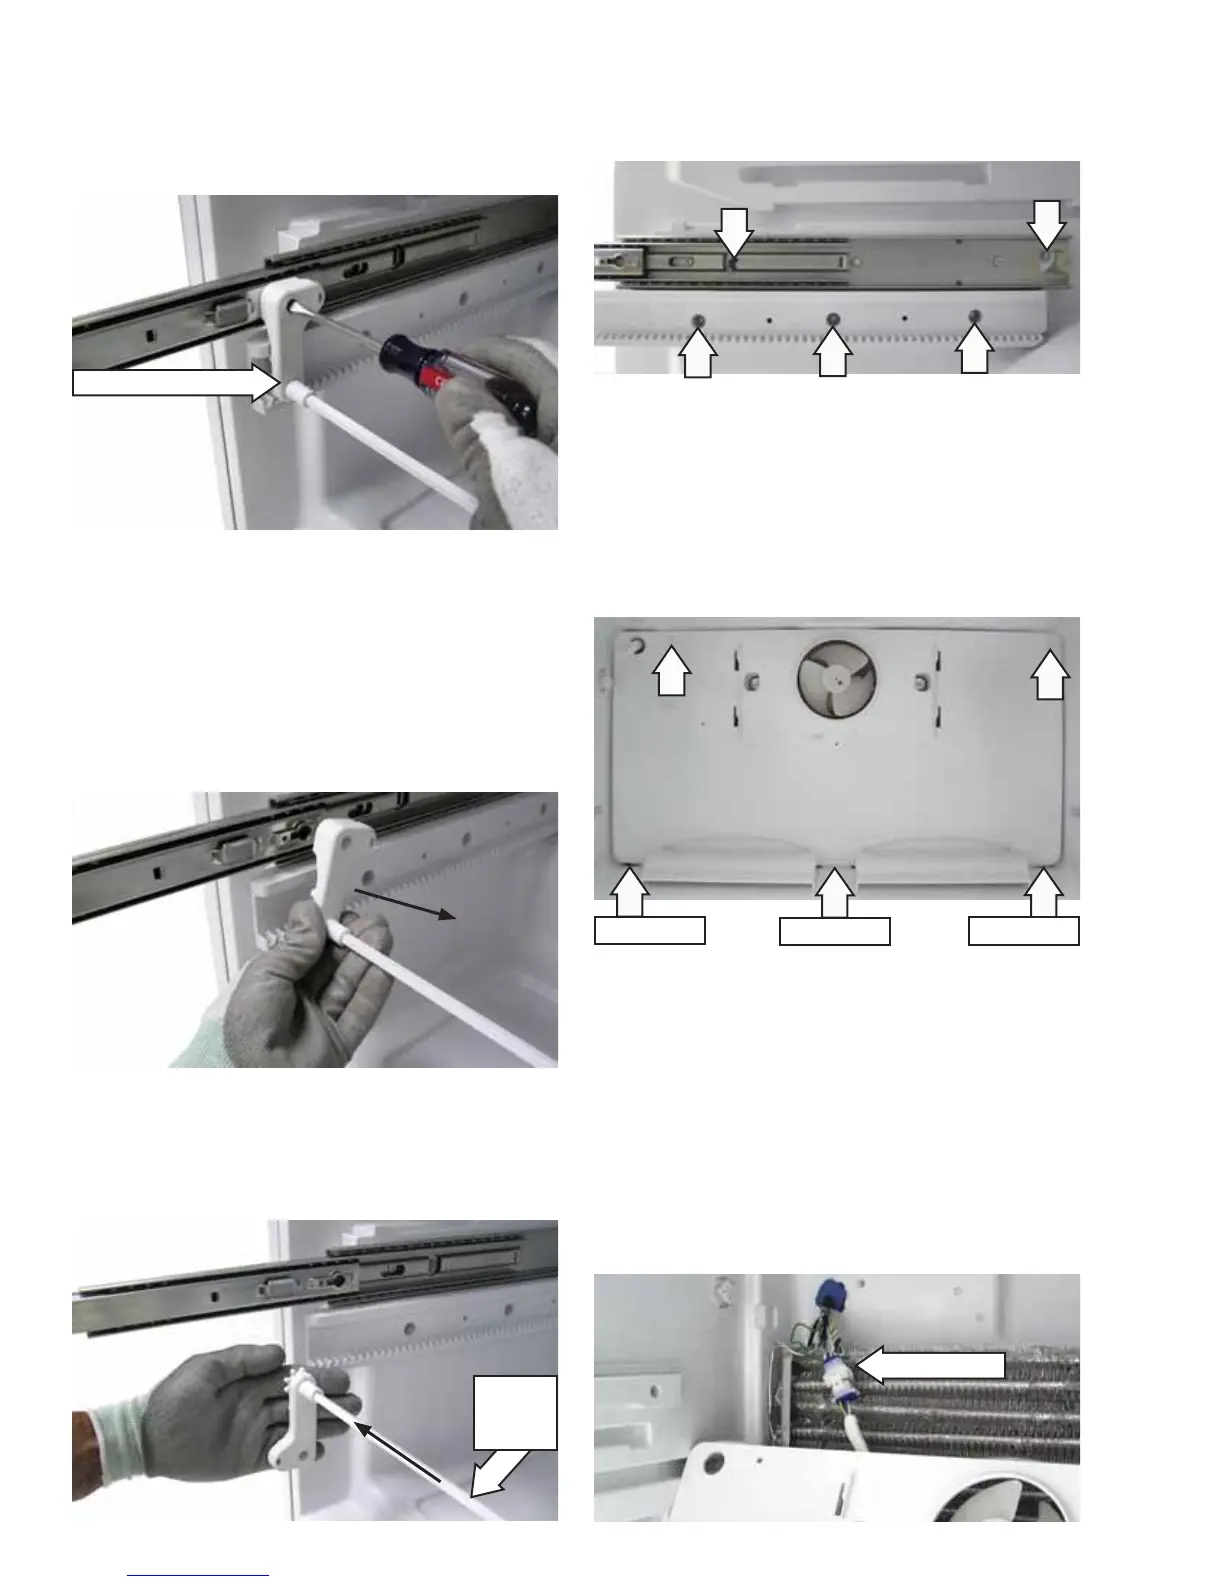
6. Using a 3/16-in. fl at blade screwdriver, remove
the 1/4-in. slotted hex-head screw from the
recess in either wheel sprocket arm. (Left wheel
sprocket arm shown.)
7. Pull the wheel sprocket arm straight out from
the track.
Caution: To prevent uneven drawer closure and
drawer rail assembly damage, install the wheel
sprocket arm in a position parallel to the opposite
sprocket arm.
9. Remove the fi ve recessed 1/4-in. hex-head
screws that attach each drawer rail assembly to
the freezer side walls.
Note: The evaporator cover is attached to the
evaporator compartment with two 1/4-in. hex-head
screws, 3 bottom tabs, and 5 snap tabs located on
the back of the cover.
10. Remove the two 1/4-in. hex-head screws from
the evaporator cover.
8. Pull out the wheel sprocket arm and wheel
sprocket axel from the opposite drawer rail
assembly.
11. Pull the right side of the evaporator cover
out, then maneuver the left side out from the
icemaker fi ll tube (if present), and harness
receptacle.
12. Lower the evaporator cover. Reach behind the
top left corner, pull up, and release the fan wire
harness from the retainer clip attached to the
cover.
13. Disconnect the wire harness.
Wheel Sprocket Arm
Bottom Tab
Bottom Tab
Bottom Tab
Wire Harness
Wheel
Sprocket
Axel