Installation Instructions
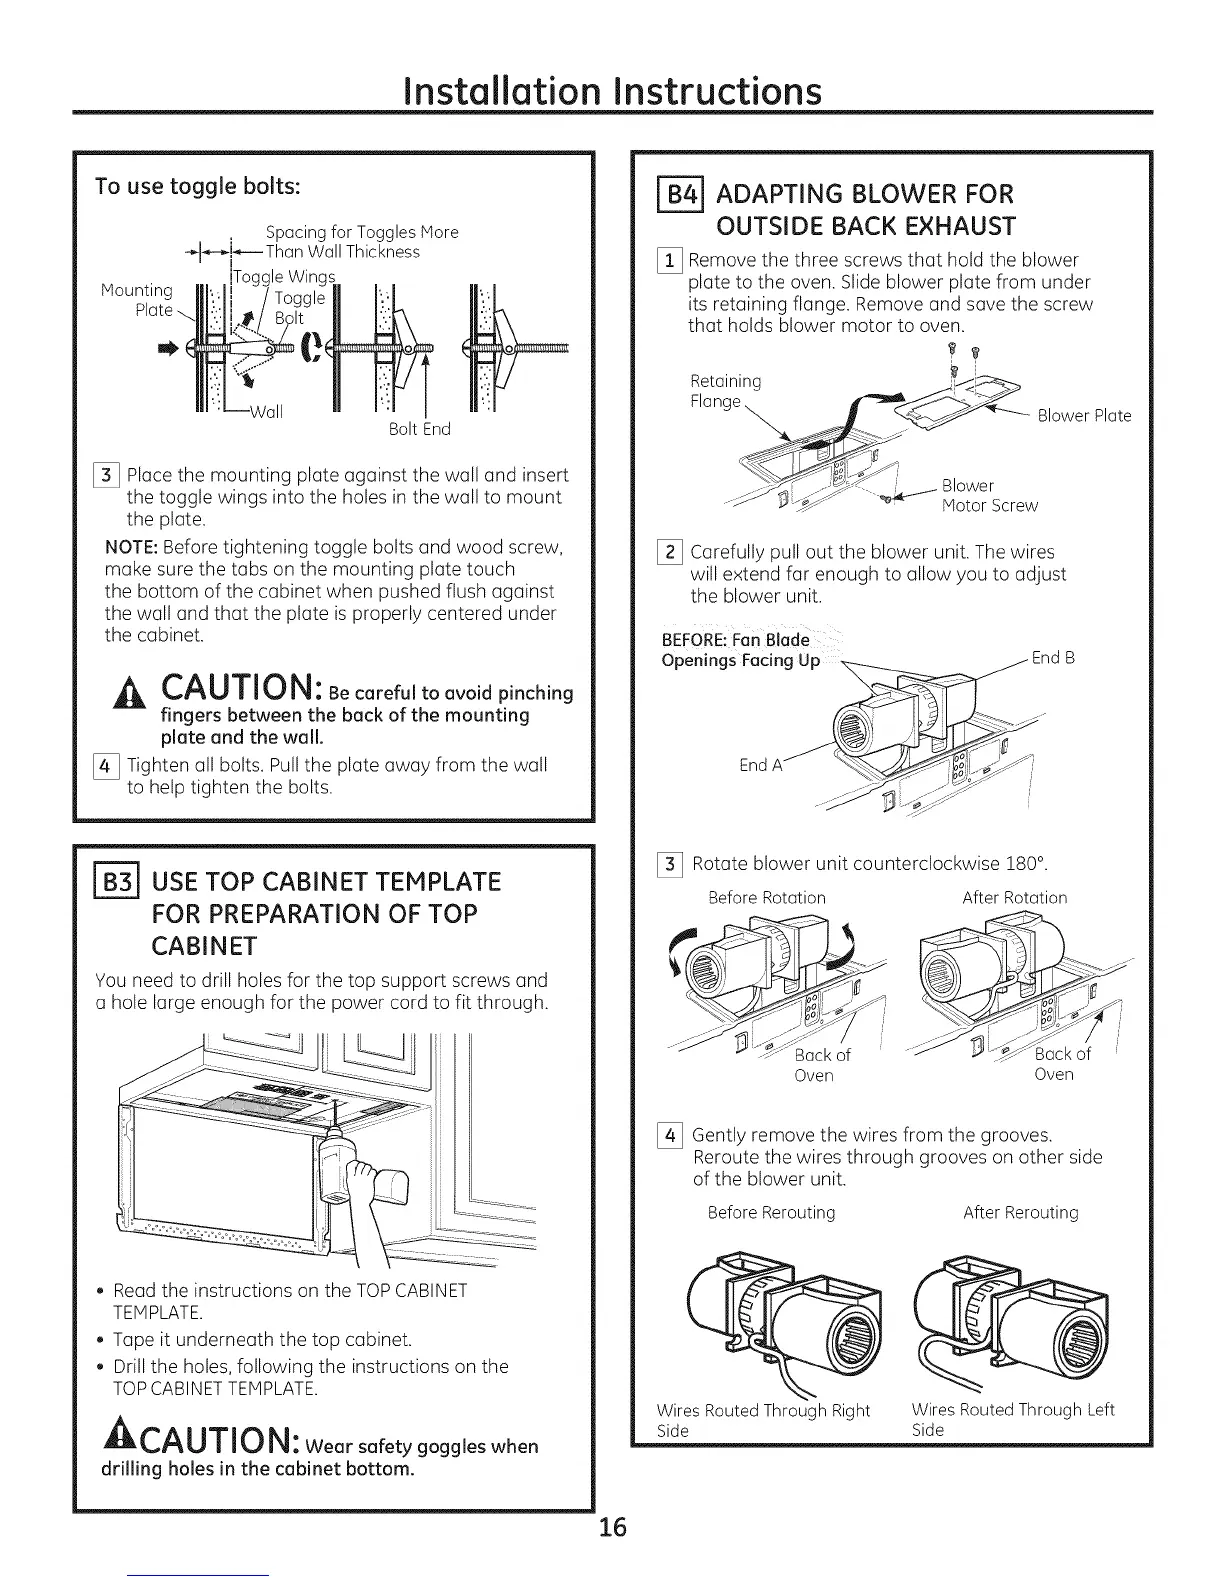
To use toggle bolts:
Spacing for Toggles More
-_l_-_----Than Wall Thickness
Mounting Toggle Wings
Platemj__"
Bolt End
[_ Place the mounting plate against the wall and insert
the toggle wings into the holes in the wall to mount
the plate.
NOTE:Before tightening toggle bolts and wood screw,
make sure the tabs on the mounting plate touch
the bottom of the cabinet when pushed flush against
the wall and that the plate is properly centered under
the cabinet.
CAUTION: Be careful to avoidpinching
fingers between the back of the mounting
plate and the wall.
[_ Tighten all bolts. Pull the plate away from the wall
to help tighten the bolts.
['_ USE TOP CABINET TEMPLATE
FOR PREPARATION OF TOP
CABINET
You need to drill holes for the top support screws and
a hole large enough for the power cord to fit through.
• Read the instructions on the TOP CABINET
TEMPLATE.
• Tape it underneath the top cabinet.
Drill the holes, following the instructions on the
TOP CABINET TEMPLATE.
CAUTION: Wearsafety goggles when
drilling holes in the cabinet bottom.
I-_ ADAPTING BLOWER FOR
OUTSIDE BACK EXHAUST
[_ Remove the three screws that hold the blower
plate to the oven. Slide blower plate from under
its retaining flange. Remove and save the screw
that holds blower motor to oven.
Retaining /._<J_
Flange__ __...__.___
_, _. q7"_ _--_ Blower Plate
__ Blower
._"- _i-_ MotorScrew
[_ Carefully pull out the blower unit. Thewires
will extend far enough to allow you to adjust
the blower unit.
BEFORE:Fan Blade
End
[_ Rotate blower unit counterclockwise 180°.
Before Rotation After Rotation
Back of
Oven Oven
3ack of
[_ Gently remove the wires from the grooves,
Reroute the wires through grooves on other side
of the blower unit.
Before Rerouting After Rerouting
Wires Routed Through Right
Side
Wires RoutedThroughLeft
Side
16