– 12 –
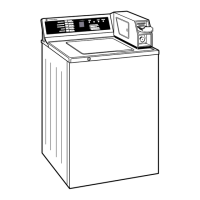
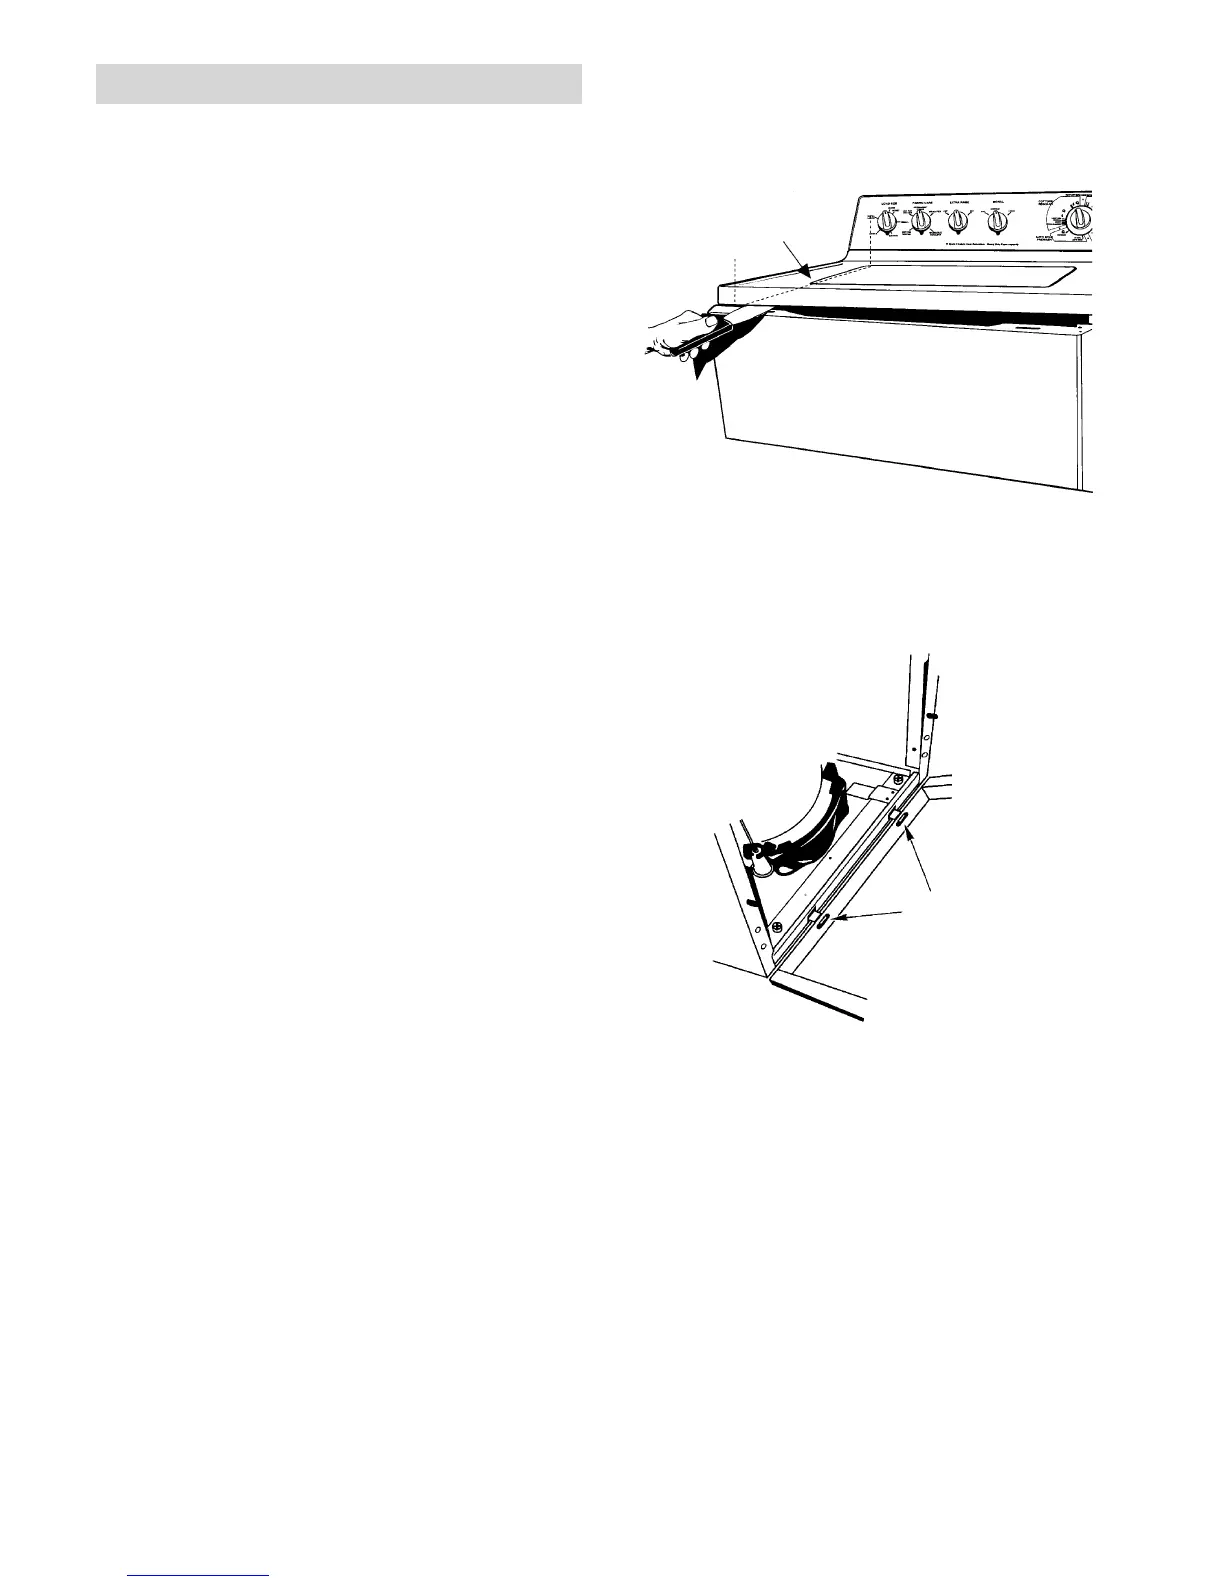
BOTTOM
TABS
ROTATE FRONT PANEL
OUT AND LIFT OFF TABS
TO REMOVE
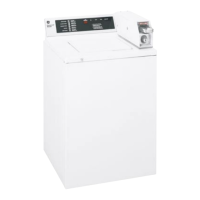
LOCATE SPRING CLIPS
ON EITHER
SIDE AND RELEASE
WITH PUTTY KNIFE
LOCATE AND RELEASE
TWO SPRING CLIPS
Cabinet
Cabinet is galvanized sheet metal, with powdered
paint coating and is rust resistant. It has a fully
enclosed bottom, and is 3 sided with a front panel.
The lid has patented colored lid instructions. The
levelling legs are installed from the factory, and are
Polypropylene with Santoprene non-skid base. Base
of leveling legs have a 1" hex nut design to allow
easy adjustment if necessary. Rear is self leveling,
and is accomplished by lifting the rear legs 4" off the
floor and lowering the washer.
To Service Front Panel:
1. Locate the two spring clips between cover and
front panel and cover.
2. Insert putty knife and push to release clips.
3. Rotate front panel forward and lift off cabinet
base locating tabs.
4. To reassemble, place front panel on washer base
locating tabs, rotate up into place and press top
of panel at clips, until panel snaps into place.
To Service Cover/Lid Assembly:
1. Remove front panel.
2. Remove two 1/4" hex screws front left and right
side of cabinet top support.
3. Pull cover/lid assembly towards you and up
about 2".
4. Release lid switch wire connector, wires are
orange/orange white. Connector is located in
right rear corner of cover, you may need to press
down on wiring to allow clearance to remove
connectors.
5. Remove cover/lid assembly, taking care not to
allow lid to swing out and be damaged.
6. Reverse steps to reassemble.
 Loading...