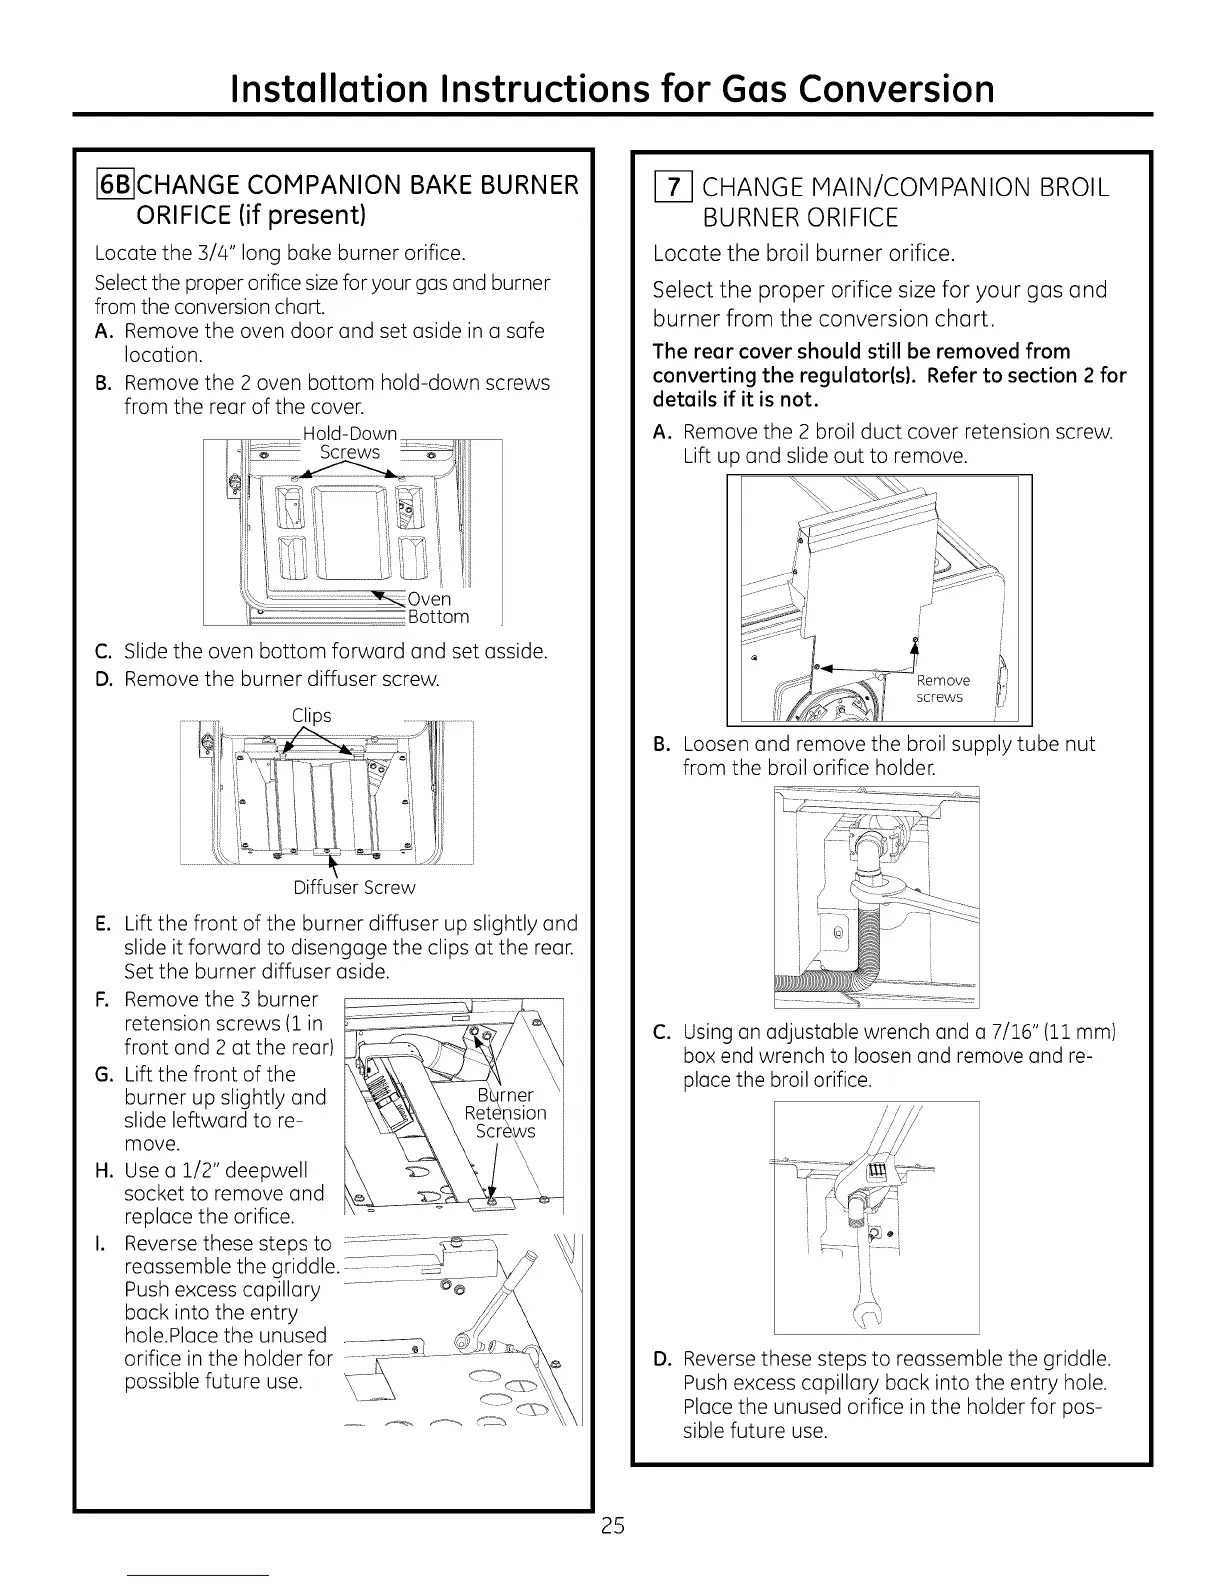
Installation Instructions for Gas Conversion
i6--_CHANGE COMPANION BAKE BURNER
ORIFICE (if present)
Locate the 3/4" long bake burner orifice.
Select the proper orifice size for your gas and burner
from the conversion chart.
A. Remove the oven door and set aside in a safe
location.
B. Remove the 2 oven bottom hold-down screws
from the rear of the cover.
Hold-Down
C. Slide the oven bottom forward and set asside.
D. Remove the burner diffuser screw.
Diffuser Screw
E. Lift the front of the burner diffuser up slightly and
slide it forward to disengage the clips at the rear.
Set the burner diffuser aside.
R Remove the 3 burner
retension screws (1 in
front and 2 at the rear)
G. Lift the front of the
burner up slightly and
slide leftward to re-
move.
H. Use a 1/2" deepwell
socket to remove and
replace the orifice.
I. Reverse these steps to
reassemble the griddle.
Push excess capillary
back into the entry
hole.Place the unused
orifice in the holder for
possible future use.
i-_ CHANGE MAIN/COMPANION BROIL
BURNER ORIFICE
Locate the broil burner orifice.
Select the proper orifice size for your gas and
burner from the conversion chart.
The rear cover should still be removed from
converting the regulatoris). Refer to section 2 for
details if it is not.
A. Remove the 2 broil duct cover retension screw.
Lift up and slide out to remove.
B°
Remove
screws
Loosen and remove the broil supply tube nut
from the broil orifice holder.
! I
C°
Using an adjustable wrench and a 7/16" (11 mm)
box end wrench to loosen and remove and re-
place the broil orifice.
//
/
/
/
D°
Reverse these steps to reassemble the griddle.
Push excess capillary back into the entry hole.
Place the unused orifice in the holder for pos-
sible future use.
25
 Loading...