Design Guide
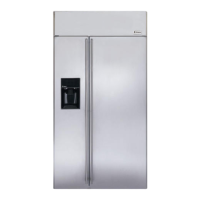
SIDE PANELS
Side panels must be used
whenever the sides of the
refrigerator will be exposed.
The !/4" side panels will
slip into the side case trim.
Secure the panels to the
refrigerator with stick-on
hook and loop fastener
strips. Order the side
panels from the cabinet
manufacturer.
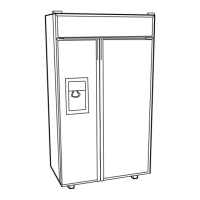
, Cut a notch in the top
front corner as shown
to allow clearance for
corner keys in the front
side trim.
_84"
]_'3" to 4"
2-9/16"
* Depending on installation heighL
TOOLS AND MATERIALS REQUIRED
, Tinsnips to cut banding
, Stepladder
, !" Bit extenion
, Tape measure
, Gloves
, !/4" Drywall screws
,5-Gal. Bucket with cover
,6" Spirit level
, Appliance hand truck
, Tubing cutter
,7/16" open-end wrench
, #2 Phillips screwdriver
, Drill and appropriate bits
,5/!6", 7/!6" socket
, Safety glasses
, !-!/8" open end wrench
, Pliers
,1/4", 5/16" Combo Rachet
,35" long 2x4 for Anti-Tip support
, !/4" copper water line tubing or GE SmartConnect TM
Refrigerator Tubing kits
, Water shut-off valve
, Custom panels for doors and grille panel
, Screws to secure refrigerator to cabinetry
, Stick-on hook and loop fastener strips for
1/4" side panels
HARDWARE SUPPLIED
, Water filter bypass plug
, Anti-Tip brackets
,1/4" nut and ferrule
, Dispenser trims for 1/4" and 3/4" overlay panels
(for use with Custom Panel models).
, Aluminum cover trim for 3/4" overlay panels
with custom handles. Includes 22 flat head screws
and 4 endcaps.
FLOORING
For proper installation, this refrigerator must be placed
on a level surface of hard material that is at the same
height as the rest of the flooring. This surface should
be strong enough to support a fully loaded refrigerator,
or approximately 1,500 Ibs.
NOTE: Protect the finish of the flooring. Cut a large
section of the cardboard carton and place under
the refrigerator where you are working.
GROUNDING THE REFRIGERATOR
IMPORTANT - (Please read carefully)
FOR PERSONAL SAFETY,THIS APPLIANCE MUST
BE PROPERLY GROUNDED.
The power cord of this appliance is equipped
with a 3-prong (grounding) plug which mates
with a standard :S-prong (grounding) wall receptacle
to minimize the possibility of electric shock hazard
from this appliance,
Have the wall outlet and circuit checked by
a qualified electrician to make sure the outlet
is properly grounded.
Where a standard 2-prong wall outlet is encountered,
it is your personal responsibility and obligation
to have it replaced with a properly grounded
3-prong wall outlet.
DO NOT, UNDER
ANY CIRCUMSTANCES,
CUT OR REMOVE
THE THIRD (GROUND) PRONG
FROM THE POWER CORD.
DO NOT USE AN ADAPTER PLUG TO CONNECT
THE REFRIGERATOR TO A 2-PRONG OUTLET.
DO NOT USE AN EXTENSION CORD WITH THIS
APPLIANCE.
10
 Loading...