20
09665-08.2018-Gb
7 I Installation of service kits
Removal (see Fig. 6):
Unscrew the screws (1) from the cylinder cover (2) and dismount cylinder cover (2) with valve plate (4).
Remove the gasket residues from the body of the compressor.
Installation (see Fig. 6):
Apply a little oil to the lower valve plate gasket (5) install the upper valve plate gasket (3) (metallic gasket) dry.
Pay attention to the correct installation position of the gaskets (3, 5) of the valve plate (4) and of the cylinder cover (2).
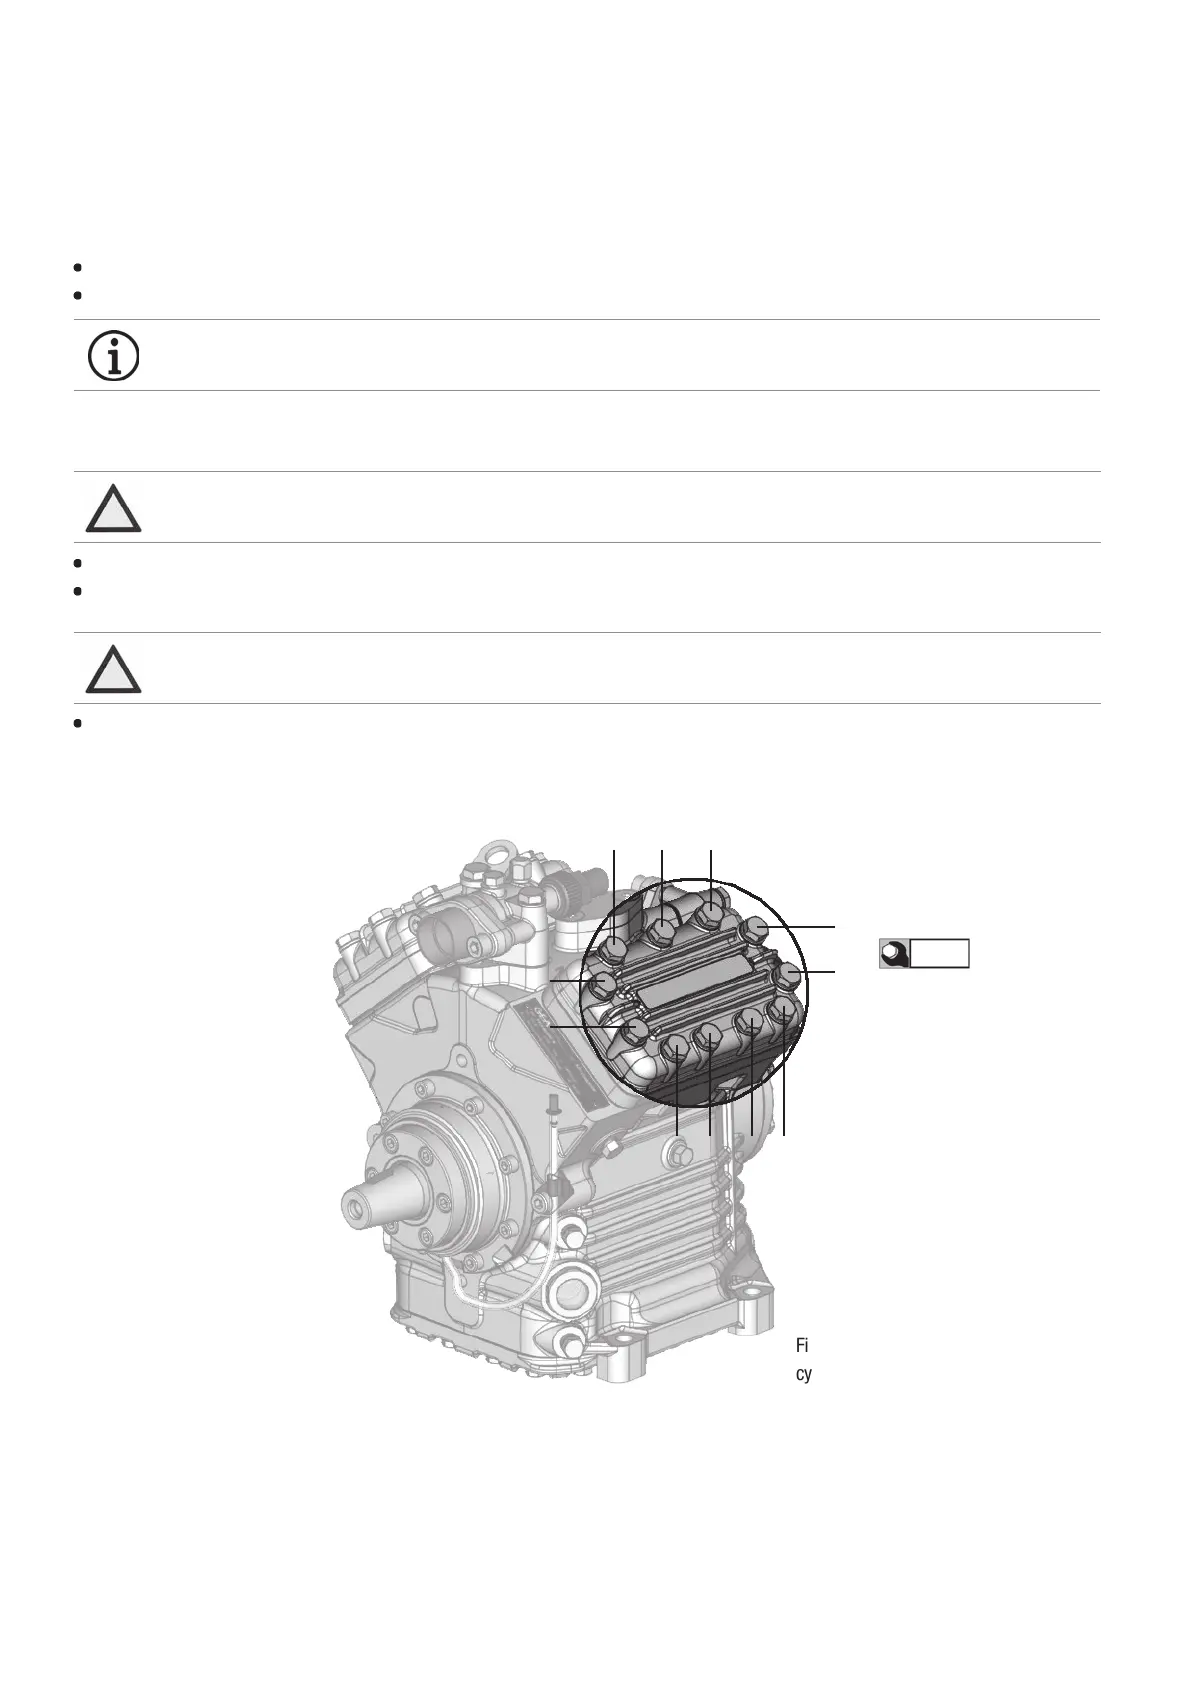
Tighten the cylinder cover screws (Pos. 1 in Fig. 6) according to the sequence shown in Fig. 7!
Fig. 7: Sequence for tightening the
cylinder cover screws
9
11
10
8
5 1 4
6 3 2 7
ATTENTION The conversion of the compressor from one type of valve plate to another is not possible!
INFO Don‘t let any gasket residues fall into the compressor
ATTENTION Install the K type valve plate (Item No. 80010) only with the inscription „TOP“ facing upwards (see Fig. 6).
60 Nm
 Loading...