31
09665-08.2018-Gb
10 I Disassembly of the compressor
7
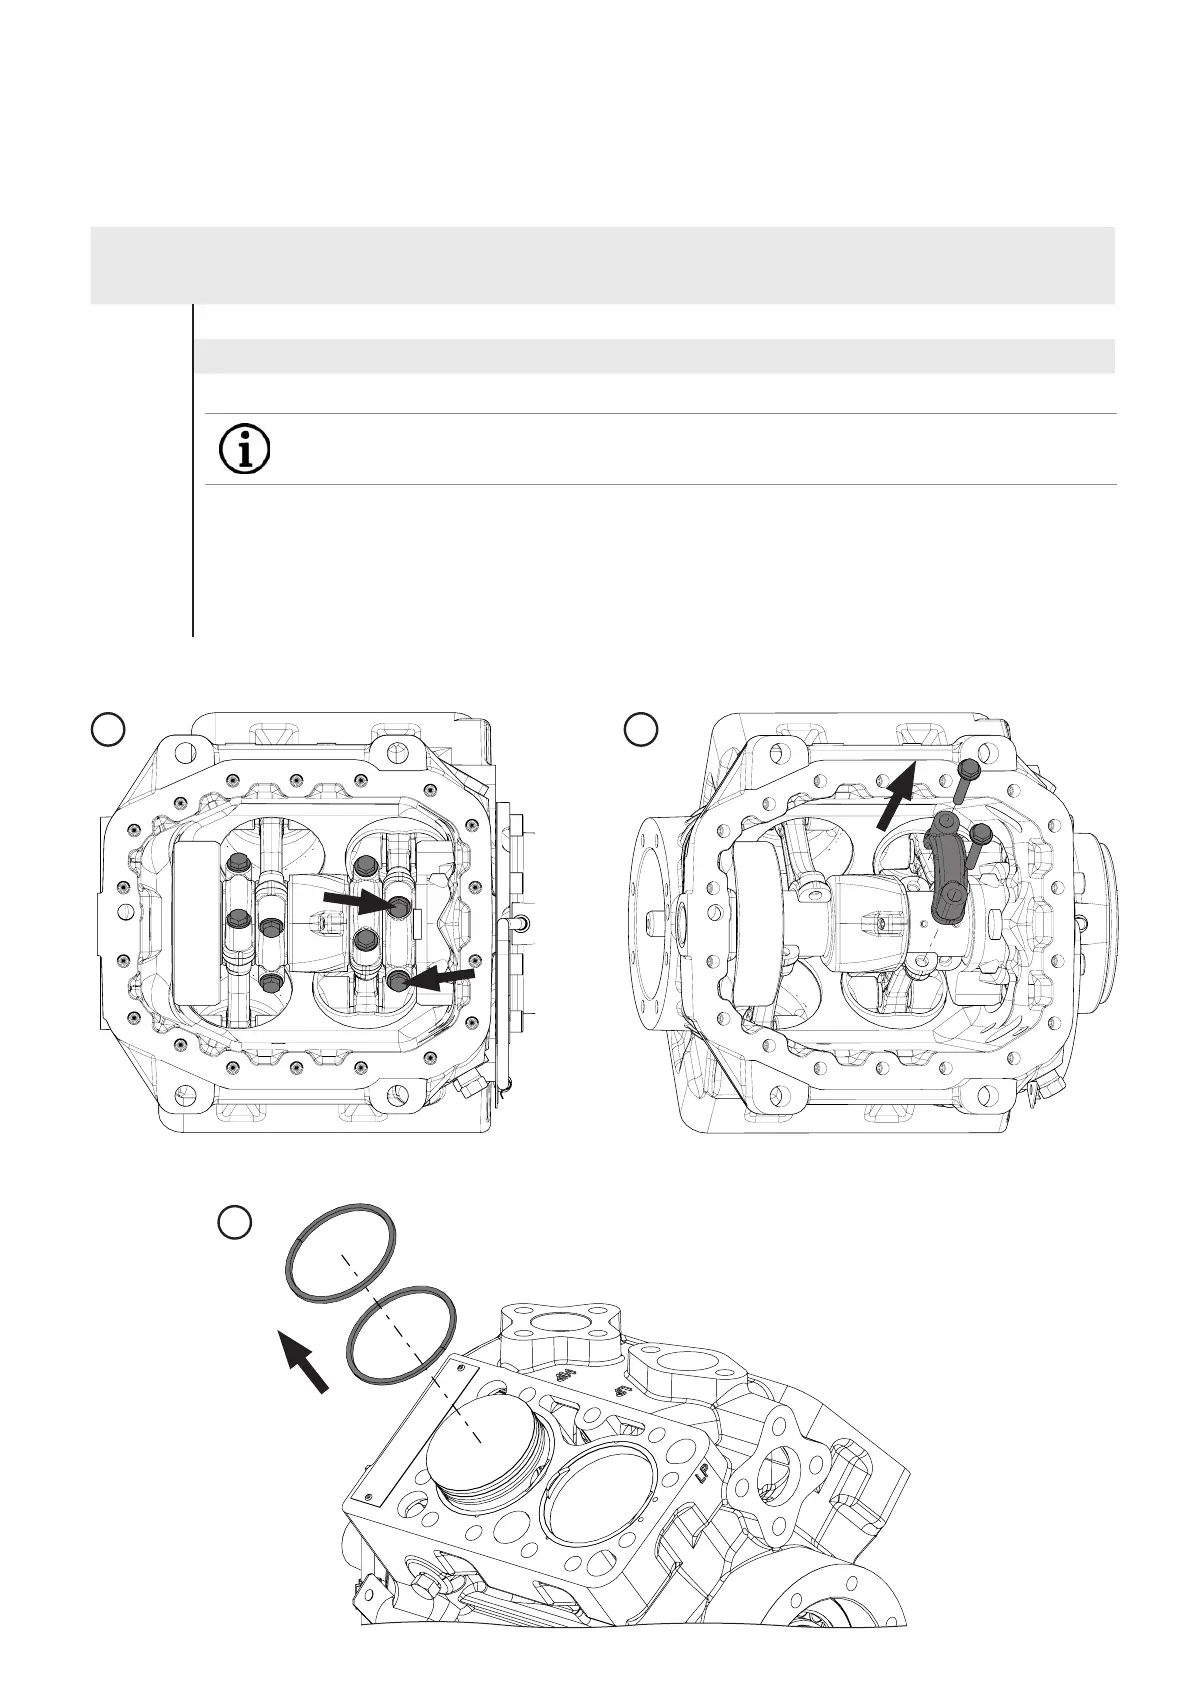
Disassembly of the compressor rods from the crankshaft
Position in
parts list
Parts list position: 2040 opt. 2045 or 2030 opt. 2035 together with 2100
Tools: Spanner SW 10
Working course
2100
2100
2040,
2045
300, 290
- Unscrew the hexagon head screws from the connecting rod cap
- Mark the connecting rod cap and remove it
- Push the piston and connecting rod upwards until the stop
- Remove the piston rings
- The same procedure should be applied for the remaining connecting rods
INFO In order to prevent any mix-up during reassembly, mark the connecting rods and caps
belonging together clearly and in a wipe-resistant fashion!
1 2
3
 Loading...