ENGLISH
33
9 - INSTALLATION
9.1 DIRECTIONS FOR PROPER INSTALLATION
- The softener must be installed by qualified staff who shall issue a certificate of proper installation in
compliance with the European and national regulations.
- The softener must be installed in places with enough room for maintenance.
- The installation of the softener must be carried out by following the drawings shown at paragraphs 9.2
– 9.3 – 9.4.
- The installer must not run water inside the softener in any case.
- The user shall notify the installation to the national competent authority.
- The user shall take care of getting the salt.
- The installation of softeners for domestic potable use must be carried out by following the directions
below:
• placing the equipment in hygienically suitable areas;
• presence of a water meter before the equipment and of taking points for analysis before and after
treatment systems;
• presence of a by-pass system for cutting out the softener;
• presence of a manual or automatic mixing valve for adjusting the water hardness at the outlet
(optional);
• presence of a check valve;
• device for the automatic disinfection of the resins (AD) – recommended;
• in case og hight and/ or pulsating mains pressure, it is necessary to install a pressure reducer and a
water hammer shock absorber before the filter.
Make sure the following conditions are observed:
- Pressure: 2÷6 bar
- Room temperature: 5÷40°C
- Water temperature: 5÷40°C
- Minimum water flow rate: see table below
- Mains voltage: 230 Volt +/– 10% - 50/60 Hz
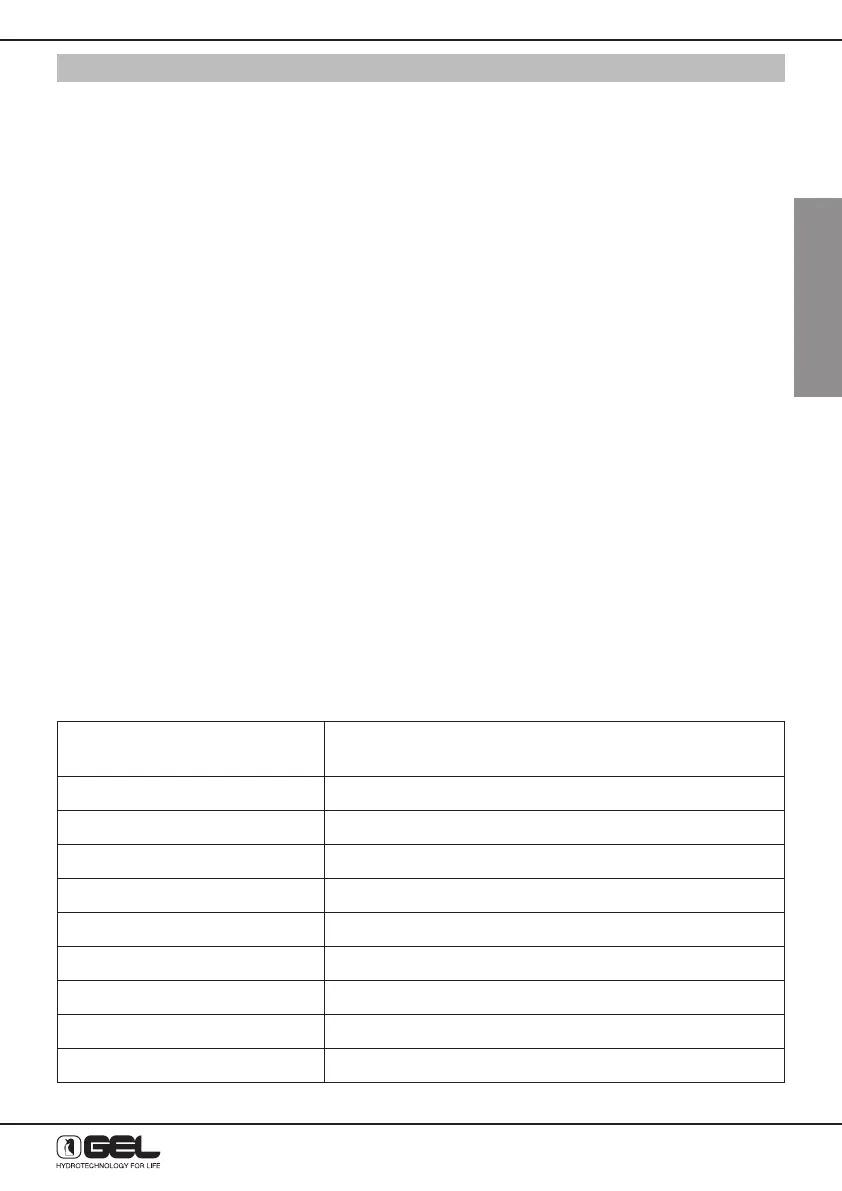
Model of softener Minimum flow rate at the entry
(l/min)
Decalux 5 Basic 5,33
Decalux 8 Basic 5,33
Decalux 15 Basic 8,0
Decalux 20 Basic 8,0
Decalux 25 Basic 8,0
Decal 15 Basic 8,0
Decal 20 Basic 8,0
Decal 25 Basic 8,0