System Setup (cont.):
Mounting the DCP:
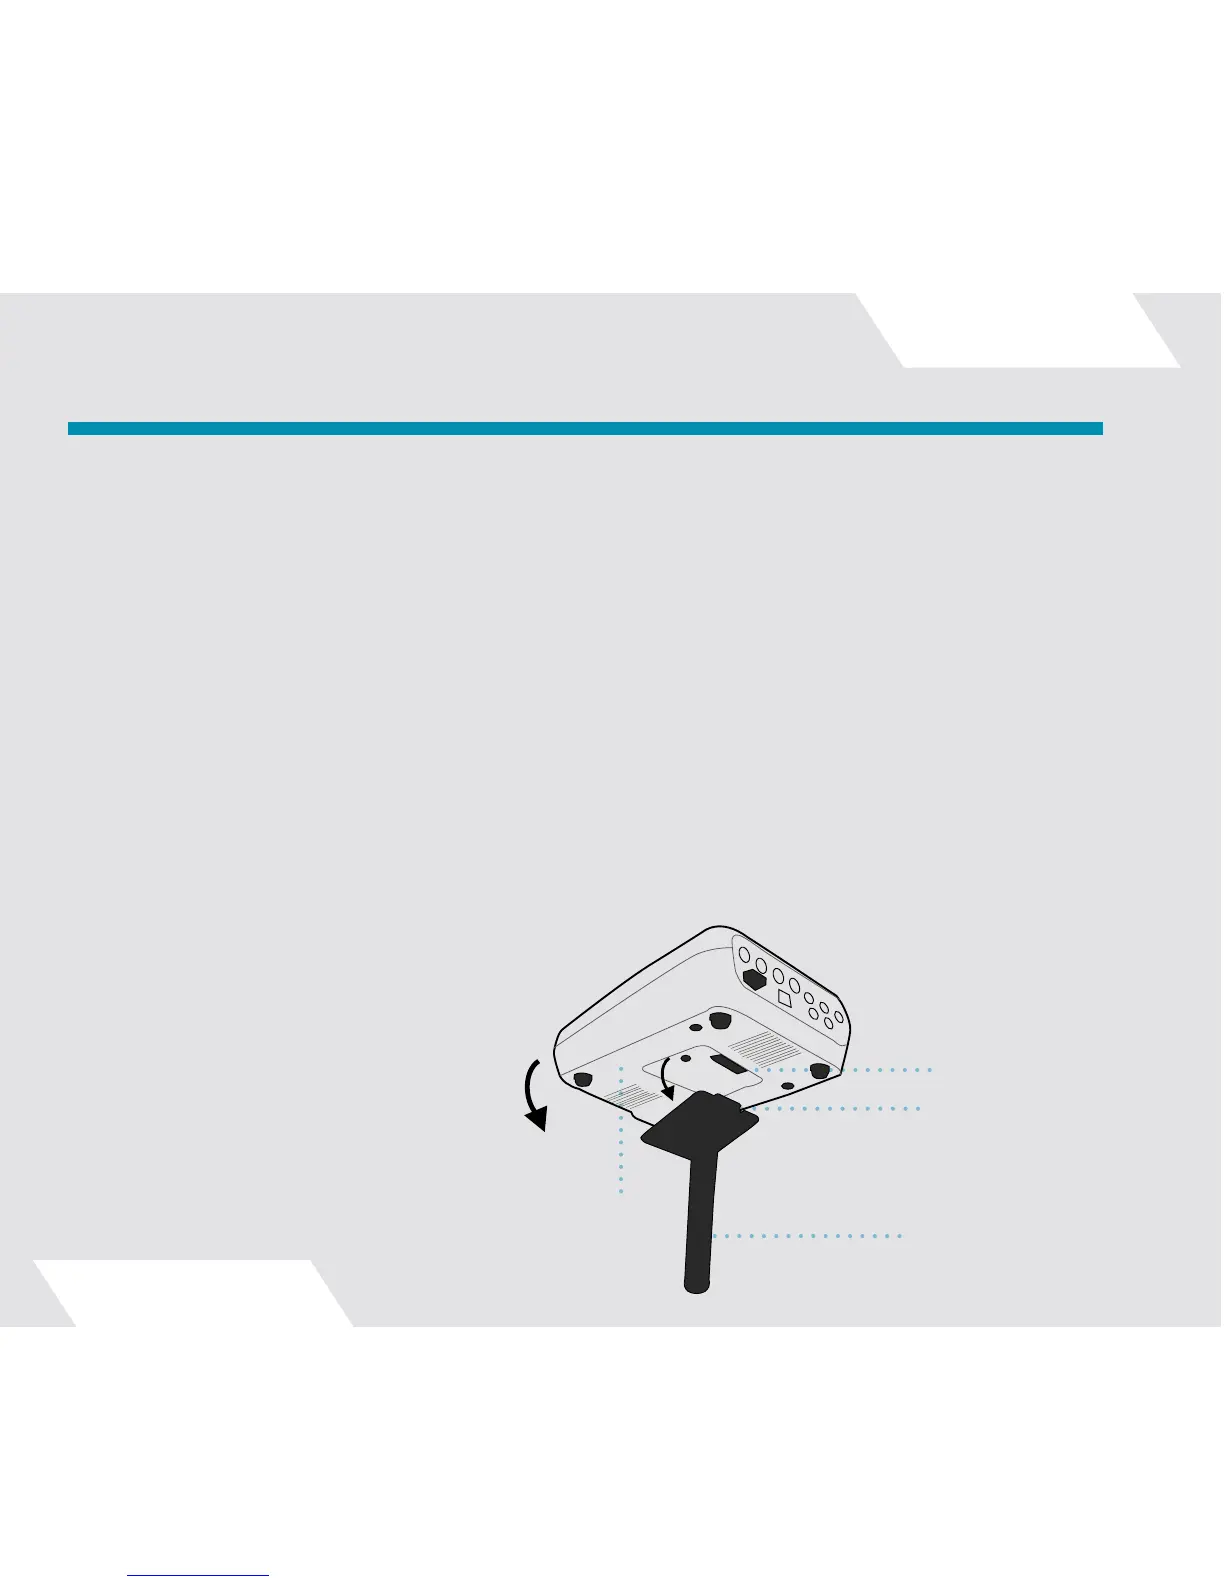
Secure the DCP Mounting Bracket to your existing drum hardware. The bracket has an embedded magnet that
makes mounting the DCP quick and easy. Slide the lip of the mount into the tab on the underside of the DCP.
The DCP will snap into place, locking with the mounting bracket.
Note that it is normal for the bottom surface of the DCP to become quite warm while in operation. It is recom-
mended that you not place the DCP on a soft surface such as carpet or upholstery that could prevent the flow
of air around the unit. Use the mounting stand or place the unit on a hard surface, on its rubber feet.
Connect the supplied 12VDC regulated power adapter to the power input of the controller. Use only the power
supply provided. Make sure it’s switched to the “Standby” position (blue “Z” logo pulsating) while you connect
your cymbal pickups in the following steps.
Important: Always switch the DCP to “Standby” mode before connecting or disconnecting cymbal pickup
cables. Connecting or disconnecting cymbal pickups with the unit fully powered on may result in a DCP crash,
loss of user settings data, or speaker damage. Note that even with the DCP switched to Standby, the pickup
lights will flash briefly during plug insertion; this is normal.
Setting Up Your Digital Cymbal Processor:
Alignment Channel
●
Bottom of DCP
●
Alignment Tab
●
DCP Mounting Bracket
●
9