22 Owner’s Manual for G4-ECO Light Tower
Operation
Adding Fuel
(000204)
DANGER
Explosion and Fire. Do not overfill fuel tank.
Overfilling may cause fuel to leak and ignite
or explode, resulting in death or serious
NOTE: Never allow dust, foreign matter or water to enter
fuel tank.
1. Place unit on a firm, level surface in a well venti-
lated area.
2. Verify unit is OFF and cooled for a minimum of two
min
utes.
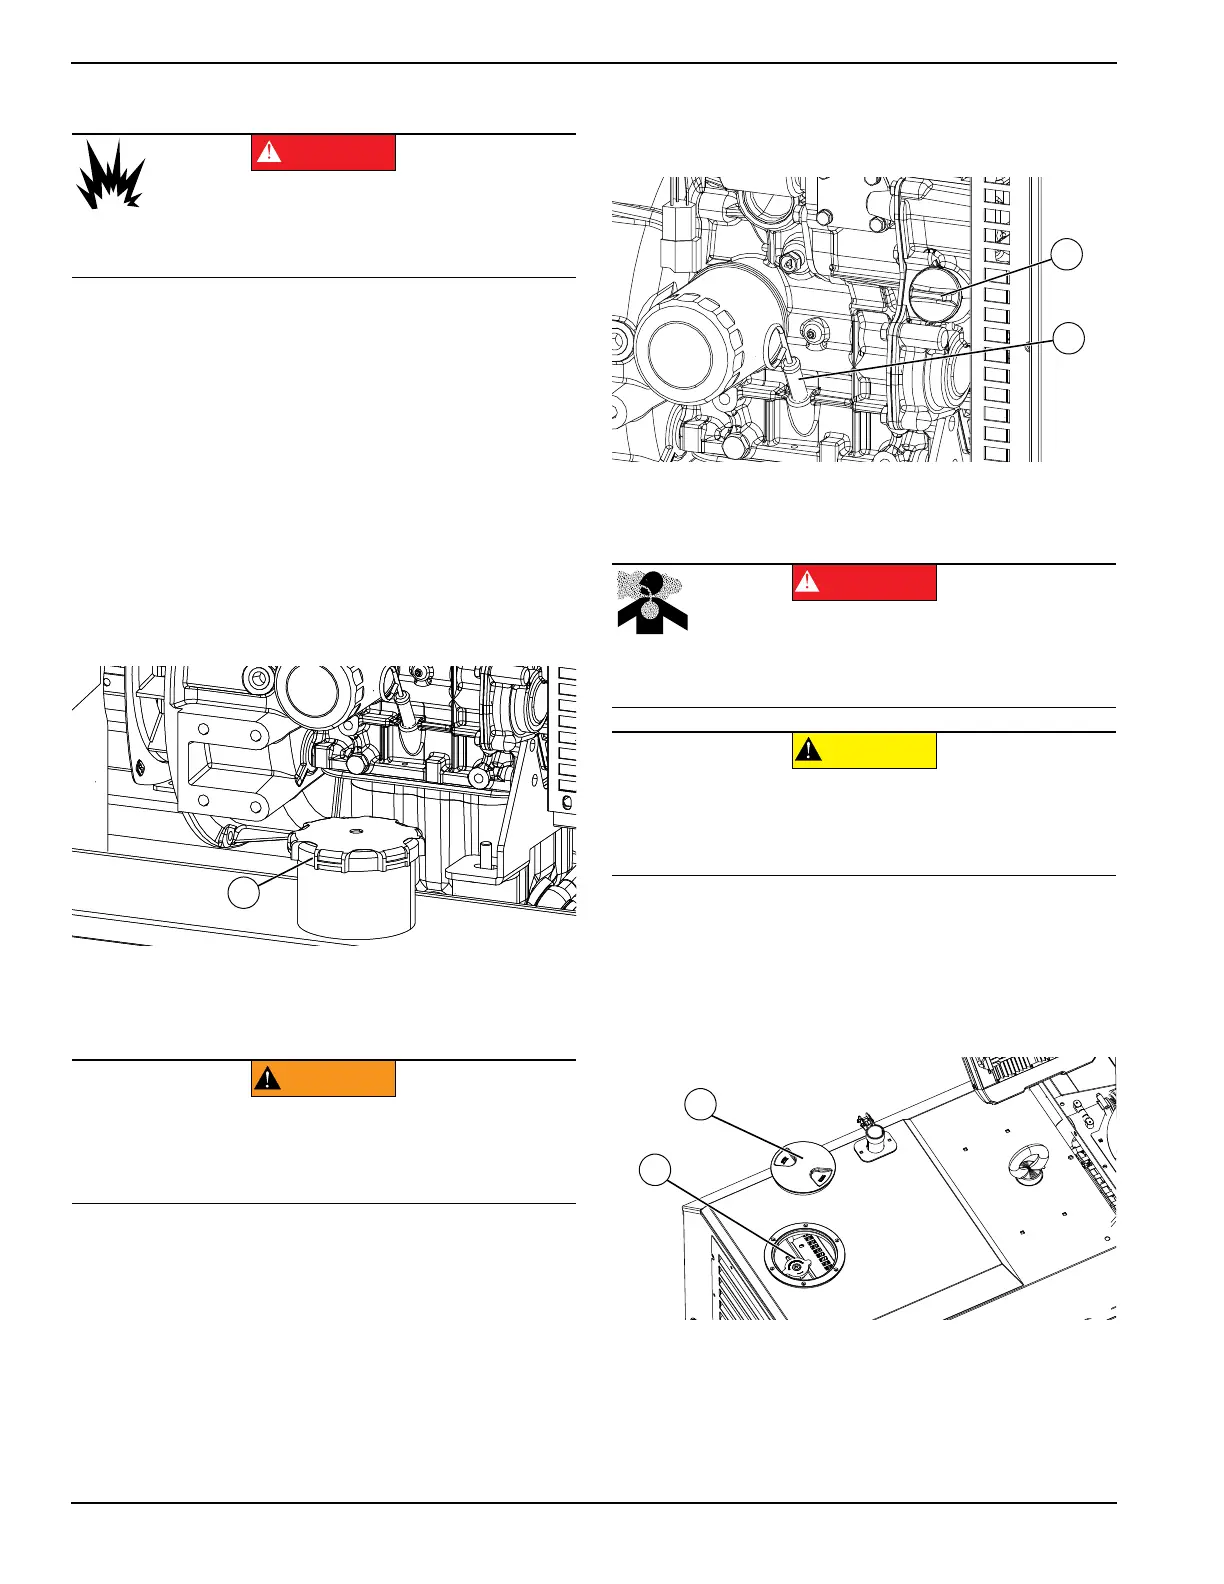
3. See Figure 3-1. Remove fuel fill cap (A).
4. Fill tank with diesel fuel to
0.25 in (6.4 mm) from
the bottom of fill neck to allow for fuel expansion.
See Resetting Maintenance Alarms.
5. Install fuel fill cap.
NOTE: Allow
spilled fuel to evaporate before starting
unit.
Figure 3-1. Adding Fuel
Adding Engine Oil
(000210)
WARNING
Skin irritation. Avoid prolonged or repeated contact with
used motor oil. Used motor oil has been shown to cause
skin cancer in laboratory animals. Thoroughly wash
exposed areas with soap and water.
NOTE: DO NOT start unit if engine oil level is below the
MIN mark on the dipstick.
NOTE: Check e
ngine oil level before starting or more
than 5 minutes after stopping the engine.
1. See Figure 3-2. Remove oil dipstick (A) and wipe
d
ipstick clean.
2. Insert dipstick into filler nec
k. Remove dipstick and
verify oil level is between the MIN and MAX marks.
3. Add engine oil through oil fill (B)
as necessary. See
Engine Oil Recommendations.
NOTE: V
erify oil level often during filling process to
ensure overfilling does not occur.
1. Replace dipstick.
Figure 3-2. Oil Fill and Dipstick Location
Adding Engine Coolant
(000149)
DANGER
Risk of poisoning. Do not use mouth to siphon
coolant. Doing so will result in death or serious
injury.
Risk of overheating. Do not use any chromate base
rust inhibitor with propylene glycol base antifreeze,
boosters, or additives. Doing so will cause overheating
and possible equipment damage.
(000165a)
CAUTION
If coolant level is below the filler neck, add coolant
according to the following procedure. See Coolant
Recommendations.
1. Verify engine is stopped and cooled.
1. Remove cover (A).
2. See Figure 3-3. Remove radiator fill cap (B).
Figure 3-3. Radiator Fill
3. Fill radiator slowly with coolant until coolant
comes
up to the filler neck. See Coolant Recommenda-
tions
4. Replace radiator fill cap.


 To Next Page