RECOMMENDED BATTERY
Servicing of the battery is to be performed or supervised by per-
sonnel knowledgeable of batteries and the required precautions.
Keep unauthorized personal away from batteries.
Use only 12 volt negative (-) ground batteries with a minimum
rating of 450 cold-cranking amps at -17.8C (0 F). (OEM require-
ments may differ.)
Damage will result to the engine starter if a
battery rated less than OEM required cold-
cranking amps is used.
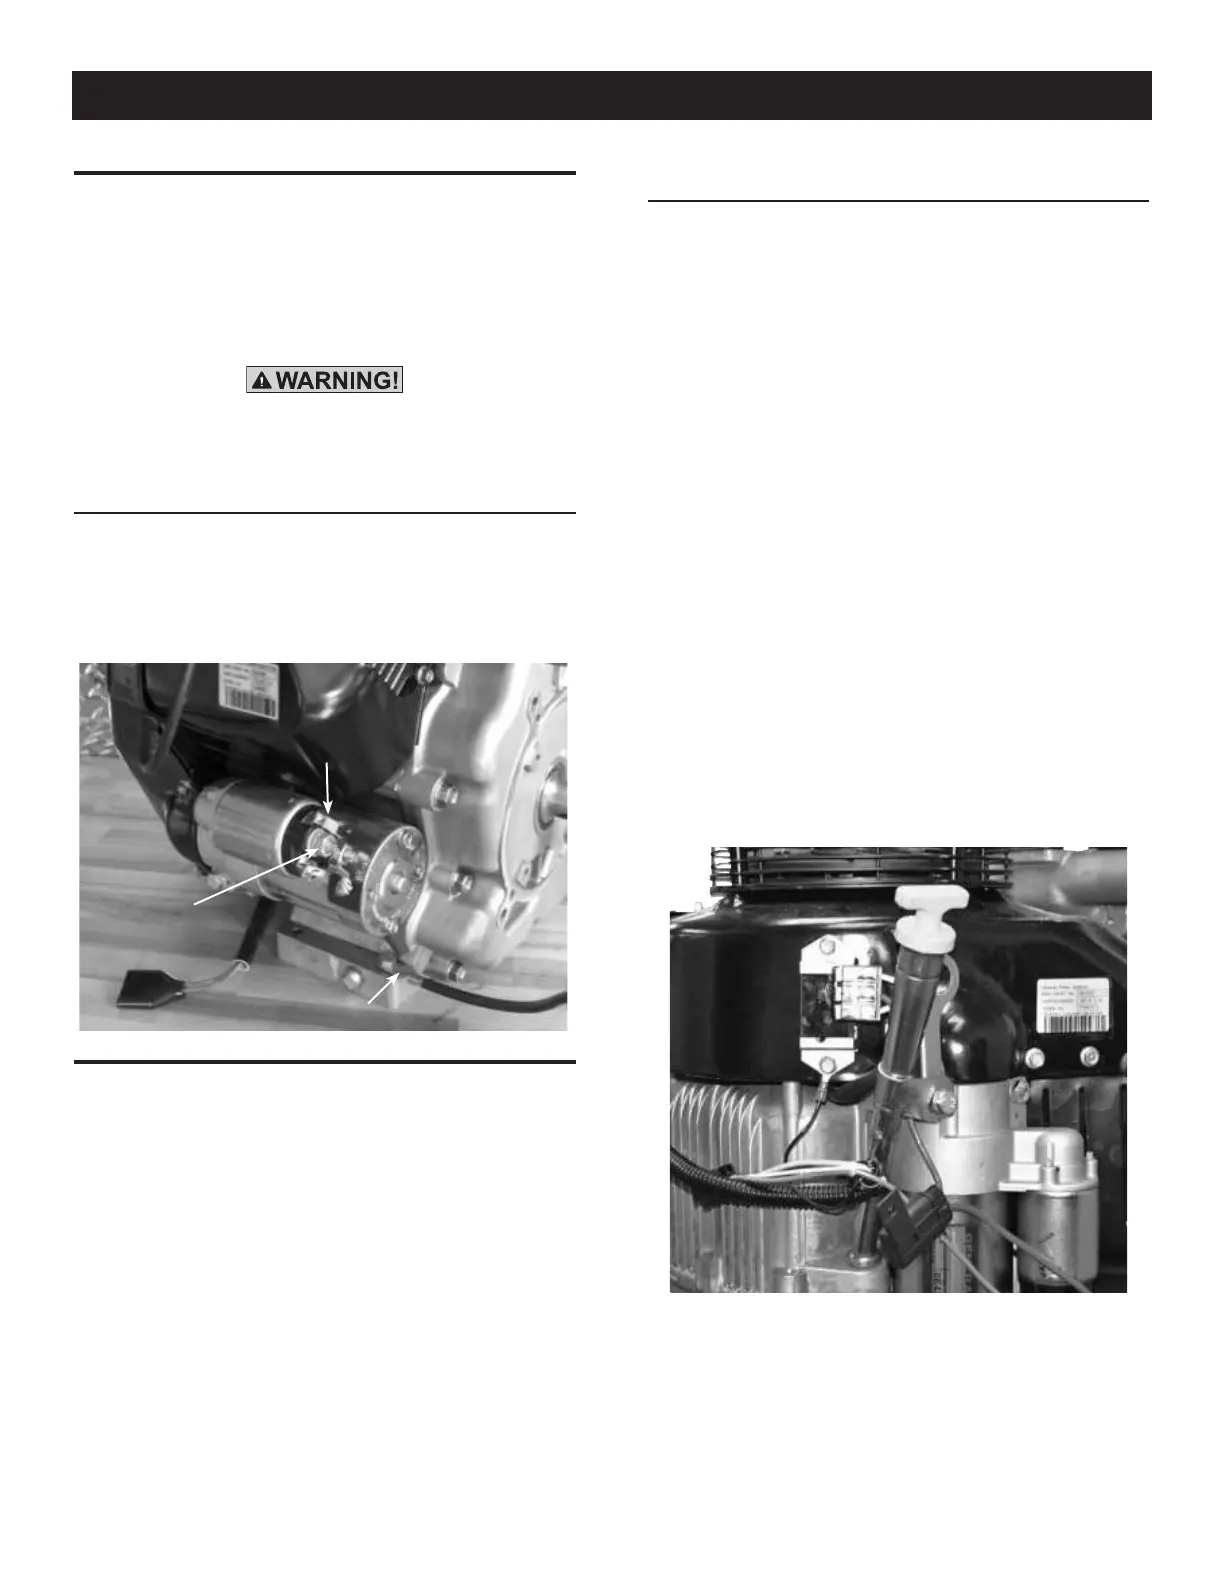
BATTERY CABLES
Using battery cables that are too long or too small in diameter may
cause a decrease in voltage which leads to a starting problem due
to voltage drop. Use a cable size "2" for length up to 10 feet. See
Figure 1 for battery cable connections.
Figure 1 — Battery Cable Connections
OPERATION AND MAINTENANCE
It is the owner’s/operator's responsibility to perform all safety
checks; to make sure that all maintenance for safe operation is
performed promptly; and to have the equipment checked by an
authorized dealer periodically. Normal maintenance service and
replacement of parts are the responsibility of the owner/operator
and, as such, are not considered defects in materials or workman-
ship within the terms of the warranty. Individual operating habits
and usage contribute to the need for maintenance service.
Proper maintenance and care of the equipment assures a mini-
mum number of problems and keeps operating expenses at a
minimum. See an authorized Dixie Chopper dealer for service aids
and accessories.
BEFORE STARTING THE ENGINE
Perform the following tasks before trying to start the engine:
Checking and Adding Engine Oil
NOTE:
When adding oil to the engine crankcase in the future, use only
high quality detergent oil rated with API service classification
SF or higher SAE 30 weight. Use no special additives.
Select the oil’s viscosity grade according to the expected operating
temperature. Lucas oil 15W-40 is recommended by Dixie Chopper.
• Above 40°F, use SAE 30, synthetic 5W-30, 15W-40, or SAE
10W-30.
• Below 40°F, use 5W-30 or synthetic 5W-30.
Check engine oil level frequently to avoid possible damage from
running low on oil.
• Place engine on a level surface.
• Clean area around oil fill and remove oil fill cap and dipstick
(Figure 2).
• Wipe dipstick clean. Reinstall and check oil level on dipstick.
• Slowly fill engine with oil through the oil fill opening until it
reaches the full mark on the dipstick. Stop filling occasionally
to check oil level. DO NOT OVERFILL.
• Install dipstick and push in securely.
• Check engine oil level before starting each time thereafter.
Figure 2 — Oil Fill/Check
Adding Fuel
Fill the fuel tank using clean, fresh regular UNLEADED gasoline.
4
Battery
Positive(+)
Starter
Contactor
Typical Battery Ground
General Information
 Loading...