Before beginning to data log, you should:
1) Disable the meter’s APO function so the meter will not shut itself down
after 15 minutes of front-panel inactivity. To disable APO: a) Power off the
meter; b) Power it back on in a special way by pressing and holding the
button while pressing and holding the button for at least 3 seconds.
You should release the and buttons precisely when SdHC 2.0
appears on the LCD. If you release the button too soon, Auto OFF will
appear before SdHC 2.0. The meter will power on, but the APO function will
not be disabled. If you release the button too late, the meter will fail to
power on. Unlike the display that follows a normal power on sequence
detailed on page 6, if you have successfully disabled the APO function you
will not see the clock icon that normally appears in the lower left corner of
the LCD to indicate that the APO function is enabled.
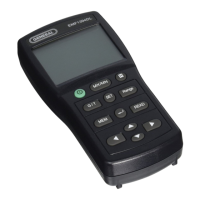
2) Set the data logging sampling time. To set the sampling time, press and
hold the SET button for at least 3 seconds. A number from 1 to 255 will
appear, flashing, on the upper readout and the term INTV (for interval) will
appear at the bottom right of the LCD. The number represents the data
logging sampling time, in seconds. Use the
and buttons to set the sampling time to any value from 1 to 255
seconds and then press the button to save your selection. The meter will
resume operating in normal display mode.
Choosing a sampling time requires making a tradeoff. Choose a small
number if you want to capture many EMF values over a short period of
time. The downside of using a short sampling time (such as 1 second) is
that you will fill up the MicroSD card with data within a few hours. By
comparison, choosing a long sampling time (such as
60 seconds) avoids filling up the MicroSD card’s capacity prematurely, but
at the risk of missing key changes in EMF intensity that may occur within
the samples, one-minute apart. As a compromise, consider an intermediate
sampling time value on the order of 15 seconds.
3) Set the current day, hour, minute and second to serve as a time stamp
for your data logs. To set the day and clock, press and hold the SET button
for at least 3 seconds, as you did to set the sampling time. When the
currently selected sampling time begins flashing, press the ► button. The
upper readout will go blank and the number above day in the lower left
readout will begin flashing. Use the and buttons to change the value
to that of the current day, and then press the button to save your