13
English
4.Cutoutandremovethesquare.(SeeFIG.5)
5.Thisopeningwillallowsawdusttofallthroughthesawbase.
6.Placethesawontheworkbench,andalignthemounting
holesofthesawwithholesthathavebeendrilledthrough
thesurface.
7.Securethesawtotheworkbenchusingboltsandnuts.
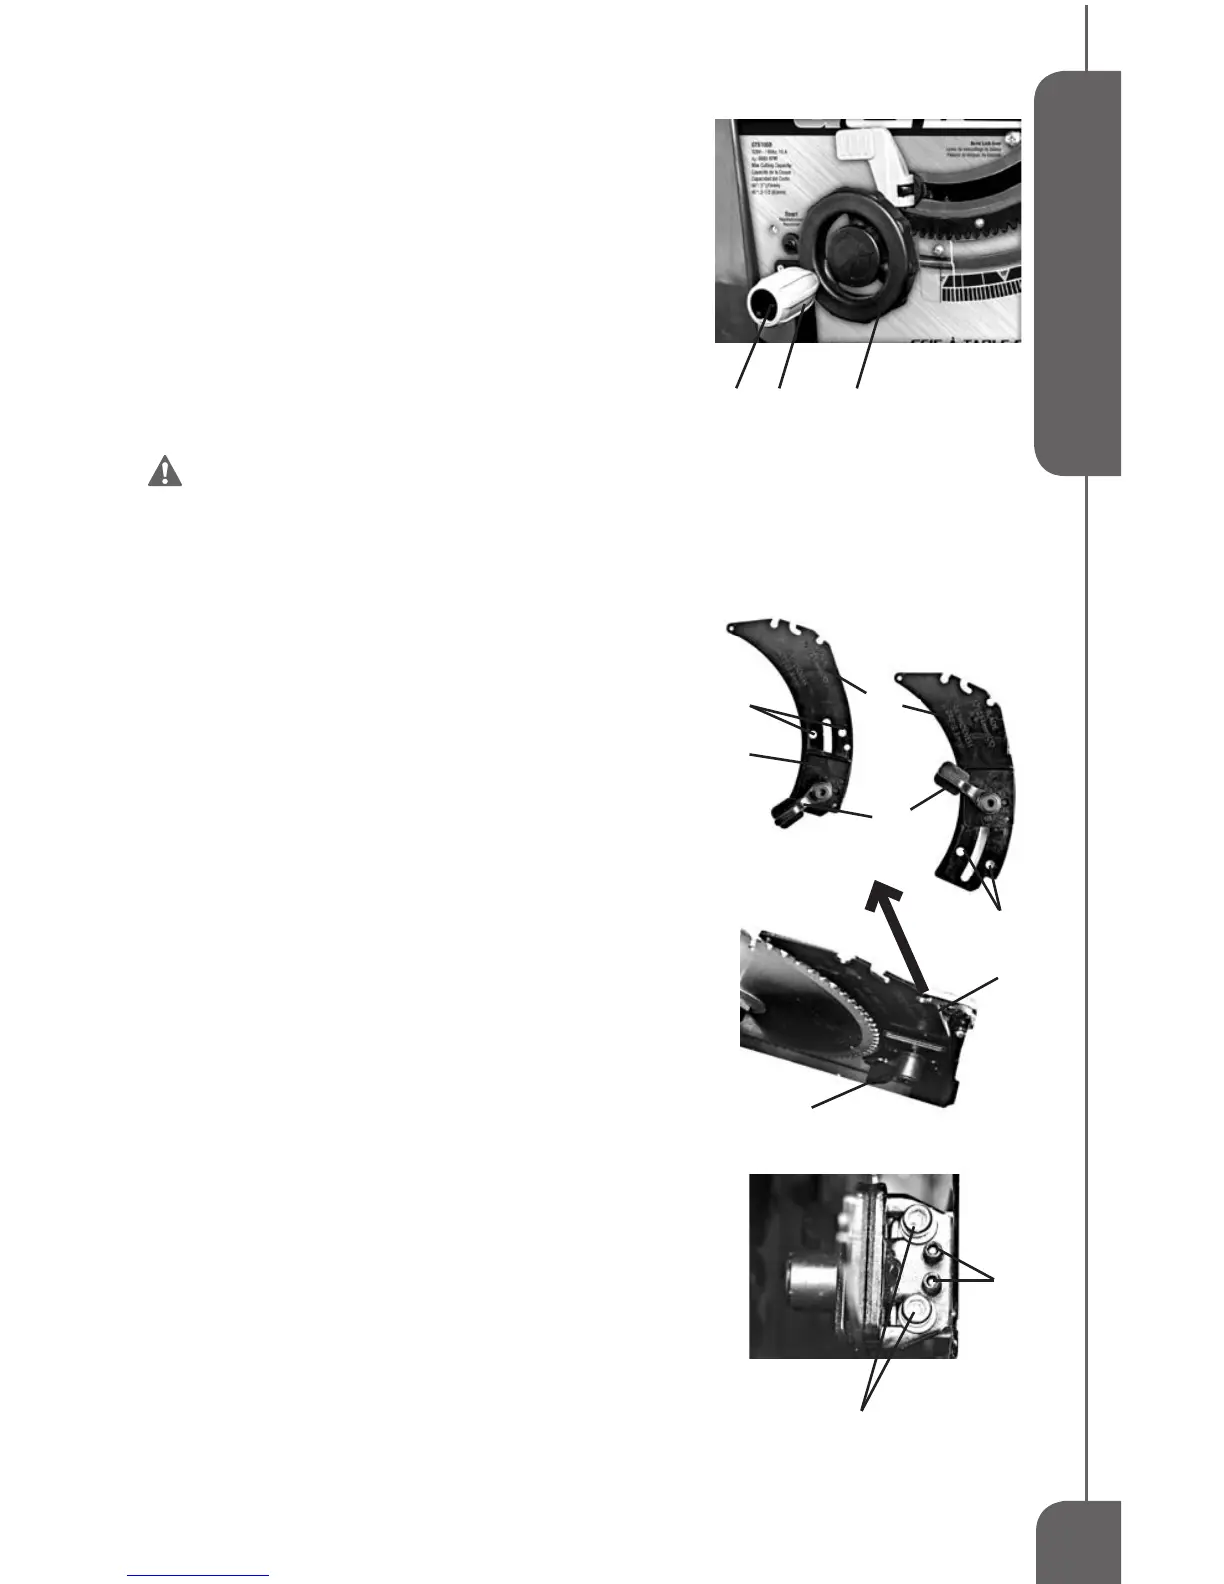
INSTALLING THE BLADE CONTROL WHEEL
HANDLE (FIG 6)
Placethenutintothenutslotonthebacksideoftheblade
controlwheel(2).
Insertthelongscrew(3)throughthewheelhandle(1),aplastic
washerandthebladecontrolwheel(2).Tightenthescrewinto
thenutbyusingascrewdriver(notprovided).
WARNING: To prevent personal Injury,
always unplug the saw from power source before
make any adjustments.
ADJUSTING THE SPLITTER (FIG 7)
Thesplitter(1)hastwopositions:StoragepositionandWorking
position. The splitter is in the storage position out of the
package.
To adjust the splitter to be working position
1.Removethebladethroatplate.
2.Raisethebladeuptothehighestpositionbyturningthe
bladecontrolwheelcounterclockwise.Setthebevelat0°.
Makesurethebevelislockedtight.
3.Releasethesplitterlockinglever(2)bypullingtheleverup.
4.Pullthesplitteruptotheworkingposition.Thetwoworking
position holes (4)shouldalignwiththetwo pins on the
xture(5).
5.Lockthesplitterbypushingthesplitterlockingleverdown.
NOTE:Makesurethesplitterislockedsecurely.
6.Placethebladethroatplatebackon.
To adjust the splitter to be the storage position
Repeattheabovesteps1to3,slidethesplitterdowntothe
storageposition.Lockthesplitterlockinglever(2).Lowerthe
bladetothelowestposition.Thesplittershouldbeunderthe
sawtable.
To adjust the height of the splitter
Loosenthetwoscrews(6).Adjustthetwoadjustingscrews
(7)tomakesurethesplitterisabout1/8”(3mm)abovethe
bladetips.Tightenthetwoscrews(6).
To adjust the alignment of the splitter
Thesplittermustbe precisely in LINE withthesawblade.
Loosen the two screws (6), align the splitterwith the saw
blade.Oncealigned,holdthesplitterinpositionandtighten
thetwoscrews(6).
FIG 6
3 1
2
FIG 7
WORKING
POSITION
STORAGE
POSITION
2
3
4
1
1
2
5
6
7
 Loading...