EasyManua.ls Logo

Genexis FiberTwist Series - User Manual

Genexis FiberTwist Series
10 pages
Print Icon
To Next Page IconTo Next Page
Loading...
Bracket- DIY
FiberTwist Series
Installation Guide
Question and Answer IconNeed help?

Do you have a question about the Genexis FiberTwist Series and is the answer not in the manual?

Summary

In the box

Mounting the wall plate

Mounting plate with screws and plugs

Fixing the mounting plate to the wall using screws and plugs for different wall surfaces.

Mounting plate with pre-attached tape

Securing the mounting plate to the wall using the adhesive tape.

Adjust external fiber patch cable length

Position Bracket-2 on mounting plate

Finish installation

Remove Bracket-2 from mounting plate

Remove taped mounting plate from wall surface

Overview

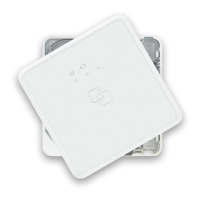
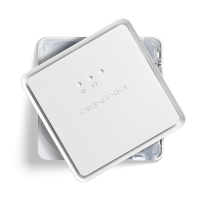
The Genexis Bracket-2 DIY FiberTwist Series is an installation guide for a mounting bracket designed for fiber optic installations. This bracket serves as a base for FiberTwist active units, providing a secure and organized way to manage fiber optic cables at the point of termination.

Function Description:

The primary function of the Bracket-2 DIY is to securely mount a FiberTwist active unit to a wall. It provides a stable platform and internal cable management for the fiber optic patch cable, ensuring a neat and reliable installation. The bracket is designed to be user-friendly, offering multiple mounting options and easy attachment/detachment of the FiberTwist unit. It also allows for optional adjustment of the external fiber patch cable length, accommodating various installation scenarios.

Important Technical Specifications:

  • Mounting Options: The bracket supports two primary mounting methods:
    • Screws and Plugs: For concrete walls or situations requiring a more permanent fixation. The package includes wall plugs and long screws for this purpose. Short screws are provided for wooden walls or direct mounting without plugs.
    • Pre-attached Tape: For quick and easy installation on suitable wall surfaces. The mounting plate comes with 3M VHB™ tape for strong adhesion.
  • Cable Management: The bracket features internal routing for the fiber optic patch cable, allowing for excess cable to be coiled within the unit. By default, the fiber is rolled up in 3 circles, which can be adjusted by removing one or two circles to gain extra cable length if needed.
  • Compatibility: Designed specifically for the Genexis FiberTwist Series active units.
  • Material: The bracket components appear to be made of durable plastic (indicated by "ABS 2" markings on some parts).
  • Dimensions: While not explicitly stated, the images suggest a compact design suitable for wall mounting in residential or commercial environments.
  • Environmental: Designed in EU.

Usage Features:

  • Flexible Mounting: Users can choose between screw-based mounting for maximum security or tape-based mounting for convenience, depending on the wall surface and preference.
  • Drilling Template: A drilling template is available online (https://genexis.eu/product/fibertwist/downloads#bracket) to assist with precise hole placement when using screws and plugs.
  • Easy Fiber Length Adjustment: The internal coiling mechanism allows for simple adjustment of the external fiber patch cable length by removing excess loops, which is useful when the patch cable is pre-installed and needs minor length modifications.
  • Snap-in Installation of FiberTwist Unit: The FiberTwist active unit easily clicks into place on the Bracket-2, simplifying the final installation step. Guidance pins and an audible click ensure correct positioning.
  • Secure Attachment: Once the FiberTwist unit is clicked into place, it is securely held by the bracket.
  • Removable Design: The Bracket-2 can be removed from the mounting plate by pressing an unlock button on the bottom side and angling the bracket towards the user. This allows for maintenance or replacement of the FiberTwist unit or the bracket itself, even with the active device still installed.
  • Tape Hardening Time: When using tape, it's important to note that the tape will be fully hardened after 24 hours. Excessive force should be avoided during this period to ensure optimal adhesion.

Maintenance Features:

  • Removability for Service: The design allows for easy removal of the Bracket-2 (and the attached FiberTwist unit) from the mounting plate, facilitating maintenance or troubleshooting of the active device or the fiber connection without needing to fully unmount the entire setup.
  • Reinstallation of Mounting Plate: If the taped mounting plate needs to be removed from the wall, the tape cannot be reused. In such cases, the screw option should be used for reinstallation. This ensures a secure re-attachment if the original tape adhesion is compromised.
  • Protective Cap Removal: The installation guide emphasizes removing the protective cap from the FiberTwist coupler before connecting the patch cable, which is a standard maintenance step to ensure clean fiber connections.
  • Compatibility with FiberTwist Installation Guides: The final step of installation refers to the active FiberTwist product's installation guide, indicating that the Bracket-2 is an integral part of a larger, modular system, and its maintenance is linked to the overall FiberTwist ecosystem.

Genexis FiberTwist Series Specifications

General IconGeneral
BrandGenexis
ModelFiberTwist Series
CategoryNetwork Router
LanguageEnglish

Related product manuals