Do you have a question about the Genie Pro Stealth and is the answer not in the manual?
Explains hazard classifications (Danger, Warning, Caution) and their effects.
Key safety guidelines to reduce risk of severe injury or death during installation.
Explains how the STB system prevents door closing when beam is broken.
Details the automatic stop and reverse function upon contact.
Explains the automatic opening function if the door doesn't close within 30 seconds.
Describes the function used to set door opening and closing force.
Details how the automatic lighting system operates.
Describes how to manually operate the door in emergencies or for maintenance.
Visual identification and sizing of various fasteners used in the kit.
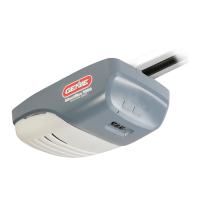
Visual guide to identify key components like remotes and wall controls.
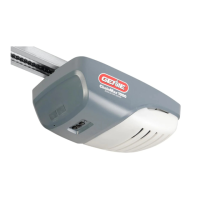
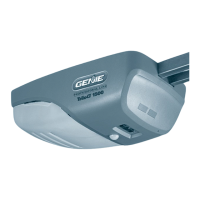
Detailed breakdown and labeling of the power head assembly parts.
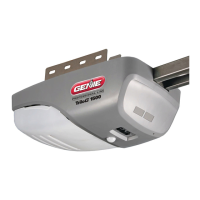
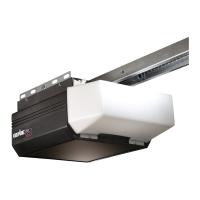
Detailed breakdown and labeling of the PRO-MAX power head assembly parts.
Visual identification of parts related to the door channel assembly.
Visual identification of parts related to the door rail assembly.
Instructions regarding the blue parts bag for operator assembly.
Step-by-step guide for connecting the channel to the power head.
Step-by-step guide for connecting the rail to the power head.
Critical safety warnings and instructions for a safe installation process.
Helps users determine the correct installation procedure based on door type.
Detailed steps for installing the operator on track-guided garage doors.
Detailed steps for installing the operator on trackless garage doors.
Critical warning about unplugging the operator before STB installation.
Emphasizes that the door won't close automatically without the STB system.
Instructions for positioning and fastening STB sensor and source brackets.
Guidance on placing the STB source and sensor based on garage layout.
Instructions for routing and securing the STB system wiring.
Procedure to verify and adjust STB alignment for proper function.
Guide to diagnose and resolve common STB system issues via LED indicators.
Warning about potential electrical shock and improper operation.
Caution regarding the use of light and its impact on functionality.
Recommendations for optimal placement of the wall control unit.
Steps to strip insulation from wires for wall control connection.
Instructions for connecting wires from the power head to the wall control.
Steps for physically attaching the wall control unit to the wall.
Explanation of features like Vacation Locking and Independent Light Control.
Critical warning about electrical shock and proper grounding.
Advice to check local codes for direct wiring requirements.
Detailed instructions for electricians performing permanent wiring installations.
Safety warnings regarding clear paths and ladder placement during settings.
Instruction to lock the carriage before proceeding with limit switch adjustments.
Procedure to set the upper travel limit for the garage door.
Procedure to set the lower travel limit for the garage door.
Guidance on adjusting "OPEN FORCE" if the door doesn't reach the fully open position.
Warning to adjust operator for minimum force needed for door operation.
Step-by-step instructions to set the force for opening the garage door.
Step-by-step instructions to set the force for closing the garage door.
Principle of setting the minimum force required for door movement.
Procedure to test the automatic reversal of the door upon contact with an object.
Information about the motor protector potentially tripping during adjustments.
Detailed steps to fine-tune the door's fully open position.
Detailed steps to fine-tune the door's fully closed position.
Re-testing the contact reverse feature after limit adjustments.
Safety precautions regarding moving doors and children with remotes.
Information about factory-set unique codes for each remote control.
Step-by-step guide to program a single-button remote control.
Instructions for programming each button on a multi-button remote.
How to use the remote control to open, close, and stop the door.
Procedure to clear all previously programmed remote controls.
Initial step for accessing the remote control's battery compartment.
Instructions for replacing the battery in the remote control.
Guide for attaching the visor clip to the remote control unit.
Details on how to operate the remote control with the installed clip.
Instructions for installing the correct type of light bulbs in the operator.
Steps to bend the lens tabs to activate the hinge mechanism.
Instructions for using screws to attach the lens panel to the operator.
Guidance on aligning the lens and panel for proper screw insertion.
Recommendations for maintaining door springs and hardware.
Procedure to check if the garage door is properly balanced.
Steps to test the contact reverse safety feature.
Actions to take if the door fails to reverse during the contact test.
Guidance on using self-diagnostic features for STB system maintenance.
Recap of critical safety instructions for operating the garage door opener.
Important note on using only the specified Series II wall control.
Solutions for when the operator fails to respond to the wall control.
Troubleshooting steps for a door that operates without command.
Solutions for when the door stops prematurely during closing.
Troubleshooting for doors that stop and reverse during the closing cycle.
Solutions for improving the operating range of the remote control.
Steps to take when the operator motor runs but the door remains stationary.
Solutions when the wall control functions but the remote control does not.
Guidance for diagnosing and resolving STB system malfunctions.
Warning about potential electrical shock when accessing wiring.
Electrical schematic for the Stealth motor configuration.
Specific wiring notes or diagrams pertaining to the ProMax motor.
Information on what defects and parts are covered under the warranty.
Specifies the duration of the warranty for different parts and models.
Clarifies who is eligible to receive warranty service.
Defines the geographical regions where the warranty is valid.
Details what is not covered by the warranty and any limitations.
Instructions on how to initiate and receive warranty service.
Advice to record installation details for future reference.
| Type | Chain Drive |
|---|---|
| Maximum Door Weight | 500 lbs |
| Voltage | 120V |
| Motor Type | DC |
| Drive Type | Chain |
| Maximum Door Height | 7 feet |
| Speed | 7.0 inches per second |
| Remote Controls Included | 2 |
| Security | Rolling Code Technology |